skoda Workshop Repair Guides

Skoda Workshop Service and Repair Manuals

Connecting remote control > < Removing and installing the fuel gauge sender
Removing and installing the fuel tank
Observe safety measures → Chapter.
Observe rules for cleanliness → Chapter.
Special tools and workshop equipment required
t  Engine/gearbox jack (e.g. -V.A.G 1383 A-)
t  Fuel extraction device (e.g. -V.A.G 1433 A-)
Removing
–  On models fitted with a coded radio set, pay attention to the coding; determine if necessary.
–  Disconnect the earth strap from the battery with the ignition off.
–  Empty fuel tank with fuel extraction equipment (e. g. -V.A.G 1433 A-).
–  Remove rear axle → Chassis → Rep. Gr.42.
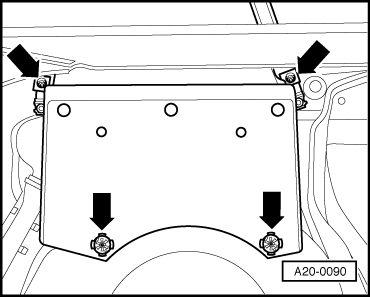
–  Unscrew cover (below rear seat).
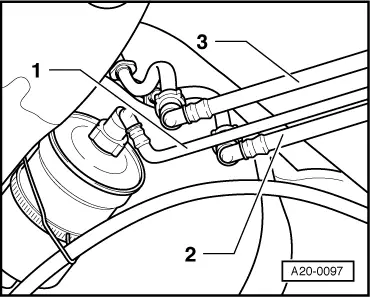
–  Unlock and unplug 4-pin connector of flange at fuel tank.
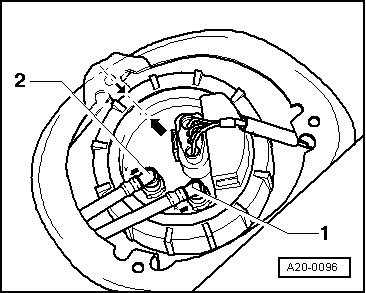
–  Open the fuel tank cap, lever out tensioning ring in rubber bowl (around filler neck).
–  Press through rubber bowl to the inside.
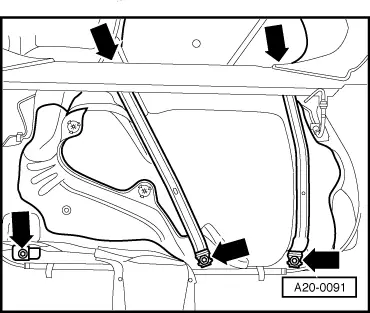
–  Remove rear right wheelhouse liner.
–  Unscrew fuel filler neck below wheelhouse liner.
   
–  Remove cover below fuel tank -arrows- (if fitted).
  A20-0090
–  Separate return-flow line -2- (blue), feed line -1- (black) and vent line -3- (white) at the front right of fuel tank (press release buttons).
–  Position engine/gearbox jack (e. g. -V.A.G 1383 A-) below the fuel tank for supporting.
  A20-0097
–  Detach bolted connections -arrows- at front left and at the retaining straps.
–  Lower the fuel tank.
Install
Installation is carried out in the reverse order. Pay attention to the following:
  A20-0091
–  Connect fuel lines to the flange of the fuel delivery unit:
t  Blue return-flow line -1- to connection marked -R-.
t  Black feed line -2- to connection marked -V-.
  A20-0096

Connecting remote control > < Removing and installing the fuel gauge sender