skoda Workshop Repair Guides

Skoda Workshop Service and Repair Manuals

Checking the gear oil level in the rear final drive > < Replace O-ring for cover/rear final drive (final drive installed)
Removing and installing the rear final drive
Special tools and workshop equipment required
t  Socket insert -T10035-
t  Gearbox mount -3282-
t  Engine/gearbox jack, e.g. -V.A.G 1383 A -
Removing
–  Remove rear silencer → Relevant Engine → Rep. Gr.26.
–  Remove the heat shield from the vehicle floor below the luggage compartment.
–  Mark the position of the rear propshaft pipe on the flange of the rear final drive.
   
–  Unscrew rear propshaft pipe with flexible disk and oscillation damper from rear final drive -arrows-.
–  Remove both drive shafts from the flange shafts/final drive and attach to the suspension arm.
  N39-0681
–  Unscrew screws -A- and -B-.
–  Release screws -C- with socket insert -T10035 -.
  N39-0826
–  Position the gearbox jack, e.g. -V.A.G 1383 A-, with gearbox mount -3282- below the final drive and secure the final drive with screws -1- M8 x 15.
–  Unscrew the fixing screws on right and left for the supporting frame -arrow A-.
–  Then screw out the fixing screws on right and left at the cross member/final drive -arrow B-.
  Note
The fig. only shows one of the two fixing screws.
–  Disconnect the plug from the connection of the Haldex coupling -arrow C-.
  S39-0137
–  Remove the ventilation pipe on right and left from the holder -arrow-.
  Note
The fig. only shows the left ventilation pipe.
–  Slightly lower the final drive and move the final drive with the spindles of the gearbox mount into oblique position. Then carefully pull out the supporting frame.
  N39-0751
–  Lower the final drive.
  S39-0138
–  If the final drive should be replaced or tensioned in the assembly stand, the cross member -A- must be unscrewed.
Install
Installation is performed in the reverse order, pay attention to the following points:
t  The gasket rings in the flanges of the propshaft must not be damaged when removing and installing.
t  In case of damaged gasket rings the propshaft must be replaced.
t  Slide the propshaft horizontally onto the guide stud.
  N39-0741
–  If the final drive should be replaced, the ventilation pipes left -A- and right -B- must be removed.
A - Ventilation pipe (400 mm long)
B - Ventilation pipe (300 mm long)
  N39-1103
As of 04.00, balancing washers and new screws for the propshaft were inserted on the flange of the Haldex coupling -arrows-.
Two new screws can be fitted with one balancing washer each.
  N39-0835
In order to avoid droning noises, if necessary the balancing washers must be repaced with the washers after releasing the screw connections -A-.
Assignment of the washers → electronic catalogue of original parts.
  N39-0837
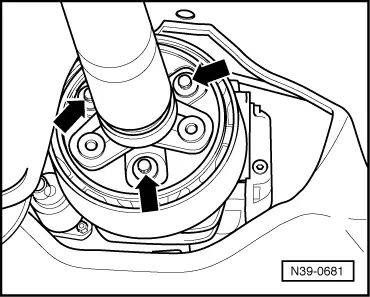
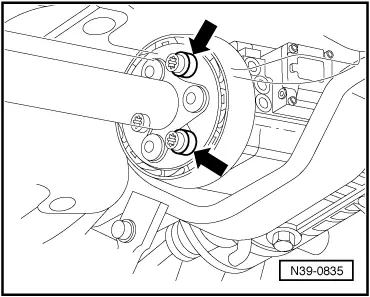
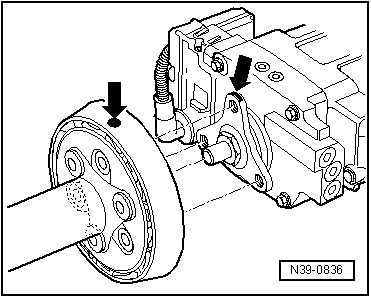
–  Install the propshaft on the flange of the Haldex coupling in such a way that the markings -arrows- are on the same line.
  Note
t  If droning noises occur while driving, the following must be observed:
t  
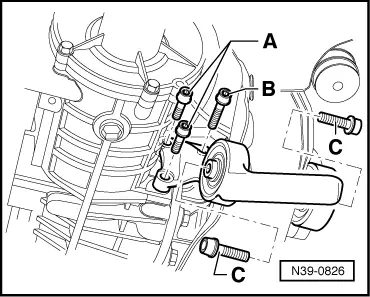
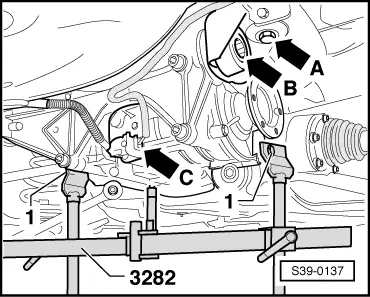
Unscrew the propshaft with the flexible disk from the flange of the Haldex coupling and screw on again offset to a hole.
t  If the droning noises can still be heard, the propshaft must be screwed on once again offset to a hole.
t  
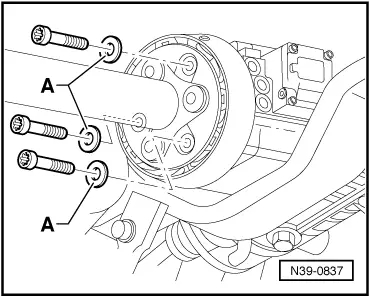
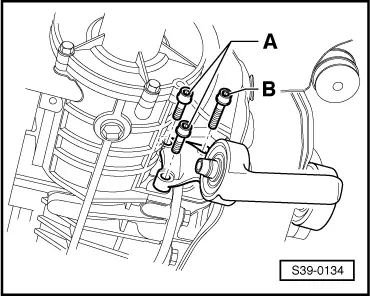
Three protruding bushings at the flange of the rear final drive and propshaft flange grip into the location holes of the flexible disks.
t  For attaching the supporting frame at the body, always use new screws → Chassis → Rep. Gr.42.
  N39-0836
–  The fixing screws of the front bracket/final drive have different lengths.
  S39-0134
Screws -A-M10 x 40
Screw -B-M10 x 55

–  Check the gear oil in the rear final drive → Chapter.
Tightening torques
Drive shaft to flange shaft → Chassis → Rep. Gr.42
   
ComponentTightening
torque
Front bracket to supporting frame60 Nm
Front bracket to rear final drive1)40 Nm + 45°
Cross member to supporting frame60 Nm
Cross member to rear final drive60 Nm
Propshaft to rear final drive60 Nm

1) Always replace these bolts.
   

Checking the gear oil level in the rear final drive > < Replace O-ring for cover/rear final drive (final drive installed)