skoda Workshop Repair Guides

Skoda Workshop Service and Repair Manuals

Clutch, control > < Overview of Transmission System
General repair information
To carry out gearbox repairs successfully and correctly, scrupulous care and cleanliness, as well as the proper tools, are essential requirements. Obviously, the generally valid basic safety rules apply to repair work.
A number of generally valid notes for individual repair operations - which are otherwise listed several times at numerous points in the workshop manual - are summarized here.
Gearbox
t  When installing, ensure the dowel sleeves are correctly located between the engine and gearbox.
t  When replacing the gearbox check the oil level and if necessary top up → Chapter.
t  Filling capacity → Chapter.
t  Specification → electronic catalogue of original parts.
  Note
t  If oil is topped up with the gearbox mounted, the inspection of the oil level must be carried out as follows:
t  Pour in oil up to lower edge of filler hole and close filler hole with screw plug. Start engine, engage a gear and allow gearbox to rotate for about 2 minutes. Switch off engine and again top up gear oil to lower edge of filler hole.
O-rings, gasket rings, gaskets, sealant
t  Thoroughly clean the housing contact surfaces before applying the sealant.
t  Apply sealant -AMV 188 200 03- evenly and not too thickly.
t  Always replace O-rings, gasket rings and gaskets.
t  After removing gaskets, check the contact surface on the housing or shaft for burrs or damage which occured during the disassembly.
   
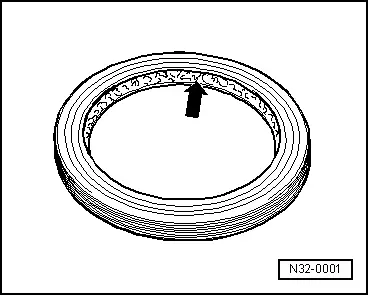
t  Lightly oil radial shaft seals at outside diameter before mounting and fill half the space between the sealing lips -arrow- with sealing grease -G 052 128 A1-.
t  The open side of the sealing rings is turned towards the fluid to be sealed.
t  Press in new gasket ring in such a way that the sealing lip is not located on the same point as the sealing lip of the old gasket ring (use tolerance for insertion depth).
t  Before inserting lightly oil the O-rings, in order to prevent the rings being squashed during installation.
t  Inspect the gearbox oil level and top up if necessary after replacing the gaskets and gasket rings → Chapter.
Circlips and tensioning sleeves
Do not over-tension the circlips.
Always replace damaged or over-tensioned circlips.
Circlips must be positioned in the base of the groove.
  N32-0001
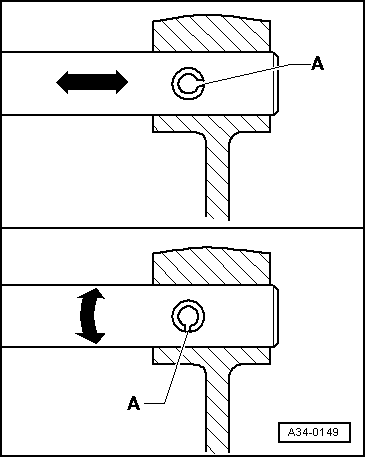
Replace roll pins. Fitting position: Slot -A- longitudinal to power flow -arrow-.
  A34-0149
Screws, nuts
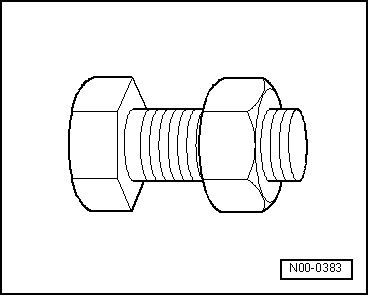
t  Slacken the bolts and nuts against the tightening sequence.
t  Slacken and tighten nuts and bolts for attaching covers and housings without tightening sequence diagonally across in stages.
t  Do not twist particularly sensitive parts - e.g. clutch pressure plates - and slacken and tighten diagonally across in stages.
t  Tightening torques apply for non-oiled nuts and bolts.
t  Always replace the self-locking nuts and screws.
t  Clean the thread of the screws that are inserted with a locking agent with a wire brush. Insert bolts with locking agent -AMV 185 101 A1-.
t  Clean the threaded holes into which self-locking screws or screws with locking agent were screwed in (using e.g. a screw-tap). Otherwise there is a risk that the screws will shear at the next disassembly.
Bearings
t  Position needle bearing with the lettered side (thicker end) towards the drift pin.
t  Fit all bearings to the gearbox with some gearbox fluid.
t  Jointly replace tapered-roller bearings on the same shaft and use products of the same manufacturer.
t  Before installing, heat the inner rings of the tapered-roller bearings on a heating plate or with the induction heater unit, e.g. -VAS 6414-, to approx. 100°C. Press on axial and play-free up to the stop.
t  Do not exchange the outer and inner rings of bearings of the same size - bearings go in pairs.
  N00-0383
Shims
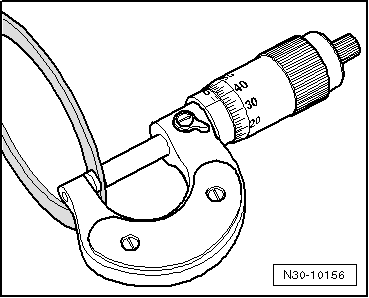
t  Gauge shims at several points with a micrometer. Different tolerances allow to measure the required thickness for each washer very precisely.
t  Inspect for burrs and damage.
t  Install only shims which are in perfect condition.
Synchronizer rings
t  These are not interchangeable. If re-using, allocate synchronizer rings to the same gear.
t  Inspect for wear, replace if necessary → Electronic Catalogue of Original Parts.
  N30-10156
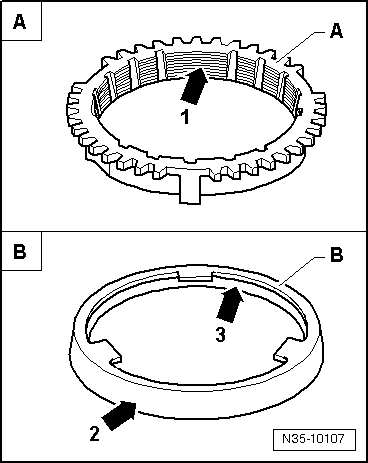
t  Check grooves -arrow 1- on synchronizer ring -A- or inner ring for flattened parts (grooves are worn).
t  On the installed intermediate ring -B-, check outer -arrow 2- or inner -arrow 3- contact surface for traces of scoring and friction.
t  Check the cone of the sliding gear for traces of scoring and friction.
t  Oil with gear oil before installing.
Gear pinions and synchronizer body
t  Clean and heat on a heating plate or with the induction heater unit e.g. -VAS 6414- to approx. 100°C before pressing on.
t  When assembling, press up to the stop until there is no axial play.
t  Check fitting position.
Sliding gears
t  Inspect wheels 1st to 6th gear for small axial play or clearance after installation.
Clutch control
t  When removing gearbox, remove slave cylinder without opening the line system.
t  If the slave cylinder with connected hydraulic line is removed, do not depress the clutch pedal. Otherwise the piston is pressed out of the slave cylinder.
t  Do not tilt the clutch pressure plate, release or tighten in small stages crosswise
t  If the clutch pedal does not return to its initial position after the coupling procedure - clutch pedal in home position - the clutch system must be bled (further measures → Chapter).
t  In order to reduce unpleasant odours if the clutch is burnt, thoroughly clean the clutch housing as well as the flywheel and the engine on the side of the gearbox.
  N35-10107

Clutch, control > < Overview of Transmission System