Outback F4-2.5L SOHC (2005)

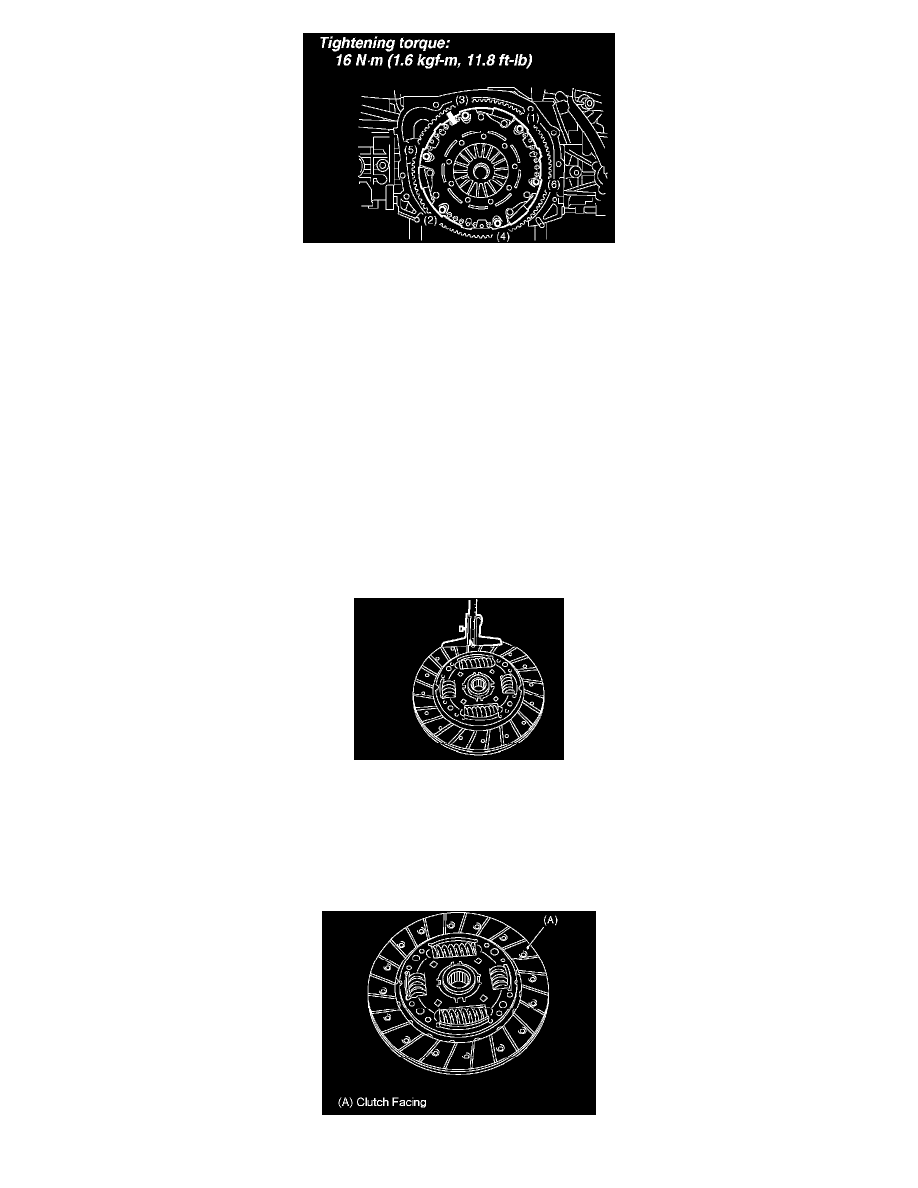
2. Place the clutch cover on flywheel and tighten the bolts to specified torque.
NOTE:
^
When reinstalling, align the alignment marks.
^
When installing a new clutch cover and flywheel, position the clutch cover in order to make the gap between 0 marks of flywheel and clutch
cover 120° or more.
^
Note the front and rear of the clutch disc when installing.
^
Tighten the clutch cover installing bolts gradually. Each bolt should be tightened to the specified torque in a crisscross order.
Tightening torque: 16 Nm (1.6 kgf-cm, 11.8 ft. lbs.)
3. Remove the ST.
ST 499747100 CLUTCH DISC GUIDE
4. Install the transmission assembly.
INSPECTION
NOTE: The illustration below is for Non-turbo model. However, perform the same procedure for Turbo model.
CLUTCH DISC
1. Facing wear: Measure the depth from the surface of facing to rivet head. Replace if the facings are worn locally or worn down to less than the
specified value.
Depth of rivet head: Limit of sinking 0.3 mm (0.012 inch)
NOTE: Do not wash the clutch disc with any cleaning fluid.
2. Hardened facing: Replace the clutch disc.
3. Oil leakage on facing: Replace the clutch disc and inspect the transmission front oil seal, transmission case mating surface, engine rear oil seal and
