
SVX FWD L6-3.3L DOHC (1994)
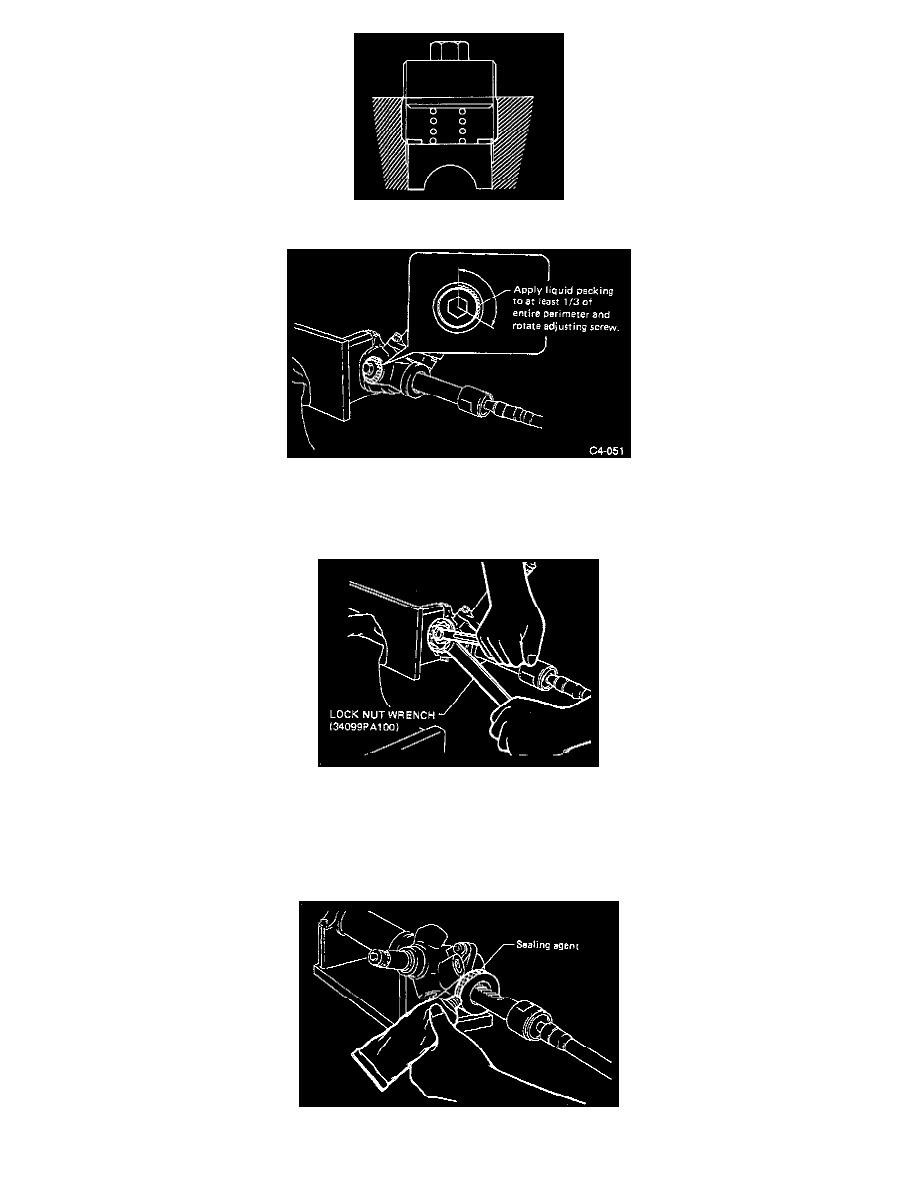
d. Turn adjusting screw so that the entire thread area is coated with liquid packing.
e. Apply liquid packing of approximately 1.5 grams (0.053 oz) to adjusting screw thread area. Also turn plug to ensure that its entire contact area
is coated with liquid packing. Liquid packing: Three-bond 1102 or equivalent.
f.
Tighten adjusting plug to 20 Nm (14 ft. lbs.) and loosen, then tighten to 5 Nm (3.6 ft. lbs.) and loosen, and finally tighten to 5 Nm (3.6 ft.
lbs.) and loosen 25°.
g. While holding adjusting plug using a closed wrench, tighten lock nut using lock nut wrench. Tightening torque: 59-74 Nm (43-54 ft. lbs.).
NOTE: Do not allow liquid packing to come in contact with pressure pad. While rotating input shaft to fully move rack shaft to the left and right,
ensure that rack moves smoothly without binding, and that rotating torque is constant
6. Installation of boot:
a. Apply sealant to gearbox housing groove. Use accessory sealant for boot kit (P/N: 34099PA110)