XT-6 2WD L6-2.7L SOHC (1989)

Brake Pad: Service and Repair
Front
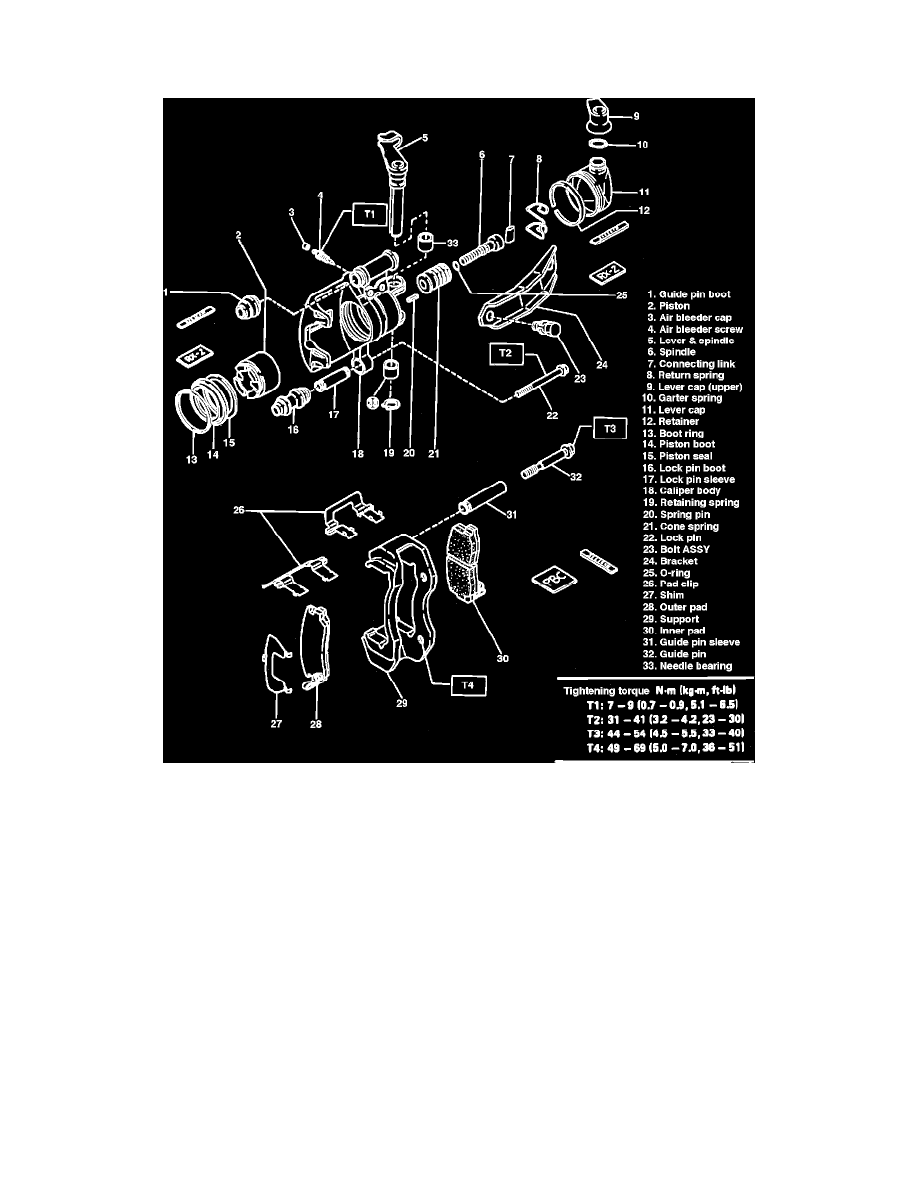
Fig. 1 Exploded View Of Front Disc Brake Assembly
Refer to Fig. 1 when performing the following procedure.
1.
Raise and support vehicle.
2.
Remove front wheels.
3.
On all except Justy, Legacy and SVX, remove outer parking brake cable clip and disconnect cable.
4.
On Legacy Turbo & SVX models, disconnect brake hose from strut.
5.
On all except Justy with 12 inch wheels, remove caliper lockpin, then rotate caliper on guide pin.
6.
On Justy with 12 inch wheels, remove caliper-to-support retaining bolts, then the boot protector and caliper.
7.
On all models, remove brake pads from support.
8.
Reverse procedure to install noting the following:
a. On all except Justy and Legacy, using wrench tool No. 925590000 and spacer tool No. 926440000 or equivalent, slowly rotate caliper piston
until seated into caliper bore. Ensure notch in piston face is aligned with tab on brake pad backing plate.
b. On Justy, Legacy and SVX, push piston into caliper body. When piston is difficult to insert, loosen the air bleeder, then push into place.
c. On all models, refer to Fig. 1 for tightening values.
d. After completing installation, depress brake pedal several times to seat brake pads against rotor. If pedal stroke is excessive, bleed hydraulic
system as needed.
