
XT-6 2WD L6-2.7L SOHC (1989)
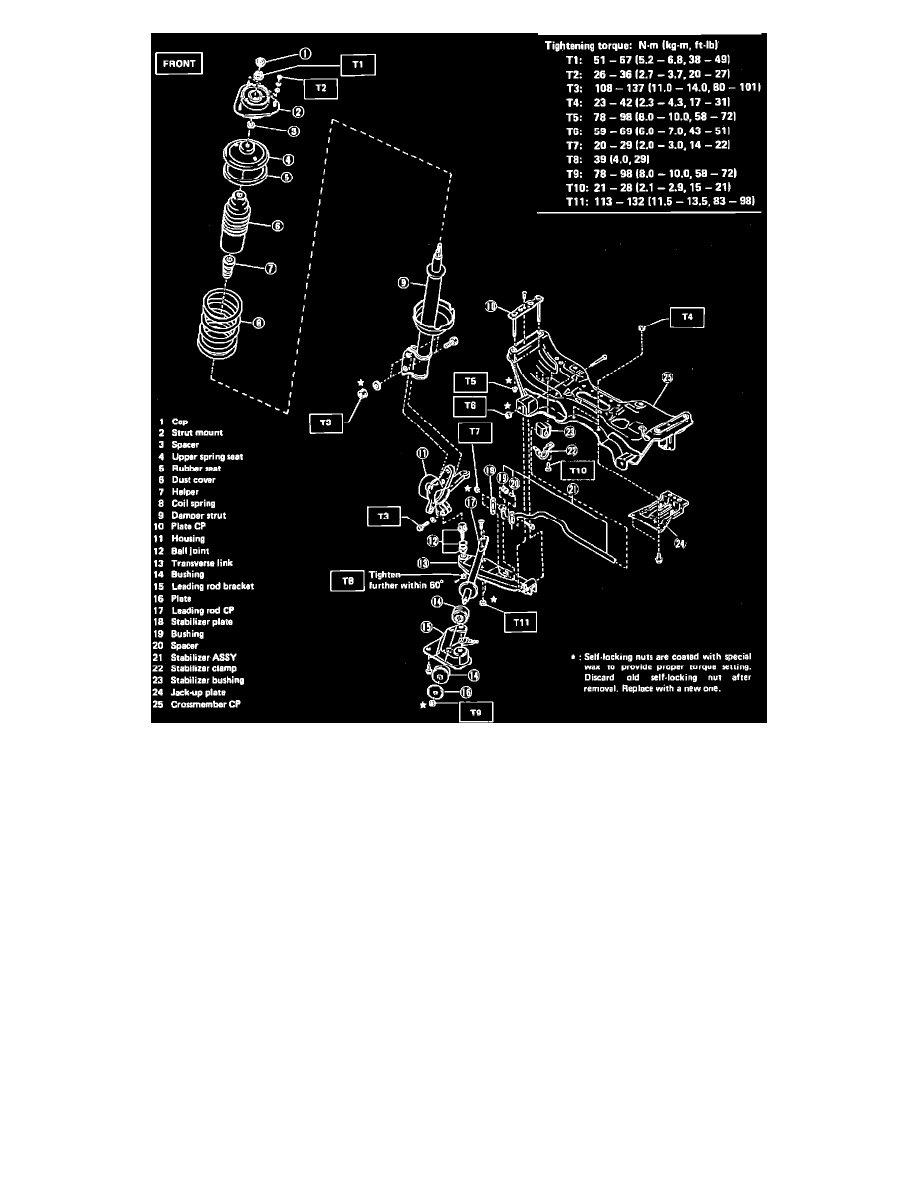
Fig. 4 Conventional Front Suspension Assembly. XT W/2.7L/6-163 Engine
Refer to Figs. 2 through 4 when performing the following procedure.
1.
Raise and support vehicle.
2.
Remove front wheels.
3.
Disconnect brake hose from caliper.
4.
Remove brake hose to strut bracket retaining clip, then separate brake hose from strut bracket.
5.
On all except XT with 2.7L/6-163 engine and Legacy, proceed as follows:
a. Remove bolts securing strut and strut bracket to axle housing.
b. Carefully remove strut from housing with housing positioned downward.
6.
On XT with 2.7L/6-163 engine and Legacy, remove strut bracket to axle housing attaching bolts.
7.
On models equipped with anti-lock brakes, remove ABS sensor.
8.
On all models, remove strut to shock tower retaining bolts.
9.
Remove strut assembly from vehicle.
10.
Properly position strut assembly in spring compressor tool, then compress spring until it separates from upper seat.
11.
On all except Legacy, position spanner tool No. 925651000 to upper spring seat holes, then remove strut rod self-locking nut using a 17mm box
wrench.
12.
On Legacy, remove strut rod self-locking nut using socket tool No. 927760000.
13.
On all models, remove strut mount and associated parts.
14.
Carefully release spring compressor tool.
15.
Remove coil spring, then the strut from spring compressor tool.
16.
Remove dust cover and helper from strut rod.
17.
Reverse procedure to install, noting the following:
a. Refer to Figs. 2 through 4 for tightening specifications.