
Grand Vitara 2WD V6-2.7L (2006)
Connecting Rod: Overhaul
Disassembly and Reassembly
Pistons, Piston Rings, Connecting Rods and Cylinders Disassembly and Reassembly
Reference: Pistons, Piston Rings, Connecting Rods and Cylinders Removal and Installation
Disassembly
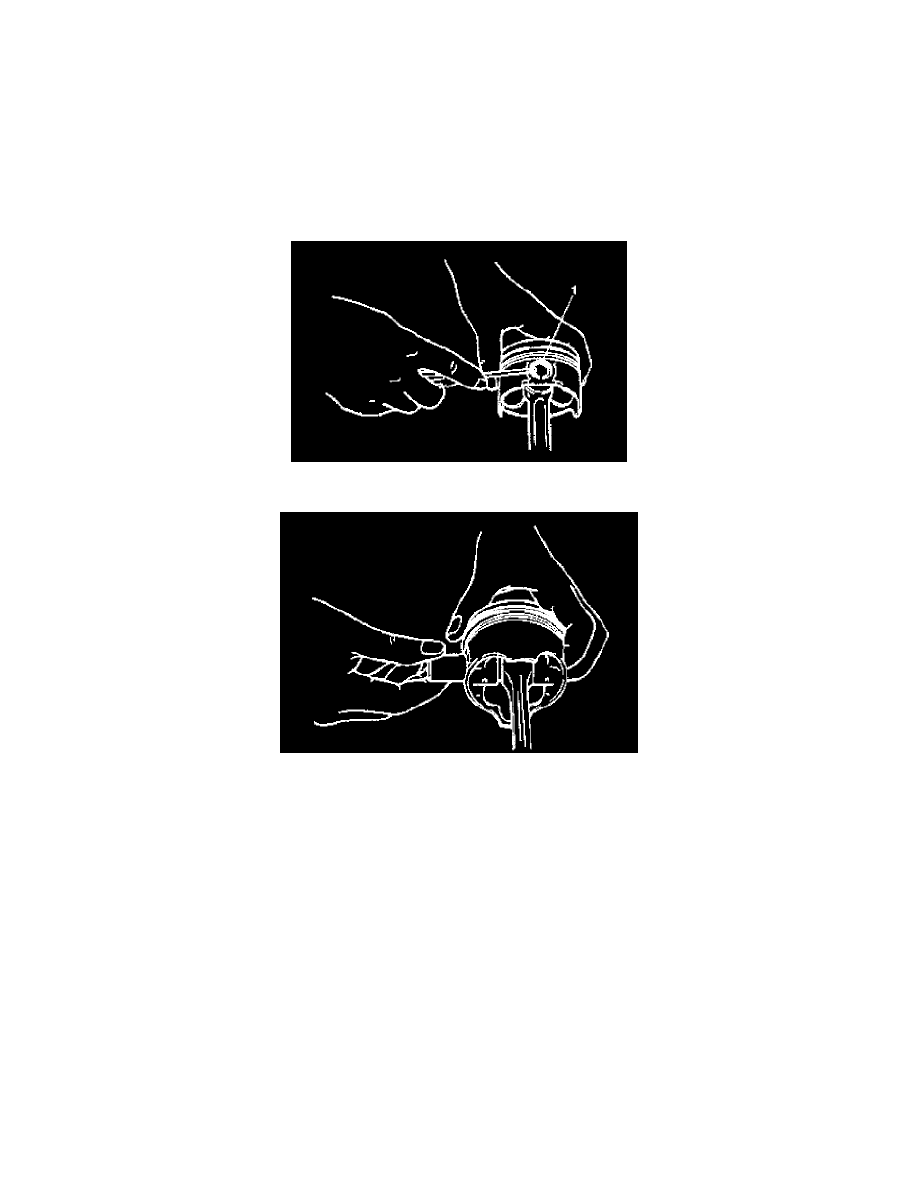
1) Using piston ring expander, remove two compression rings (Top and 2nd) and oil ring from piston.
2) Remove piston pin from connecting rod.
a) Ease out piston pin circlips (1) as shown in figure.
b) Force piston pin out.
Reassembly
Reference: Cylinders, Pistons and Piston Rings Inspection
Reference: Piston Pins and Connecting Rods Inspection
Reference: Crank Pins and Connecting Rod Bearings Inspection
1) 2 sizes of piston are available as standard size spare part so as to ensure proper piston-to cylinder clearance. When installing a standard size piston,
make sure to match piston with cylinder as follows.
a) Each piston (8) has stamped number (9) on its piston head. It represents outer diameter of piston.
b) There are also stamped numbers (10) or painted color (10) on cylinder block as shown in figure.
c) Stamped number on piston and painted color (stamped number) on cylinder block must correspond. That is, install number "2" stamped piston
to cylinder which is identified with blue painted (or "2" stamped) and a number "1" piston to cylinder with red painted (or "1" stamped).