
Grand Vitara 2WD V6-2.7L (2006)
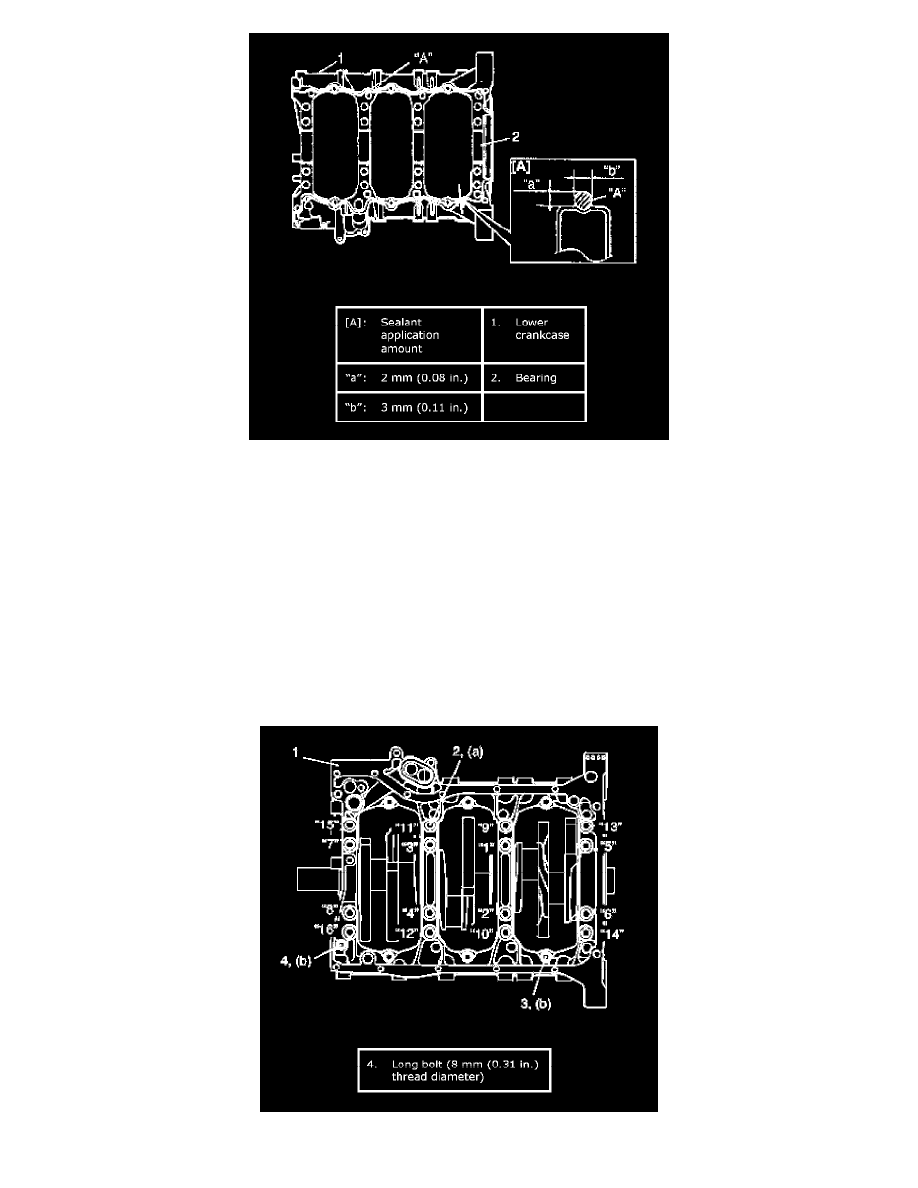
6) Install lower crankcase (1) to cylinder block. Apply oil to crankcase bolts before installing them. Tighten crankcase bolts gradually as follows.
a) Tighten crankcase bolts (10 mm (0.39 inch) thread diameter) (2) to 30 Nm (3.0 kgf-m, 22.0 ft. lbs.) according to numerical order in figure.
b) In the same manner as Step a), tighten them to 42 Nm (4.2 kgf-m, 30.5 ft. lbs.).
c) In the same manner as Step a), retighten by turning through 40°.
d) Tighten crankcase bolts (8 mm (0.31 inch) thread diameter) (3) to specified torque.
NOTE: Tighten 10 mm (0.39 inch) thread diameter bolts first (the following the order shown in figure), then tighten 8 mm (0.31 inch) thread
diameter bolts.
Tightening torque
Lower crankcase bolt (10 mm (0.39 inch) thread diameter) a: Tighten 30 Nm (3.0 kgf-m,22.0 ft. lbs.), 0 Nm (0 kgf-m, 0 ft. lbs.), 42 Nm (4.2
kgf-m, 30.5 ft. lbs.) and 40° by the specified procedure
Lower crankcase bolt (8 mm (0.31 inch) thread diameter) b: 27 Nm (2.7 kgf-m, 19.5 ft. lbs.) by the specified procedure
NOTE: After tightening crankcase bolts, check to be sure that crankshaft rotates smoothly when turned by hand.
7) Using special tools (Oil seal installer and oil seal guide), install rear oil seal (1).