
Grand Vitara 2WD V6-2.7L (2006)
Pistons, Piston Rings, Connecting Rods and Cylinders Removal and Installation
Reference: Pistons, Piston Rings, Connecting Rods and Cylinders Components
Removal
1) Remove engine assembly from vehicle.
2) Remove cylinder heads.
3) Remove oil pump.
4) Mark cylinder number on all pistons, connecting rods and connecting rod bearing caps.
5) Remove connecting rod bearing caps.
6) Clean carbon from top of cylinder bore before removing piston from cylinder.
7) Push piston and connecting rod assembly out through the top of cylinder bore.
Installation
Reference: Pistons, Piston Rings, Connecting Rods and Cylinders Disassembly and Reassembly
Reference: Cylinders, Pistons and Piston Rings Inspection
Reference: Piston Pins and Connecting Rods Inspection
Reference: Crank Pins and Connecting Rod Bearings Inspection
1) Apply engine oil to pistons, rings, cylinder walls, connecting rod bearings and crank pins.
NOTE: Do not apply oil between connecting rod and bearing or between bearing cap and bearing.
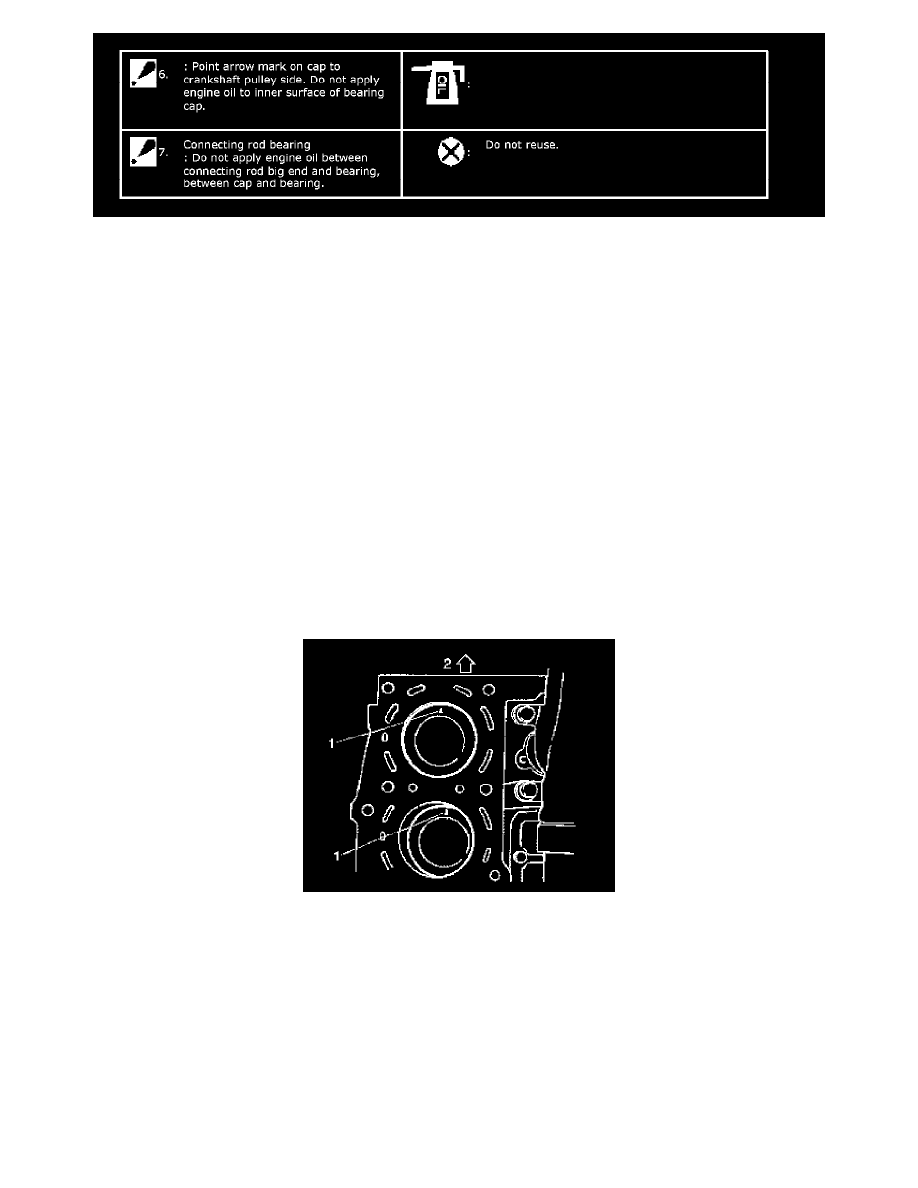
2) When installing piston and connecting rod assembly into cylinder bore, point mark (1) on piston head to crankshaft pulley side (2).
3) Install piston and connecting rod assembly into cylinder bore. Use special tool (Piston ring compressor) to compress rings. Guide connecting rod
into place on crankshaft.
Using a hammer handle, tap piston head to install piston into bore. Hold ring compressor firmly against cylinder block until all piston rings have
entered cylinder bore.
Special Tool
(A): 09916-77310