
Grand Vitara 2WD V6-2.7L (2006)
Installation
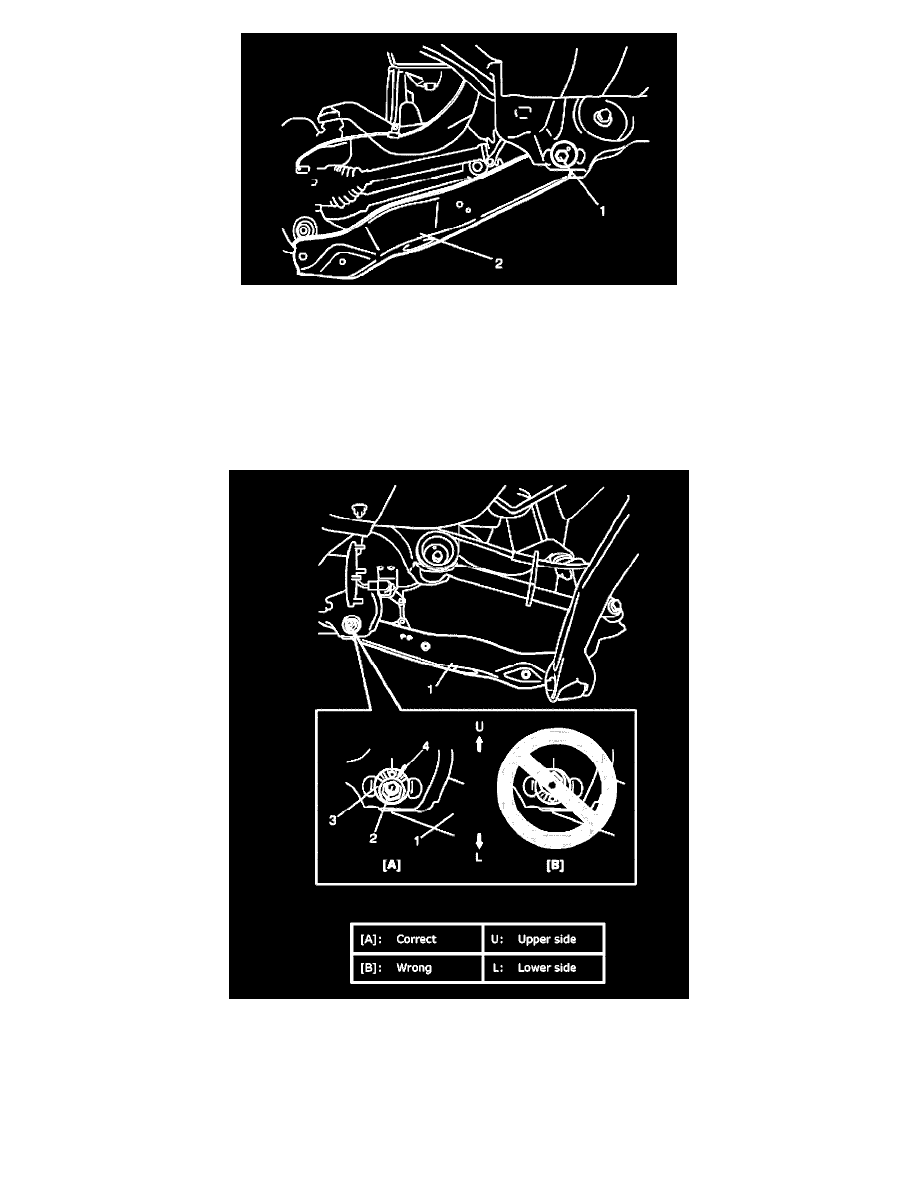
1. Install lower arm.
a. Install lower arm (1) to rear suspension frame.
b. Insert suspension lower arm inner bolt (2) from the vehicle rearward.
c. Install lower arm washer (3) with its graduated part facing up.
d. The marks (4) on lower arm washer (3) and rear suspension frame marked before its removal must be aligned and, tighten bolt and nut
temporarily by hand.
CAUTION: If reuse lower arm mount nut and lower arm outer bolt, apply engine oil to thread, bearing and trunk surface.
2. Install rear coil spring.
3. Install wheel with nuts and lower vehicle.
4. Tighten wheel nuts to specified torque.
Tightening torque
Wheel nut: 100 Nm (10.0 kg-m, 72.5 ft. lbs.)
5. Tighten lower arm outer bolt and lower arm mount nut, shock absorber bolts to specified torque with vehicle weight on suspension.