
Sidekick 4WD L4-1590cc 1.6L SOHC 0 TBI 8V (1990)
Brake Bleeding: Service and Repair
System Bleeding Procedure
Brake fluid is extremely damaging to paint. If fluid should accidentally touch painted surface, immediately wipe fluid from paint and clean
painted surface.
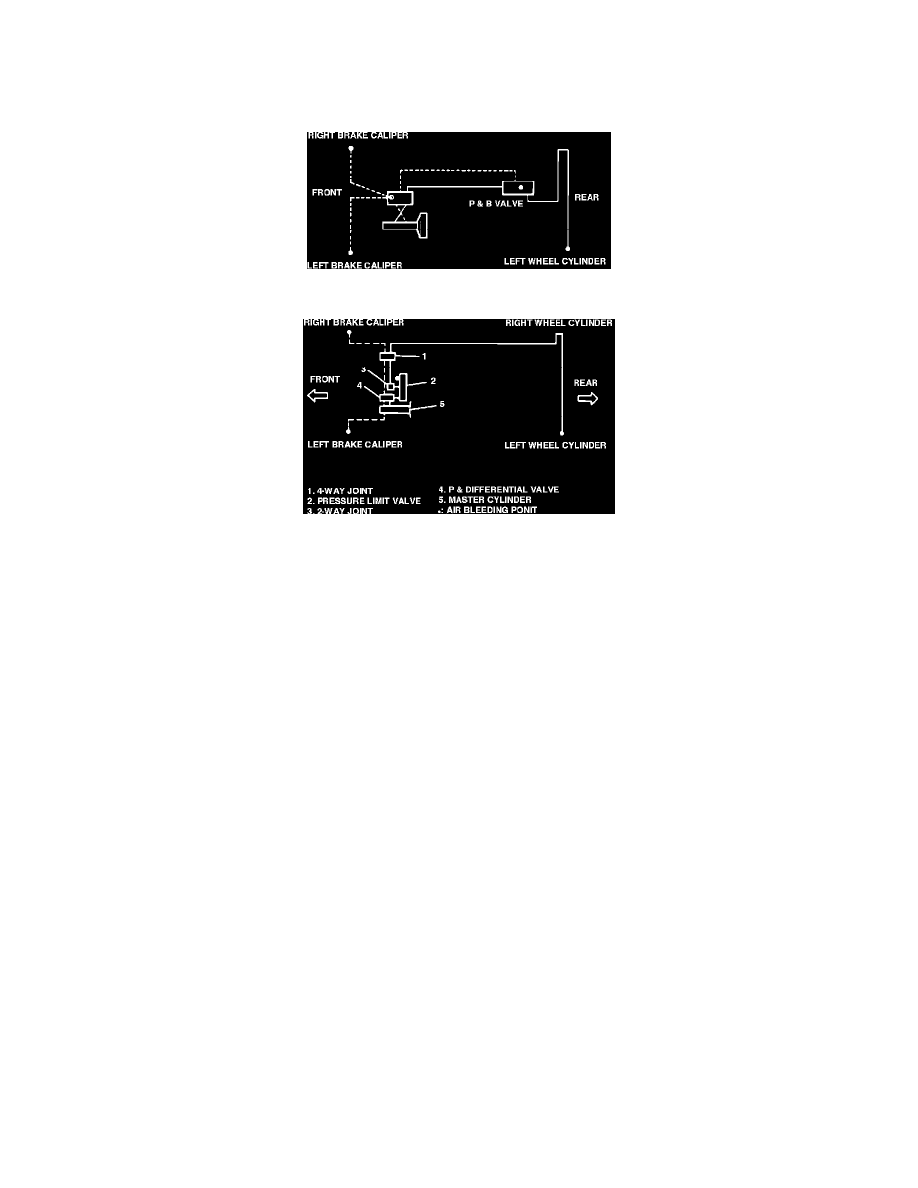
Fig. 1 Brake System Bleed Points
Fig. 2 Brake System Bleed Points
On Samurai models, bleeding is required at four places; both front wheels, P & B valve and left rear wheel cylinder, Fig. 1.
On Sidekick models, bleeding is required at four places; both front wheels, pressure limit valve and left rear wheel cylinder, Fig. 2.
On Swift models, hydraulic lines of the brake system are based on a diagonal split system. When a brake line or hose is disconnected, bleeding
operation must be performed at both ends of the line disconnected.
1.
Fill master cylinder reservoir. Reservoir should be kept at least half full during bleeding operation.
2.
Remove bleeder plug cap, then attach vinyl tube to bleeder plug of component to be bled. Insert other end of tube into suitable container.
3.
Depress brake pedal several times, then while holding pedal depressed, loosen bleeder plug 1/2 turn.
4.
When fluid pressure in cylinder is almost depleted, retighten bleeder plug.
5.
Repeat steps 3 and 4, until there are no more air bubbles in hydraulic line.
6.
When bubbles stop, depress and hold brake pedal, then tighten bleeder plug.
7.
Attach bleeder cap.
8.
After completing bleeding operation, apply fluid pressure to hydraulic system and check for leakage.
9.
Fill master cylinder reservoir up to specified level.
10.
Check brake pedal for sponginess. If pedal is spongy, repeat entire procedure.