
Sidekick 4WD L4-1590cc 1.6L SOHC 0 TBI 8V (1990)
NOTE:
THE EXHAUST HEAT SHIELD SET IS ONLY FOR VEHICLES WHICH HAVE A CONNECTING FLANGE BETWEEN THE
MUFFLER AND TAILPIPE, AS SHOWN IN THE ILLUSTRATIONS. IF THERE IS NO CONNECTING FLANGE, THERE IS NO NEED
TO INSTALL THE EXHAUST HEAT SHIELD SET.
INSTALLATION INSTRUCTIONS
Before starting installation, make sure that the vehicle floor is clean and dry in the area where the heat shield is to be installed.
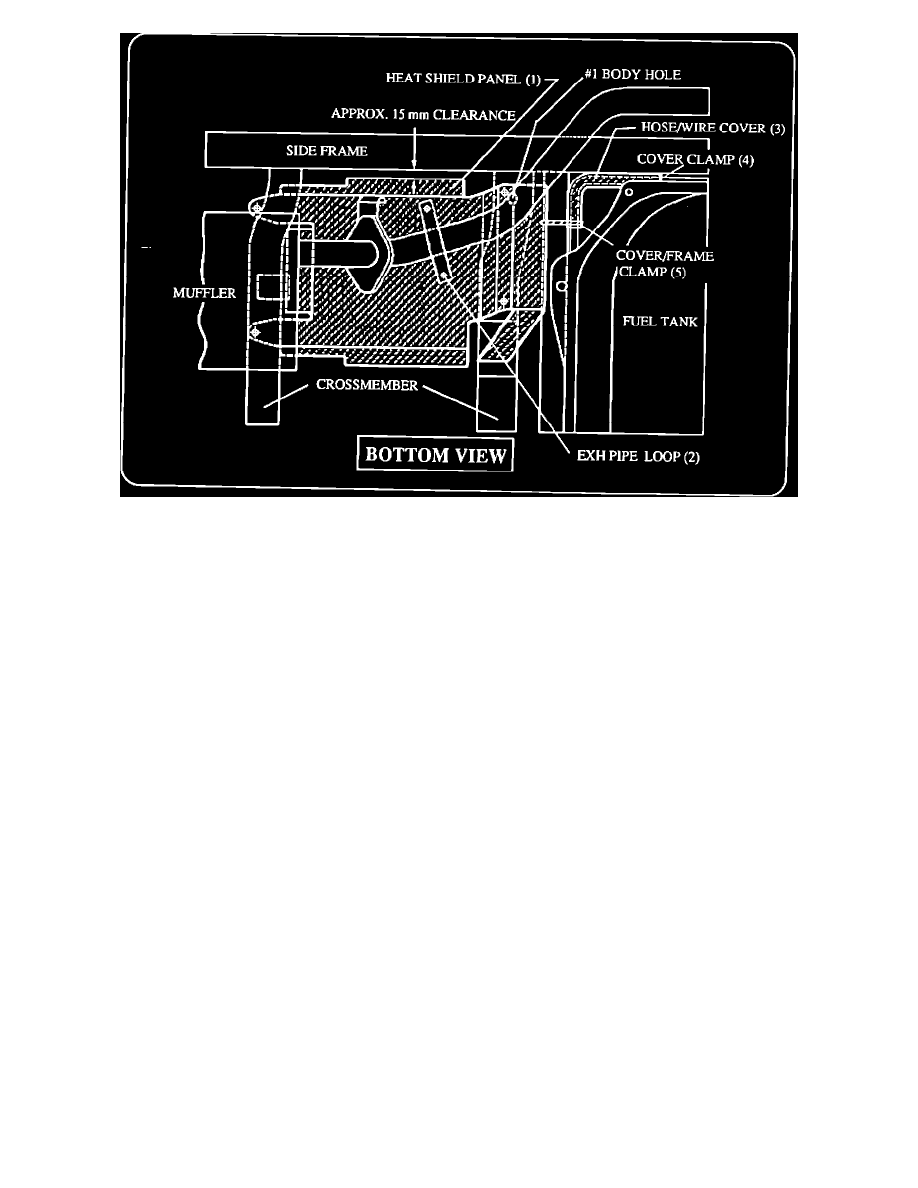
1.
Install the hose/wire cover (3) over the evaporative hose and wiring harness using the cover clamp (4) and cover/frame clamp (5), as shown in the
bottom view illustration.
2.
Position the heat shield panel (1) so that the embossment on the heat shield panel is aligned with the # 1 body hole. The panel-to-side-frame
clearance is approximately 15 mm and the panel-to-crossmember clearance is approximately 10 mm, as shown in the illustrations.
3.
Punch a 4 mm (5/32 in.) hole into the floor panel at each of the four corner anchor holes of the heat shield panel using the long punching tool
supplied (supplied free of charge by ASMC). Tap the punching tool several times with a hammer until the shoulder contact the floor panel.
4.
Apply a small amount of sealant (Suzuki Bond No. 1215 or equivalent) on the threads of each of the heat shield panel screws (7) and install the
heat shield panel using the four screws.
5.
Install the exhaust pipe loop (2) on the heat shield panel using the two exhaust pipe loop bolts (6).