
Swift L4-1298cc 1.3L SOHC MFI (1997)
6.
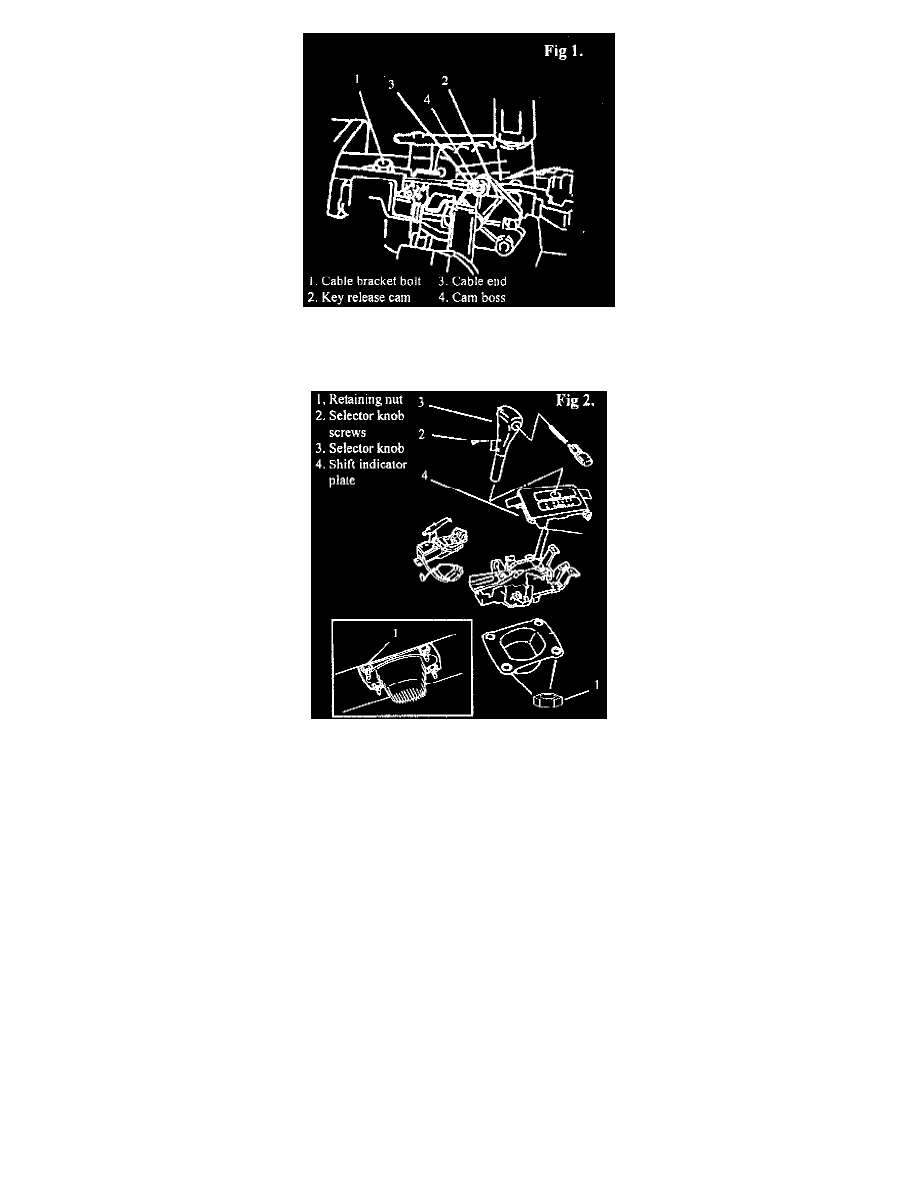
Remove the cable bracket bolt (1). Disconnect the park lock cable end (3) from the key release cam (2) and move the cables clear. See Figure 1.
7.
Raise the vehicle on a hoist.
8.
Remove all four of the shifter assembly retaining nuts (1). Lower the vehicle. See figure 2.
9.
Remove the shift selector from the vehicle.
10.
Remove the two selector knob screws (2) and selector knob (3) from the lever. Figure 2.
11.
Remove the shift indicator plate (4) from the selector. Figure 2.
INSTALLATION PROCEDURE
NOTICE:
THE NEW SHIFTER ASSEMBLY IS SHIPPED WITH A RED CAM ALIGNMENT PIN WHICH MUST NOT BE REMOVED UNTIL THE
SHIFTER IS COMPLETELY INSTALLED IN THE VEHICLE. DO NOT REMOVE THIS CAM ALIGNMENT PIN UNTIL DIRECTED TO DO
SO IN THE SERVICE PROCEDURE.
12.
Install the shift indicator plate to the replacement selector.
13.
Install the selector knob and both screws to the selector lever.
14.
Install the shift selector assembly to the vehicle.
15.
Raise the vehicle and install the retaining nuts. Torque to 16 N-m (12 ft.lbs). Lower the vehicle.
16.
Install and connect the shift select cable to the shift selector.