XL-7 2WD V6-3.6L (2007)

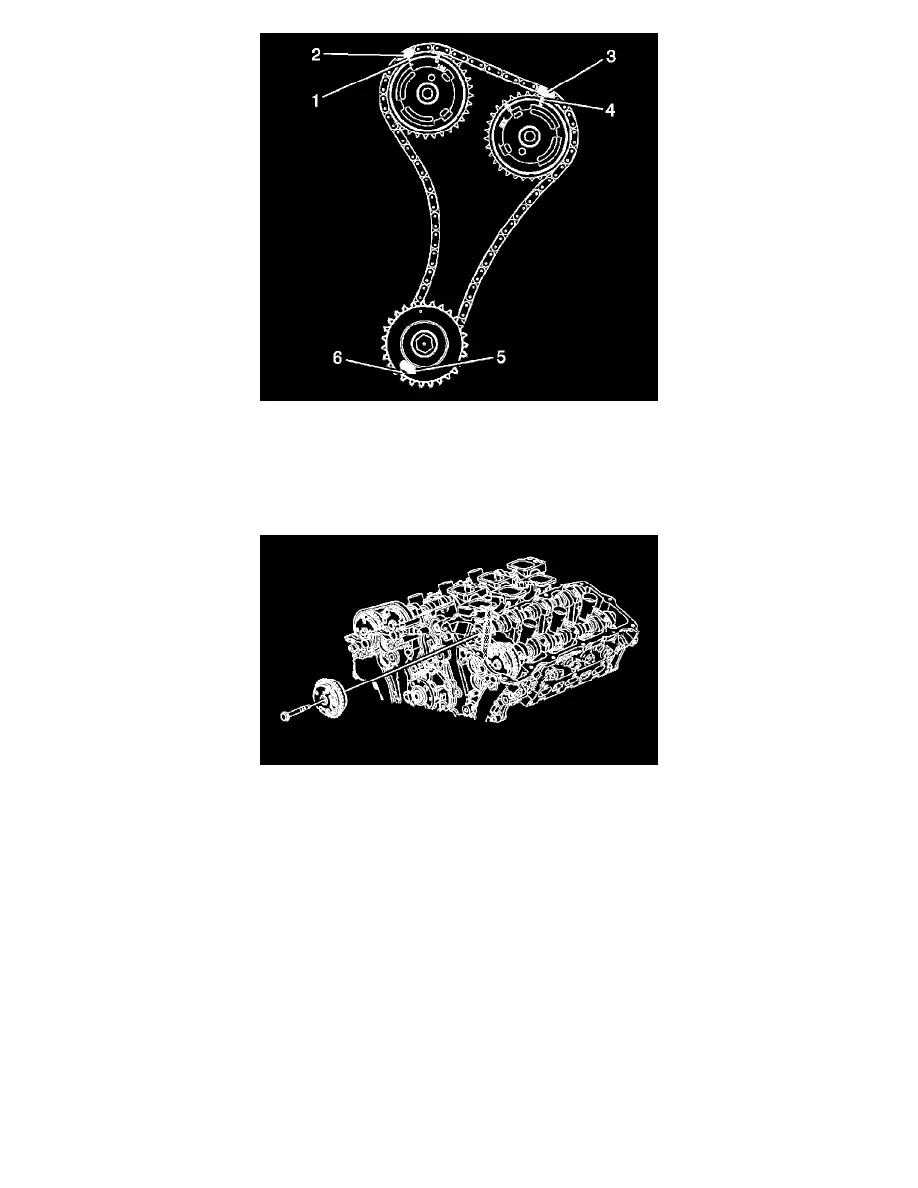
NOTE: Ensure that the camshaft timing chain and the camshaft position actuators are marked for proper assembly.
1. Align the exhaust camshaft actuator alignment mark (1) to the timing chain alignment mark (2) made during disassembly.
2. Ensure that the intake camshaft actuator alignment mark (4) and the timing chain alignment mark (3) are also aligned.
3. Position the exhaust camshaft actuator to the camshaft and install the actuator bolt hand tight.
4. Remove the EN-48313.
CAUTION: Refer to [Fastener Notice].
5. Tighten the exhaust camshaft position actuator bolt.
Tightening torque
Tighten the bolt to 58 N-m (43 ft. lbs.).
6. Install the left intake and exhaust camshaft position actuator solenoids.
7. Install the left intake and exhaust camshaft position sensors.
8. Install the left camshaft cover.
9. Install the lower intake manifold with the upper manifold.
