
Camry CE Sedan 4-Door L4-2164cc 2.2L DOHC MFI (1997)
b. Remove the shock absorber from the steering knuckle.
Installation Note: Coat the nut's threads with engine oil.
5. Remove shock absorber with coil spring Remove the 3 nuts, suspension support No.2 and shock absorber with the coil spring.
[Torque: 80 Nm (53 ft. lbs.)]
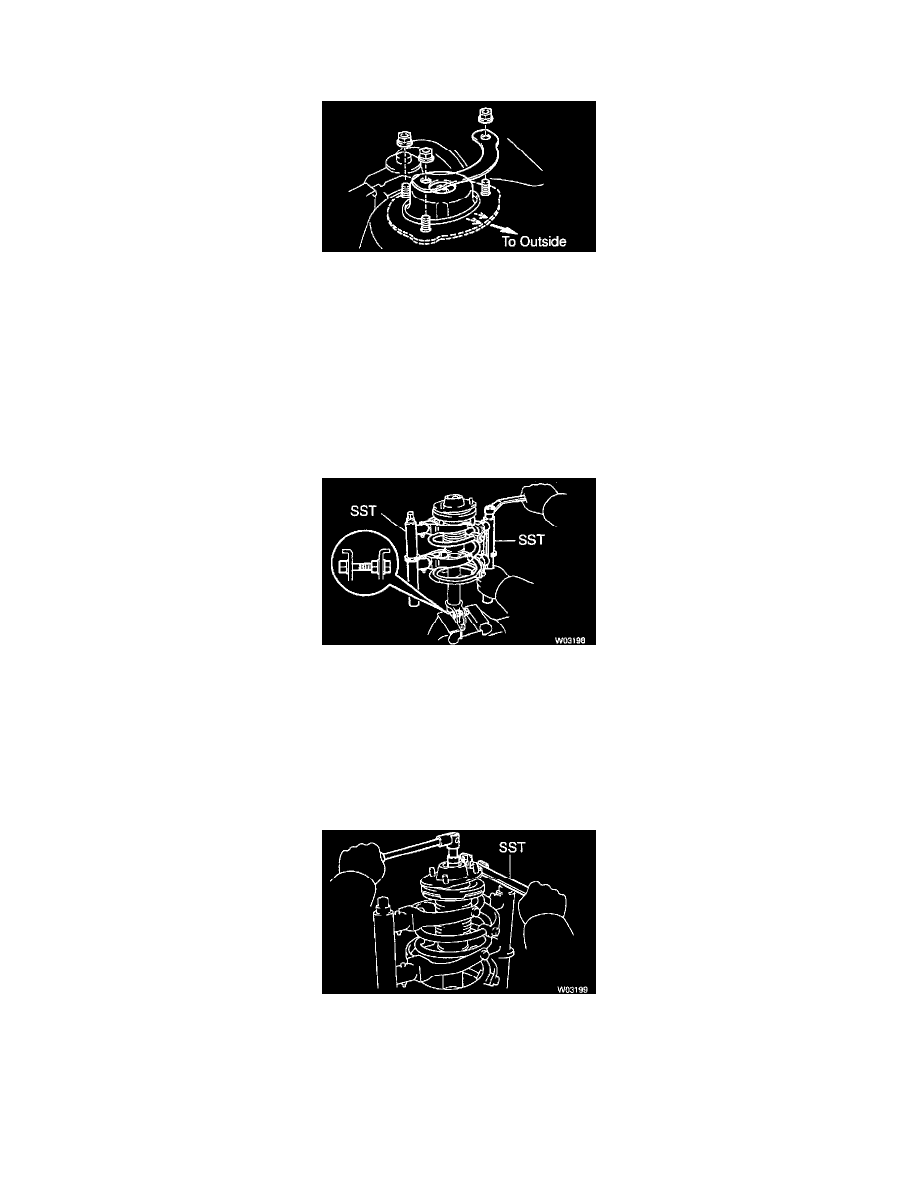
Installation Note: Rotate the suspension support and set it in the direction, as shown.
6. Install in reverse order of removal, noting the torque specifications in brackets [ ].
7. After installation, check the front wheel alignment.
Disassembly
1. Remove coil spring
a. Install 2 nuts and a bolt to the bracket at the lower portion of the shock absorber and secure it in a vise.
b. Using Special Service Tool (SST) 09727 - 30021, compress the coil spring.
CAUTION:
-
When holding the shock absorber with the coil spring removed, do not hold it by the spring lower seat. Also, do not knock the spring lower
seat.
-
Do not use an impact wrench. It will damage the SST.
NOTE:
-
Use 2 of the same type of SST.
c. Using SST 09729 - 22031 to hold the suspension support, remove the nut.
d. Remove the following parts from the shock absorber:
-
Suspension support
-
Bearing
-
Spring upper seat
-
Upper insulator
-
Coil spring
-
Lower insulator and spring bumper