
Camry CE Sedan 4-Door L4-2164cc 2.2L DOHC MFI (1997)
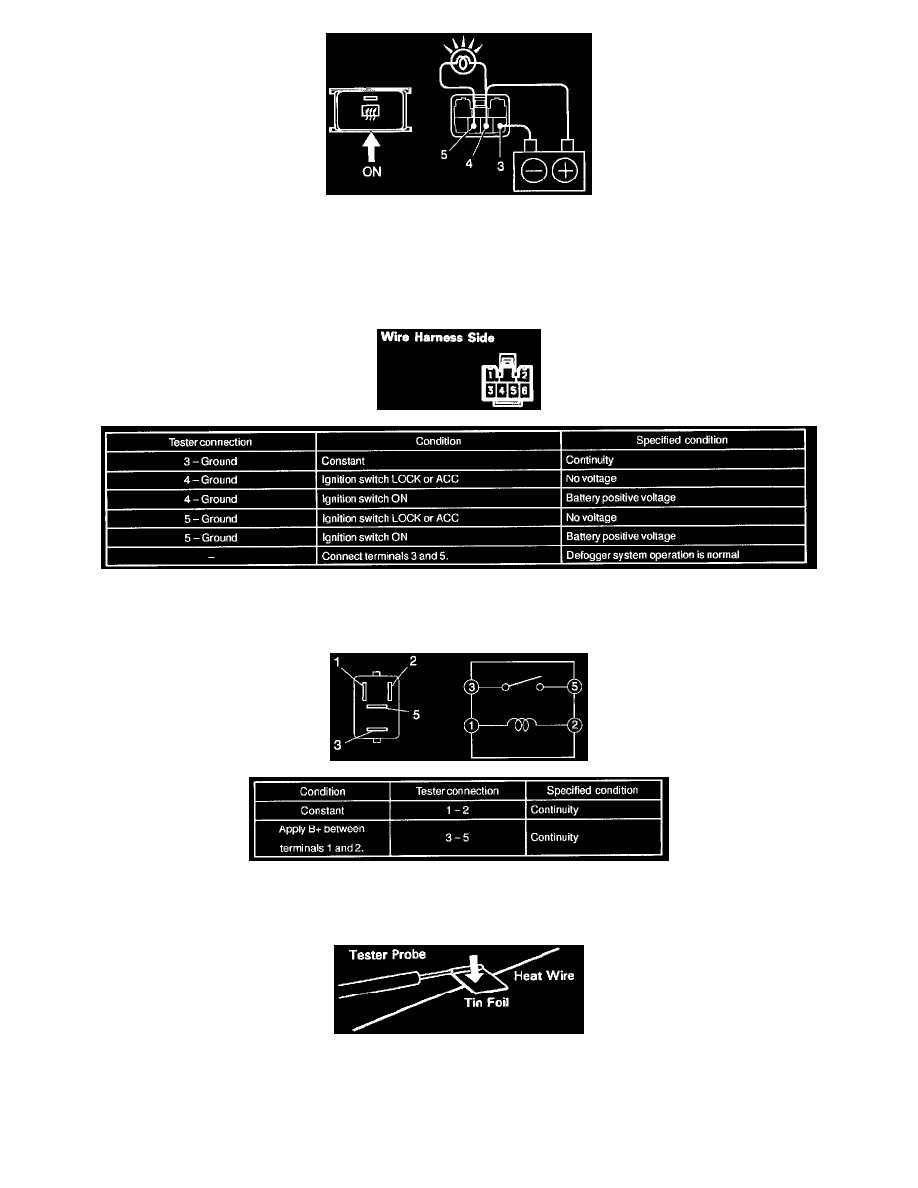
2. INSPECT DEFOGGER TIMER OPERATION
a. Connect the positive (+) lead from the battery to terminal 4 and the negative (-) lead to terminal 3.
b. Connect the positive (+) lead from the battery to terminal 5 through a 3.4 W tester bulb.
c. Push the defogger switch ON, check that the indicator light and test bulb light up for 12 to 18 minutes, then the indicator light and test bulb
lights go out.
If operation is not as specified, replace the switch.
3. INSPECT DEFOGGER TIMER CIRCUIT
Disconnect the connector from the switch and inspect the connector on the wire harness side, as shown in the chart.
If the circuit is not as specified, replace the switch.
4. INSPECT DEFOGGER RELAY CONTINUITY
If continuity is not as specified, replace the relay.
5. INSPECT DEFOGGER WIRE
NOTE:
^ When cleaning the glass, use a soft, dry cloth, and wipe the glass in the direction of the wire. Take care not to damage the wires.
^ Do not use detergents or glass cleaners with abrasive ingredients.
^ When measuring voltage, wind a piece of tin foil around the top of the negative probe and press the foil against the wire with your finger, as
shown.