
Celica GT Convertible L4-2164cc 2.2L DOHC MFI (1997)
Ball Joint: Service and Repair
REMOVAL
1. Remove the steering knuckle with the axle hub.
See: Front Steering Knuckle/Service and Repair/Removal and Installation
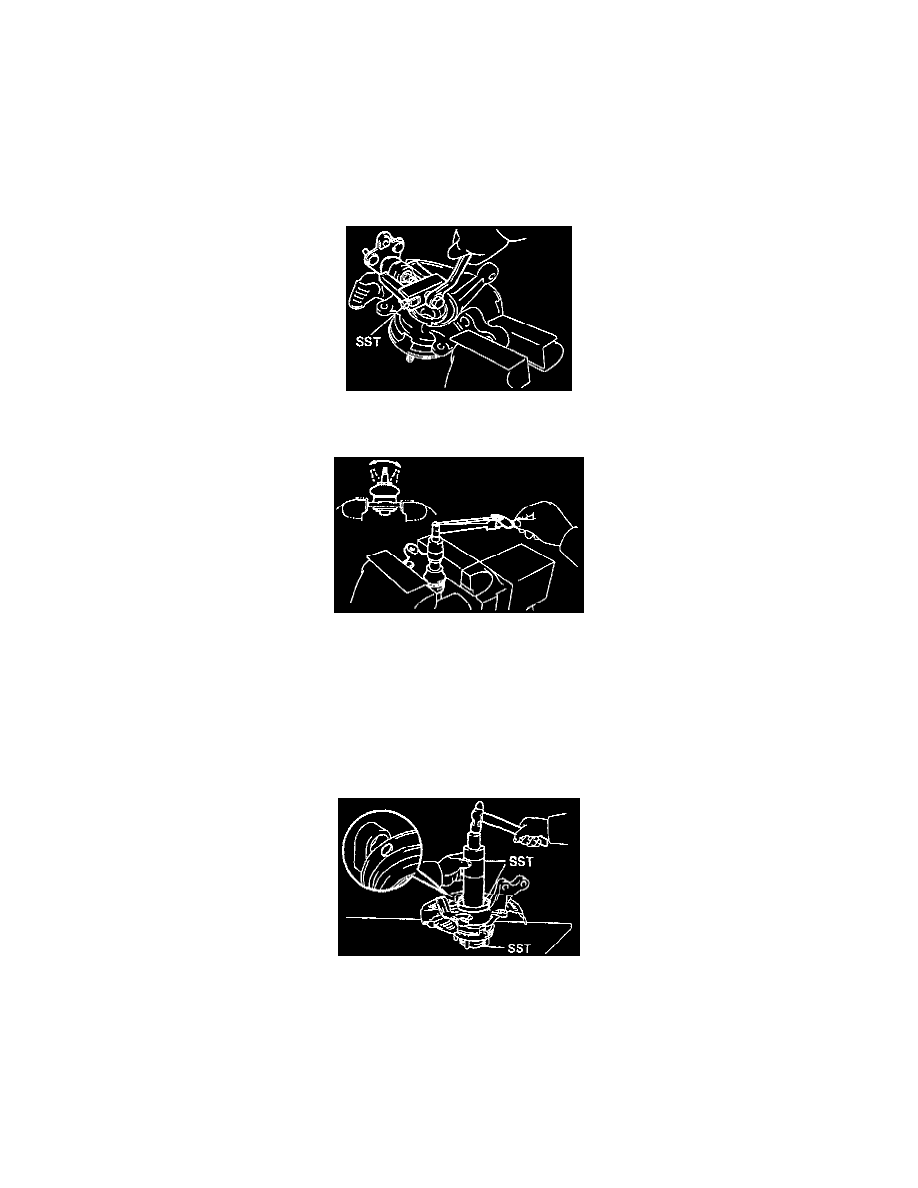
2. Remove the lower ball joint by doing the following.
a. Using a screwdriver, remove the dust deflector.
b. Remove the cotter pin and nut.
c. Using the 09628 - 62011 Special Service Tool (SST), remove the lower ball joint.
3. Inspect the ball joint for rotation condition by checking the following.
a. Flip the ball joint stud back and forth five times before installing the nut.
b. Using a torque wrench turn the nut continuously one turn each 2 - 4 seconds and take the torque reading on the 5th turn. The turning torque
should have a range of 1.0 - 2.9 Nm (8.7 - 26 inch lbs.).
INSTALLATION
1. Install the lower ball joint by doing the following.
a. Install the lower ball joint and tighten the nut to 103 Nm (76 ft. lbs.).
b. Install a new cotter pin.
2. Using the 09316 - 60011 (09316 - 00011, 09316 - 00041), 09608-32010 SST and a hammer, install a new dust deflector.
NOTE: Align the holes for the ABS speed sensor in the dust deflector and steering knuckle.
3. Install the steering knuckle with the axle hub.
See: Front Steering Knuckle/Service and Repair/Removal and Installation