
Corolla CE Sedan 4-Door L4-1587cc 1.6L DOHC MFI (1997)
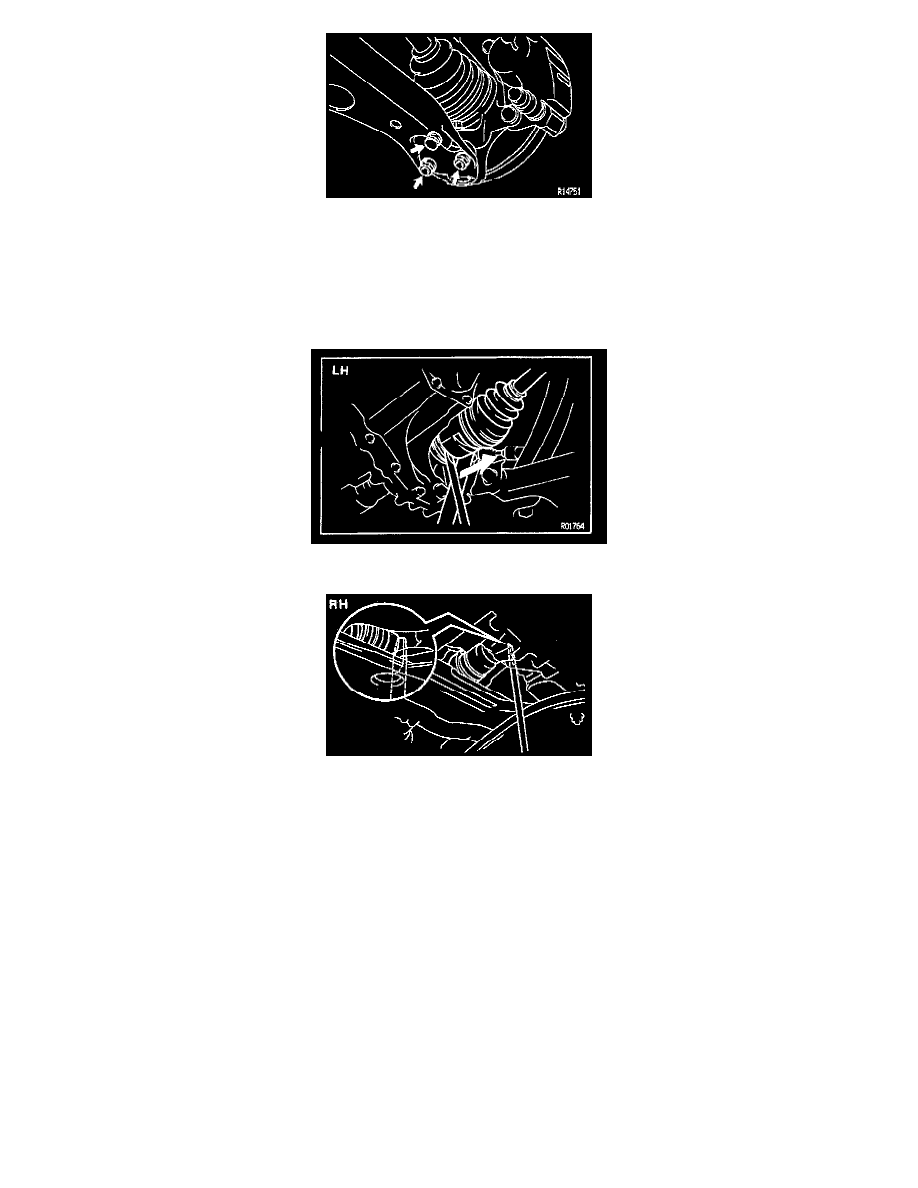
7. Disconnect lower ball joint from lower suspension arm by removing the 2 nuts and bolt.
[torque: 142 Nm (105 ft. lbs.)].
8. Disconnect drive shaft from axle hub, using a plastic hammer.
CAUTION: Be careful not to damage the boot, oil seal and speed sensor rotor.
9. Remove drive shaft:
-
LH Drive shaft: Using a hammer and hub nut wrench, remove the drive shaft from the transaxle.
-
RH Drive shaft: Using a hub nut wrench, remove the drive shaft from the transaxle.
CAUTION: Be careful not to damage the dust cover and oil seal.
10. Remove snap ring from the inboard joint spline, using a screwdriver.
11. Install in reverse order of removal, noting the torque specifications in brackets [ ]. See TSB DL001-98, 3-6-98.
Installation Note:
^
Coat the seal lip with MP grease.
^
Before installing the drive shaft, set the snap ring opening side facing downward.
^
Whether or not the drive shaft is making contact with the pinion shaft can be known by the sound or feeling when driving it in.
^
After installation, check that there is 2 - 3 mm (0.08 - 0.12 inch). of play in axial direction.
^
After installation, check that the drive shaft cannot be pulled out by hand.
12. After installation, check the ABS speed sensor signal (ABS equipped) and front wheel alignment.