
Corolla LE Sedan L4-1762cc 1.8L DOHC MFI (1998)
^
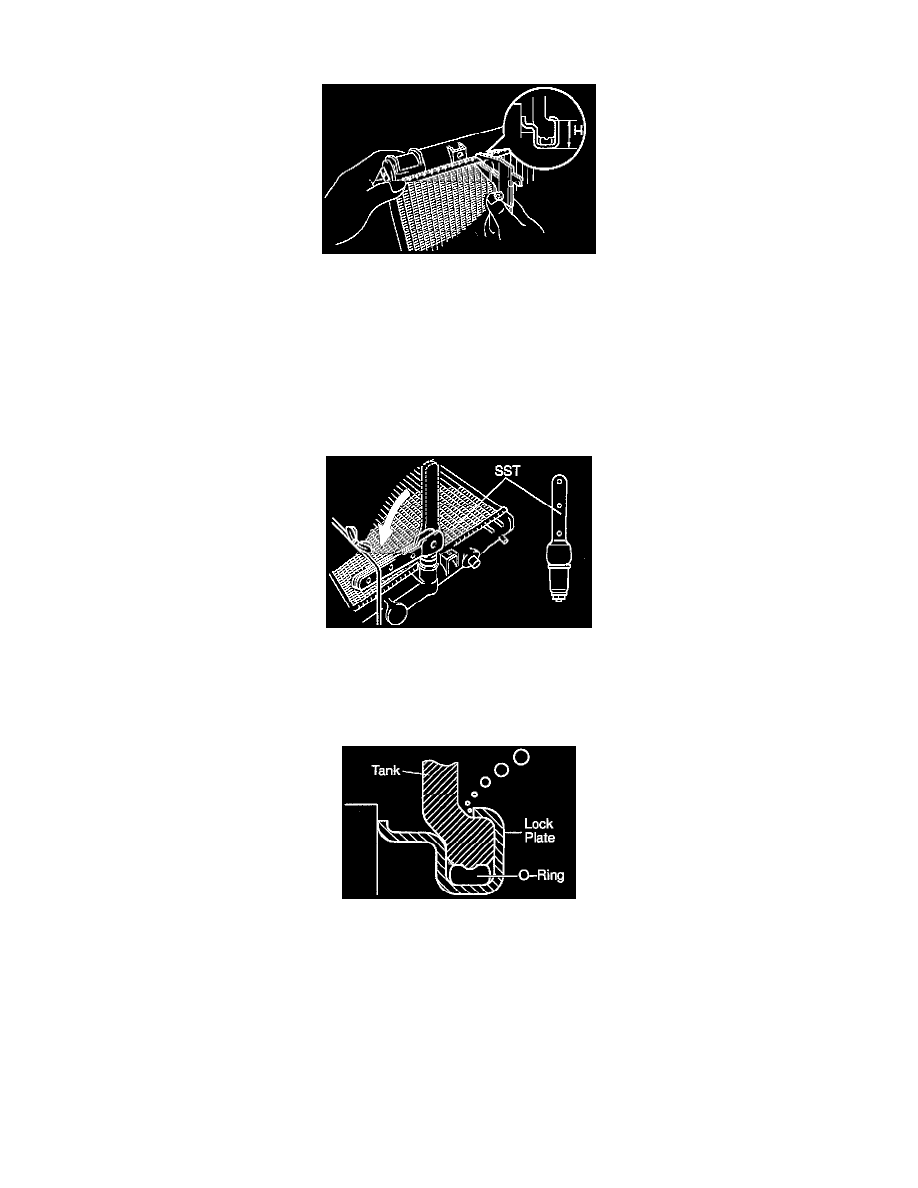
The points shown in the illustration cannot be staked with SST. Use wrap vinyl tape around the tip of a pair or similar object and be careful not
to damage the core plates.
b. Check the lock plate height "H" after completing the caulking.
Plate height: 7.40 - 7.80 mm (0.2913 - 0.3071 inch)
If not within the specified height, adjust the stopper bolt of the handle again and caulk again.
5. Install drain plug.
a. Install a new O-ring to the drain plug.
b. Install the drain plug.
6. Inspect for water leaks.
a. Tighten the drain plug.
b. Plug the inlet and outlet pipes of the radiator with SST. SST 09230-01010
c. Using a radiator cap tester, apply pressure to the radiator.
Test pressure: 177 kPa (26 psi)
d. Submerge the radiator in water.
e. Inspect for leaks.
HINT: On radiators with resin tanks, there is a clearance between the tank and lock plate where a minute amount of air will remain, giving the
appearance of an air leak when the radiator is submerged in water, therefore, before doing the water leak test, first swish the radiator around in
the water until all bubbles disappear.