
Corolla LE Sedan L4-1762cc 1.8L DOHC MFI (1998)
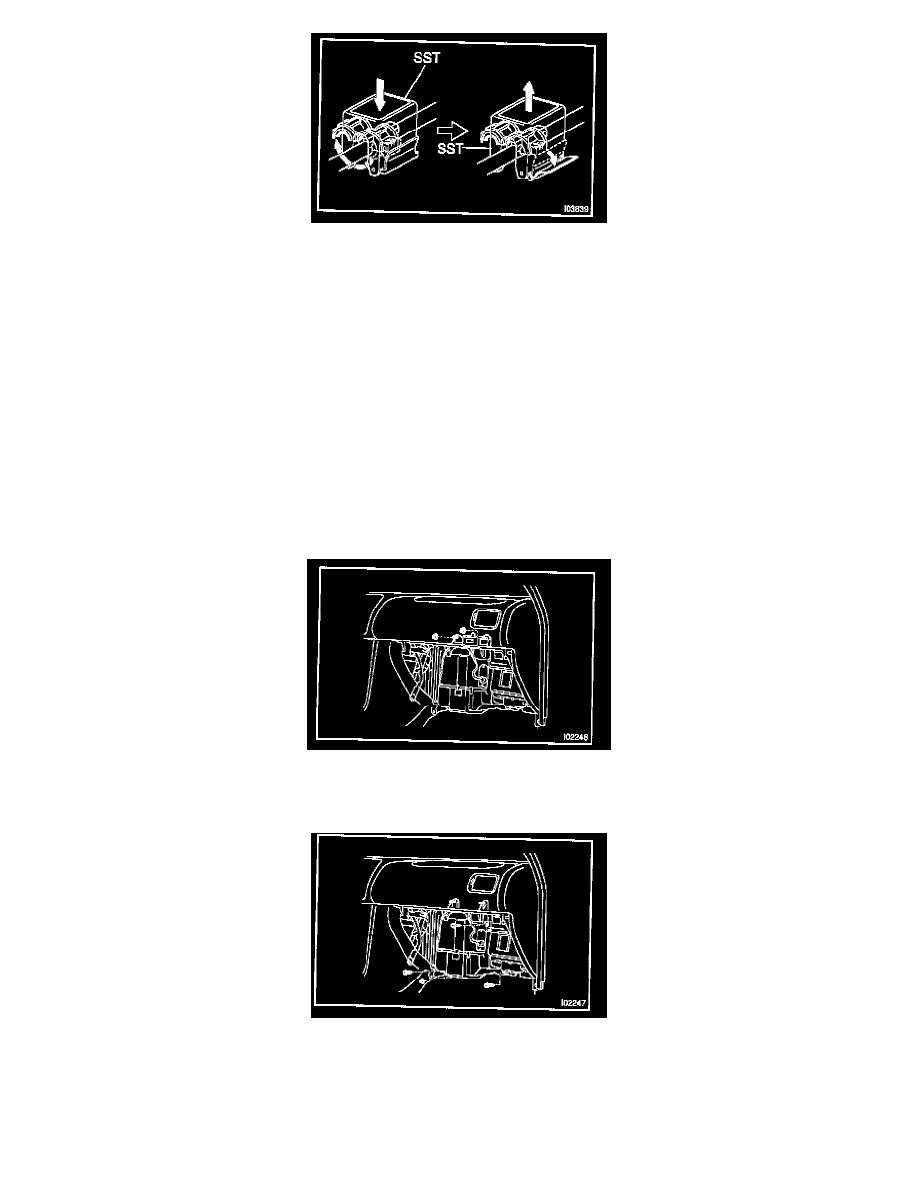
2. Push down SST and release the clamp lock.
NOTE: Be careful not to deform the tubes, when pushing SST.
3. Pull SST slightly and push the release lever, then re move piping clamp with SST
4. Remove the piping clamp from SST
c. Disconnect the both tubes
NOTE: Cap the open fillings Immediately to keep moisture or dirt out of the system.
HINT: At the time of installation, please refer to the following item.
^
Lubricate 4 new O-rings with compressor oil and instal the tubes.
^
After connection, check the fitting for claw of the piping clamp.
5. REMOVE TUBE GROMMET AND DRAIN HOSE GROMMET
6. REMOVE LOWER FINISH PANEL
7. REMOVE A/C AMPLIFIER
a. Disconnect the connector.
b. Remove the 2 nuts and amplifier.
8. REMOVE COOLING UNIT
a. Disconnect the connectors.
b. Remove the 3 screw, nut and cooling unit.
INSTALLATION