
Corolla LE Sedan L4-1762cc 1.8L DOHC MFI (1998)
3. Connect pressure feed tube.
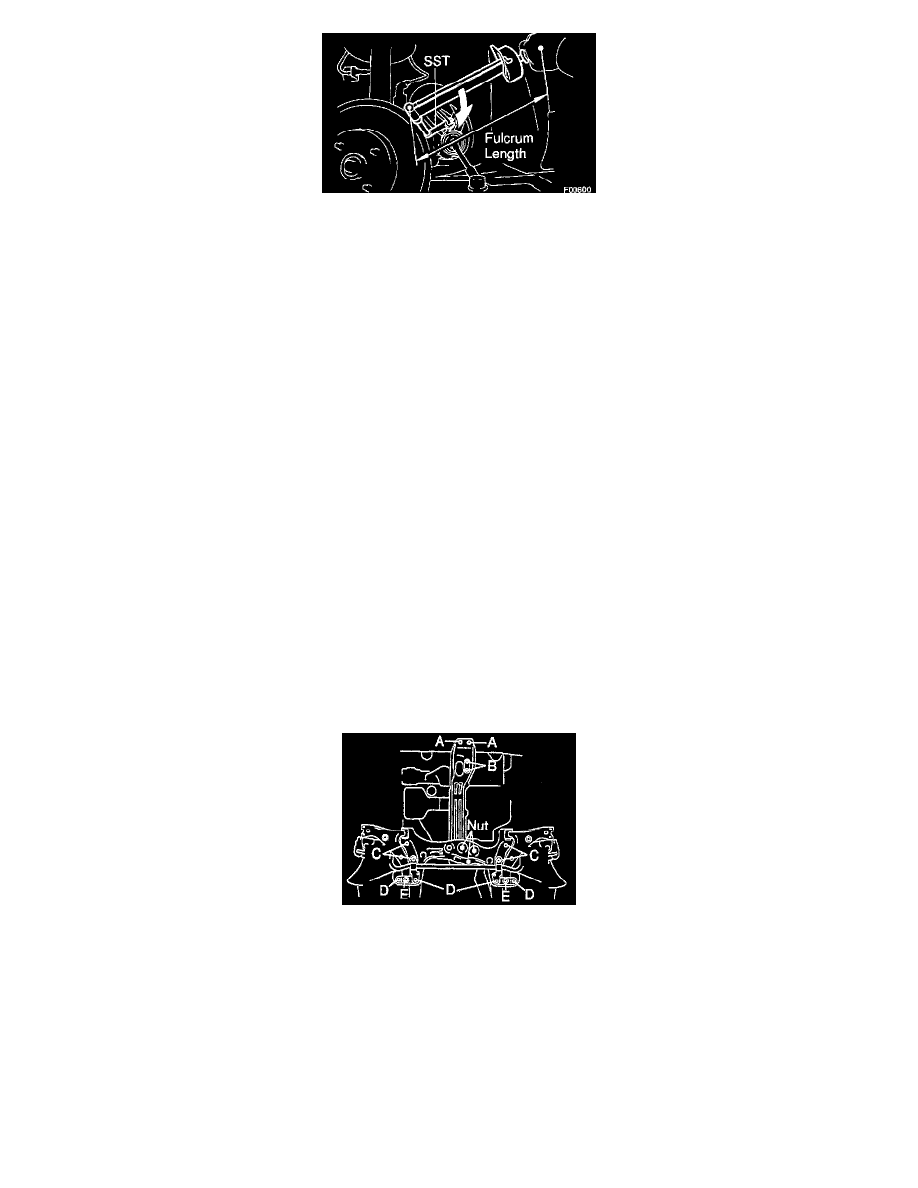
Using SST 09631-22020, connect the tube.
Torque: 32 Nm (24 ft. lbs.)
HINT:
-
Use a torque wrench with a fulcrum length of 300 mm (11.81 in.).
-
This torque value is effective in case that SST is parallel to a torque wrench.
4. Connect return hose.
Install the clip and connect the hose.
5. Connect 2 tube clamps.
Torque the bolt.
Torque: 5.4 N m (48 inch lbs.)
6. Install rack boot heat insulator.
Torque the bolt and nut.
Torque: 5.4 Nm (48 inch lbs.)
7. Install engine rear mount bracket.
a. A131 L A/T:
Torque the 2 bolts and drive shaft heat insulator set nut.
Torque:
-
Bolt: 77 Nm (57 ft. lbs.)
-
Nut: 17 Nm (12 ft. lbs.)
M/T, A245E A/T:
Torque the 3 bolts and drive shaft heat insulator set nut.
Torque:
-
Bolt: 77 Nm (57 ft. lbs.)
-
Nut: 17 Nm (12 ft. lbs.)
8. Install engine rear mount insulator.
Torque the bolt.
Torque: 87 Nm (64 ft. lbs.)
9. Install front sub-frame and lower suspension arm.
a. Torque the 14 bolts and 3 nuts.
Torque:
-
Bolt A: 60 Nm (45 ft. lbs.)
-
Bolt B: 64 Nm (47 ft. lbs.)
-
Bolt C: 225 Nm (167 ft. lbs.)
-
Bolt D: 147 Nm (109 ft. lbs.)
-
Bolt E: 175 Nm (129 ft. lbs.)
-
Nut: 57 Nm (42 ft. lbs.)
b. Remove the engine support fixture.
10. Install brace.
Torque the 2 nuts.
Torque: 69 Nm (51 ft. lbs.)