
Previa Van LE 4WD L4-2438cc 2.4L DOHC SC MFI (1997)
a. Remove the 3 screws and disconnect the connector.
b. Disconnect the 8 pawls and remove the blower motor assembly.
4. REMOVE BLOWER RESISTOR
Disconnect the connector. then remove the 2 screws and the blower resister.
DISASSEMBLY HINT: The register can be removed after the right suction grill is removed.
5. REMOVE REAR BLOWER SWITCH
Disconnect the connector, then remove the 2 screws and the rear A/C switch.
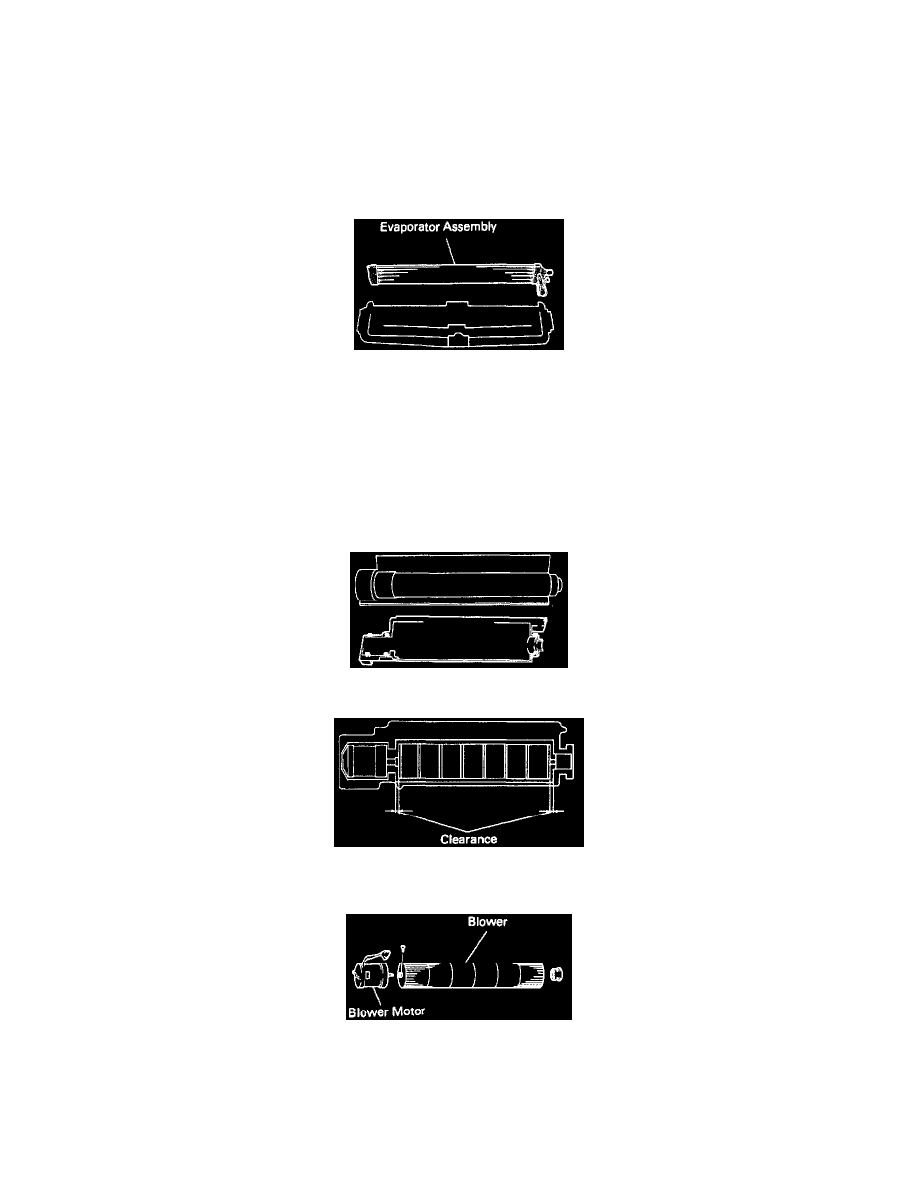
6. REMOVE EVAPORATOR
Pull out the evaporator from lower unit case.
DISASSEMBLY HINT: If evaporator was replaced, add compressor oil to compressor.
Add 40 - 50 cc (1.4 - 1.7 fl.oz.)
Compressor oil:
ND-OIL 8 or equivalent
7. DISASSEMBLE BLOWER MOTOR ASSEMBLY
a. Disconnect the 8 pawls of the blower case and separate blower motor assembly into an upper and a lower piece.
ASSEMBLY HINT: Visually adjust the blower position so that the clearance between the blower and the blower case on the right side is
equal to that on the left side.
b. Remove the screw, then remove the blower motor (together with the rubber mount) and the blower (together with the bearing).
HINT: You can first remove the blower motor and the blower.
8. REMOVE EXPANSION VALVE