
Supra L6-2997cc 3.0L DOHC MFI (1998)
(c) Apply a light coat of spindle oil or gasoline on the place where a delivery pipe touches an O-ring of the injector.
(d) While turning the injector clockwise and counterclockwise, push it to the delivery pipe. Install the 6 injectors.
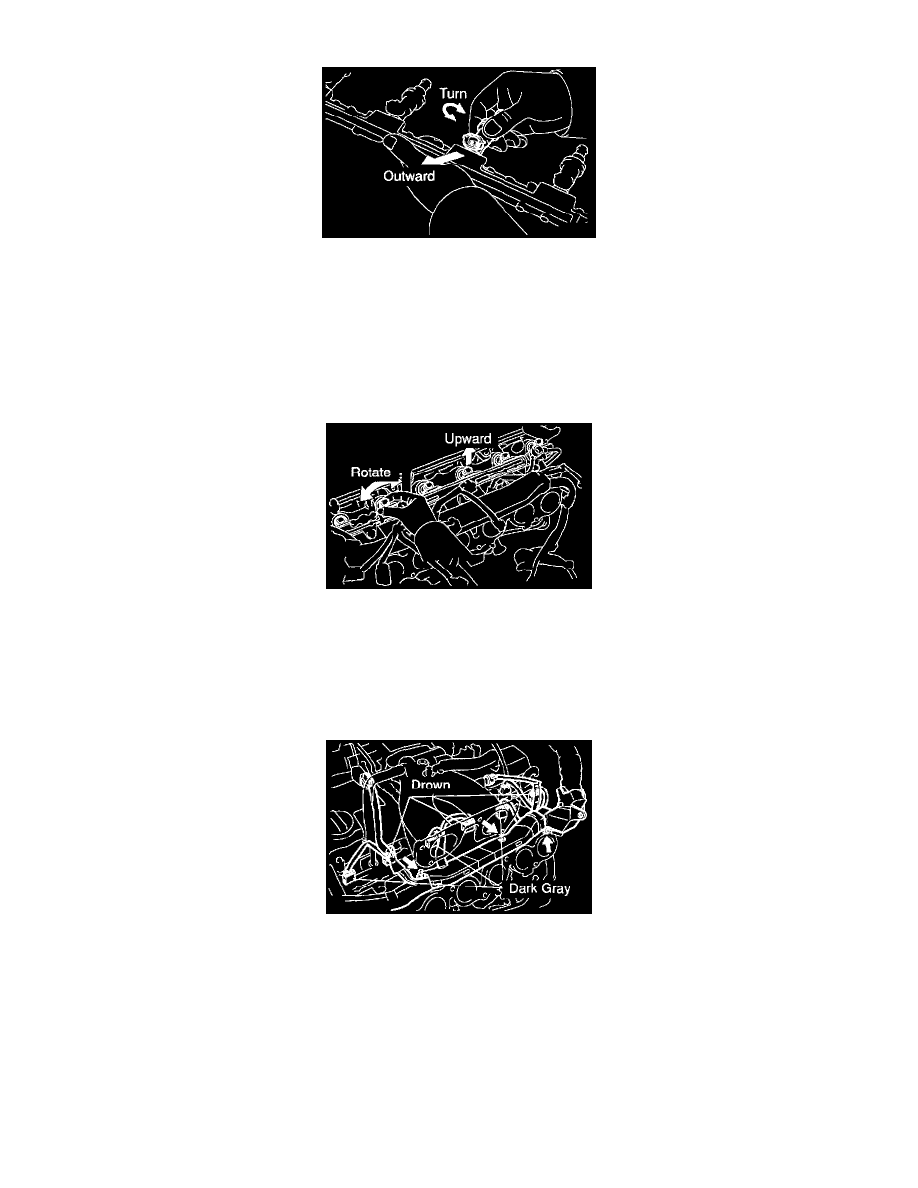
(e) Position the injector connector outward.
(f) Place the 3 spacers in position on the intake manifold.
(g) Apply a light coat of spindle oil or gasoline on the place where a intake manifold touches an O-ring of the injector.
(h) Place the 6 injectors together with the delivery pipe and 3 bolts in position on the intake manifold.
(i) Temporarily install the 3 bolts holding the delivery pipe to the intake manifold.
(j) Check that the injectors rotate smoothly.
HINT: If injectors do not rotate smoothly, the probable cause is incorrect installation of O-rings. Replace the O-rings.
(k) Position the injector connector upward.
(l) Tighten the 3 bolts holding the delivery pipe to the intake manifold.
Torque: 21 N.m (210 kgf.cm, 15 ft.lbf)
2. INSTALL ENGINE WIRE TO INTAKE MANIFOLD
(a) Install the engine wire protector with the 3 nuts.
(b) Connect the 6 injector connectors.
HINT: The No.1, No.3 and No.5 injector connectors are dark gray, and the No.2, No.4 and No.6 injector connectors are brown.
(c) Connect these connectors:
-
Camshaft position sensor connector
-
Throttle position sensor connector
-
VSV connector for EVAP
(d) Install the bolt holding the engine wire protector to the body.
3. INSTALL FUEL PRESSURE PULSATION DAMPER
4. INSTALL AIR INTAKE CHAMBER
5. CHECK FOR FUEL LEAKS