
Tercel/Cor. Tercel L4-1452cc 1AC,3A,3AC (1984)
Valve Body: Service and Repair
Removal
1.
Clean area around pan, then drain transaxle fluid.
2.
Remove oil pan and gasket, then the oil strainer.
3.
Remove apply tube bracket attaching bolts, then the apply tube.
4.
Remove oil tubes using a suitable screwdriver, then the manual detent spring.
5.
Remove manual valve, then the manual valve body.
6.
Remove valve body attaching bolts, then disconnect throttle cable.
7.
Remove valve body, then the governor apply gasket.
8.
Remove governor oil strainer.
Installation
1.
Install governor oil strainer.
2.
Install governor apply gasket.
3.
Hold valve body in place, then manually retain cam in downward position and slip cable end into slot.
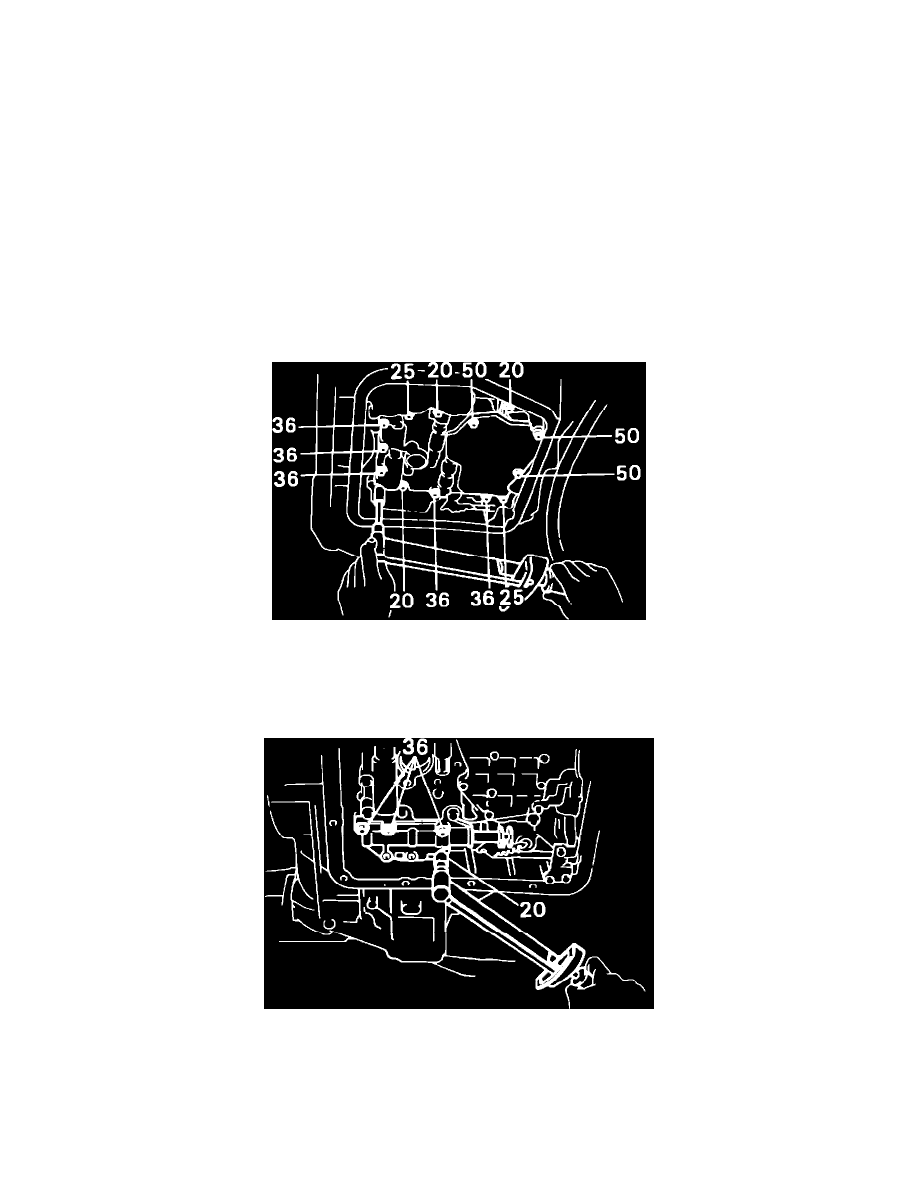
Fig. 4 Valve body attaching bolt location
4.
Position valve body in installation position, then insert and finger tighten attaching bolts. Torque bolts to 7 ft. lbs. Attaching bolt lengths (mm)
are indicated in Fig. 4.
5.
Align manual valve with pin on manual valve lever, then install manual valve body.
Fig. 5 Manual valve body attaching bolt location
6.
Insert and finger tighten manual valve body attaching bolts, then torque 7 ft. lbs. Attaching bolt lengths (mm) are indicated in Fig. 5.
7.
Install detent spring, then insert and finger tighten attaching bolt. Torque attaching bolt to 7 ft. lbs.
8.
Ensure manual lever is in contact with center of roller at tip of detent spring, then install oil tubes.
9.
Install apply tube bracket, then the oil strainer.
10.
Insert magnet into pan, then install oil pan with new gasket.