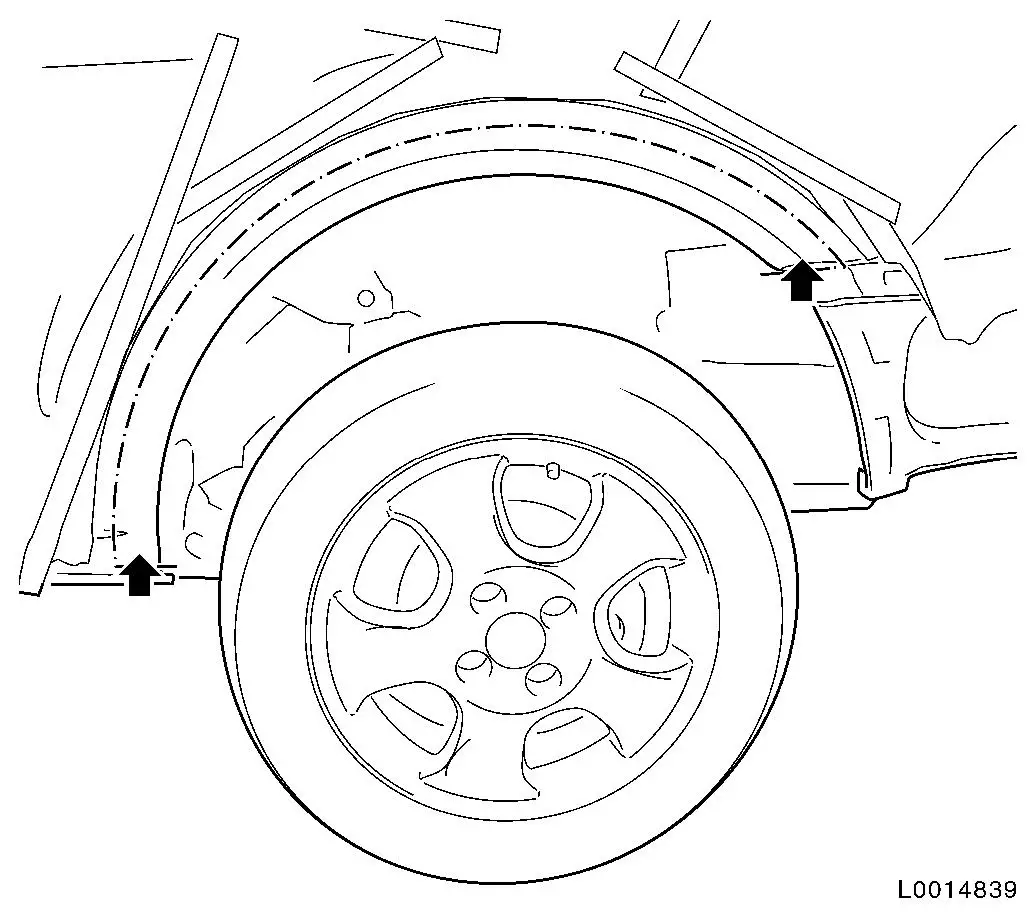
Drill open 2 spot welds (arrows) Note: Pay attention to
cutting depth!
5.
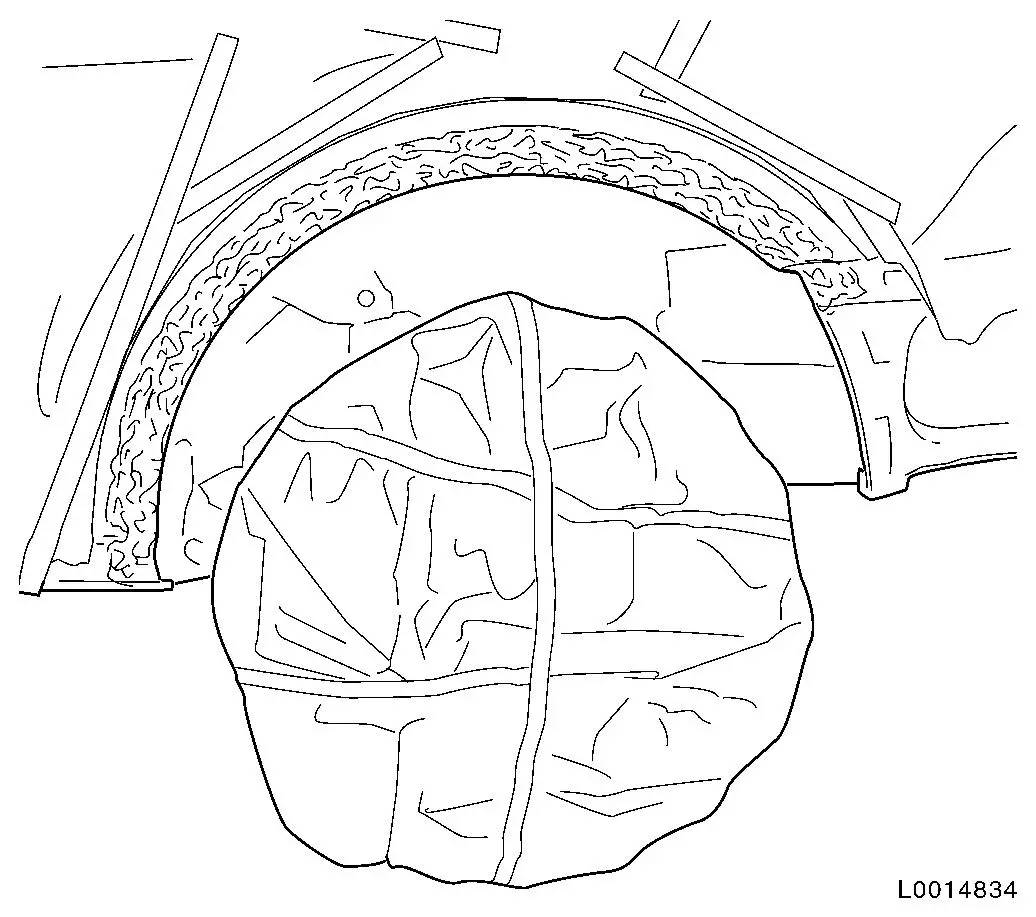
Heat up adhesive in vicinity of wheel housing using hot air
blower and pull off wheel housing with pliers
Install
6.
Remove adhesive and cavity protection wax
7.
Check that inside of wheel housing is in good condition
8.
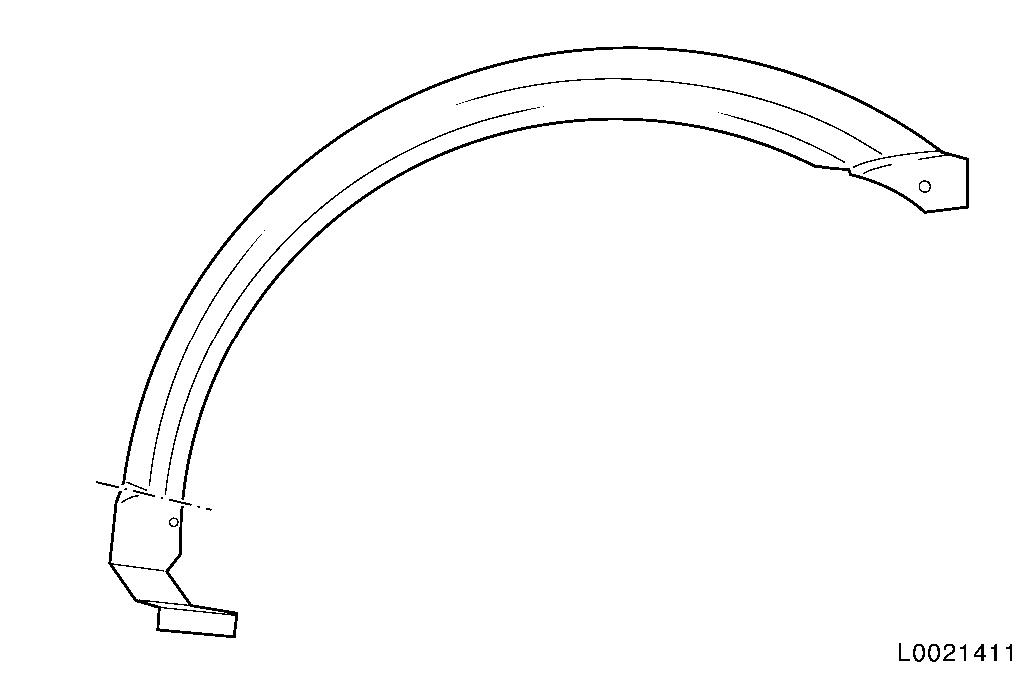
Prepare new wheel housing Note: For Models F 07
and Model F 67, the wheel house panel must be cut out of a
delivered side panel part
9.
Fit and prepare new wheel housing
•
Drill 1 fastening hole for water-tight rivet
10.
Grind inside and outside of wheel housing until bare
•
Remove dirt and grease residue with silicone remover
11.
Apply adhesive of corrosion protection adhesive system (93 160
535/15 05 000) to inside of wheel housing
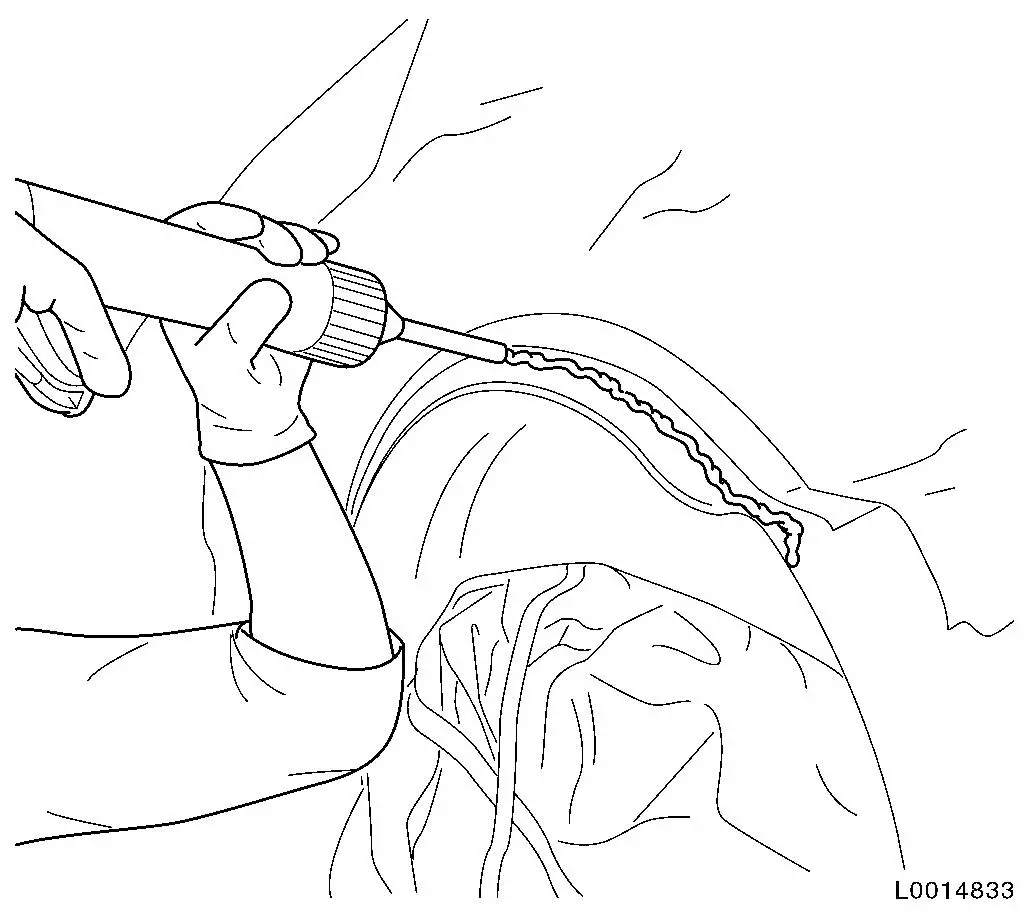
12.
Apply bead of adhesive to inside of wheel housing
13.
Apply adhesive until cavity between outer rear quarter panel
and inner rear quarter panel is completely full
14.
Apply adhesive to new wheel housing in area that has been
cut
15.
Insert and fit new wheel housing
16.
Tighten fastening rivets
•
1 water-tight rivet (I)
•
1 blind rivet (90 589 346/14 06 528) (II)
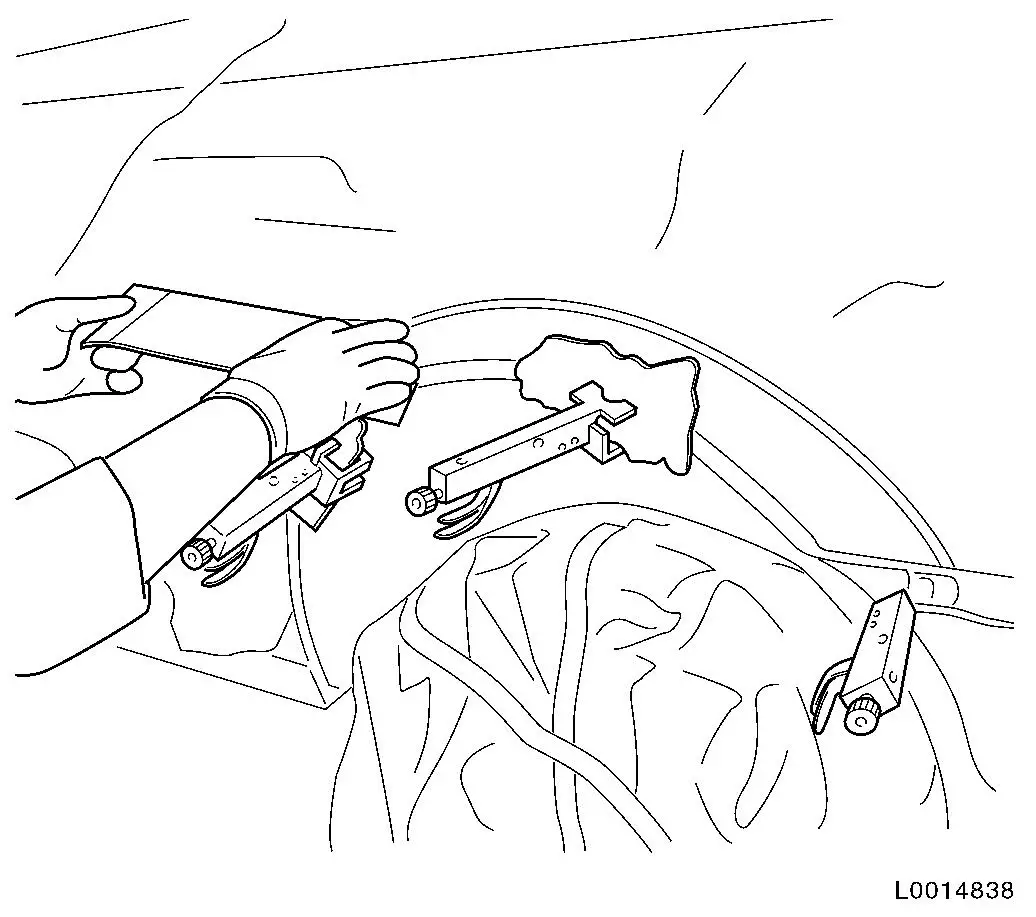
17.
Secure wheel housing area with vice-grip wrench Note: Insert cardboard
or the like between the vice-grip wrench and the wheel housing to
prevent pressure points!
18.
Distribute escaping adhesive with a stopping knife
19.
After hardening, remove vice-grip wrench, drill out securing
rivet at rear and grind adhesive to match contours