|
Active Headrest Assembly, Remove and Install or
Replace
Caution
When replacing the front seat as a result of an accident, the
active headrest assembly must also be replaced. When replacing the
front seat backrests as a result of wear, the active headrest
assembly can be re-installed.
 Remove Remove
Upholstery for front seat backrest – see operation
"Upholstery – Front Seat Backrest, Remove and Install".
|
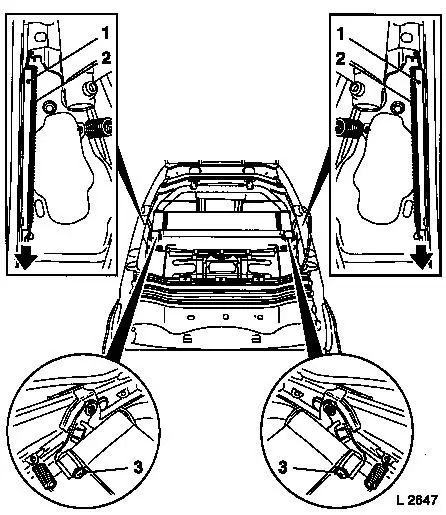
Detach tension spring for active headrest (2) at bottom. Remove
tension spring for active headrest (2) with damping grommet (1).
Release active headrest assembly from active headrest lever
(3).
|
|
|
Pull active headrest assembly (1) downwards out of mounting
bearing of active headrest.
Detach active headrest lever from (2) from front seat backrest
frame (3).
|
|
 Install
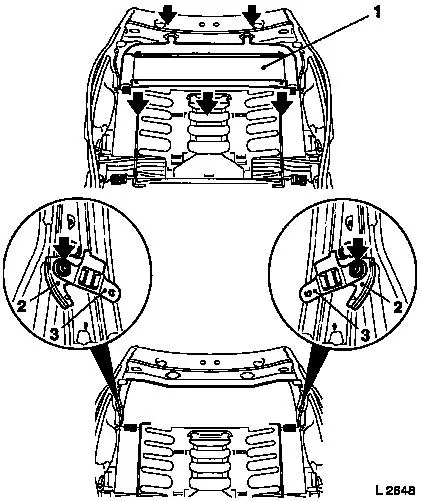
Attach active headrest lever with new special screw to front
seat backrest frame. Insert special screw with screw locking
compound (red) – tightening torque 6.5 Nm / 4.8 lbf. ft.
Caution
The active headrest lever to front seat backrest frame screw
connection consists of a self-tapping screw and must only be
released or re-inserted once. The screw head must be designated
with a yellow paint spot after re-insertion. The front seat
backrest must be replaced after repeated release of the special
screw as the thread insert is then worn.
If the special bolt was not inserted square the first time it is
inserted, the front seat backrest must also be replaced.
Install
Push the active headrest assembly into the active headrest
mounting bearing from below. Attach active headrest assembly to
active headrest lever – insert screw with screw locking
compound (red) – tightening torque 6 Nm / 4.4 lbf. ft.
Attach active headrest tension spring to active headrest lever,
tension and attach to front seat backrest frame, clip damping
grommet to tension spring with slotted end downwards.
Front seat backrest upholstery.
|
