vauxhall Workshop Repair Guides

Vauxhall Workshop Service and Repair Manuals

Crankshaft Bearing Play, Check (Determine Bearing Play Using Plastigage) > < Crankshaft Bearing Clearance, Check (with Micrometer and Inside Micrometer)

Crankshaft, Remove and Install

  Remove

Remove engine – see operation "Engine, Remove and Install".

Mount engine with Adapter KM-412-3-A on Assembly Stands KM-412.

Remove oil pump – see operation "Oil Pump, Remove and Install".

Lock flywheel or drive disc with KM-652 (1) and remove from crankshaft.

Object Number: 2392739  Size: DEFAULT

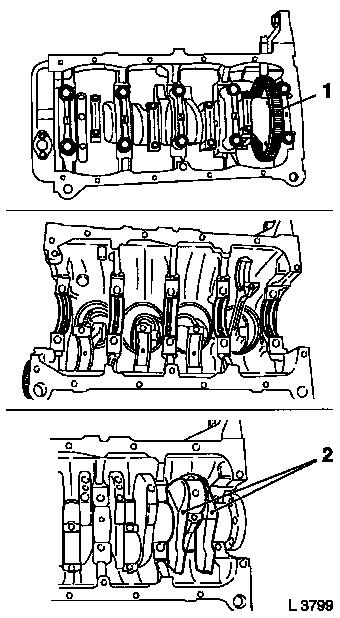
Caution

Mark order of con-rod bearing caps. Remove con-rod bearing cap from con-rod.

The mating surfaces of the cod-rods and the con-rod bearing caps form an individual fit and as a result must not be damaged or replaced under any circumstances. Do not lay con-rods and con-rod bearing caps on mating surfaces in order to avoid damage.

  Remove

Identify sequence of crankshaft bearing caps. Remove crankshaft bearing cap from cylinder block.

Remove crankshaft from cylinder block.

  Clean

Clean all parts.

  Inspect

Check crankshaft – see operation "Crankshaft, Check".

  Install

For Z 14 XE, Z 16 XE, Z 16 YNG, Z 18 XE, Z 18 XEL:

When replacing crankshaft, crankshaft pulse pick-up sensor disc (1) must be transferred – tightening torque 15 Nm / 11.5 lbf. ft.


Coat new bearing shells with engine oil and insert in cylinder block and bearing cap. Carefully insert crankshaft into cylinder block. Seat of crankshaft can be corrected by lightly tapping on crankshaft webs (2) with rubber hammer.

Object Number: 2416571  Size: DEFAULT

Apply a bead of adhesive sealing compound (black) to grooves of rear crankshaft bearing cap. Install crankshaft and con-rod bearing cap.

Note marks and installation position.

Torque-angle method

Crankshaft bearing cap to cylinder block – 50 Nm / 37 lbf. ft. + 45° + 15° 1) 2) .

Con-rod bearing cap to con-rod – 25 Nm / 18 lbf. ft. + 30° 1)   .

  Install

Install rear crankshaft seal ring – see operation "Seal Ring, Crankshaft, Rear Replace".

Lock flywheel or drive disc with KM-652. Attach flywheel to crankshaft with new bolts – tightening torque 35 Nm / 26 lbf. ft. + 30° + 15°. Attach drive disc to crankshaft with new bolts – tightening torque 60 Nm / 44 lbf. ft. Install oil pump – see operation "Oil Pump, Remove and Install". Remove engine from Assembly Stand KM-412 and Adapter KM-412-3 from engine. Install engine – see operation "Engine, Remove and Install".

Object Number: 2387677  Size: DEFAULT


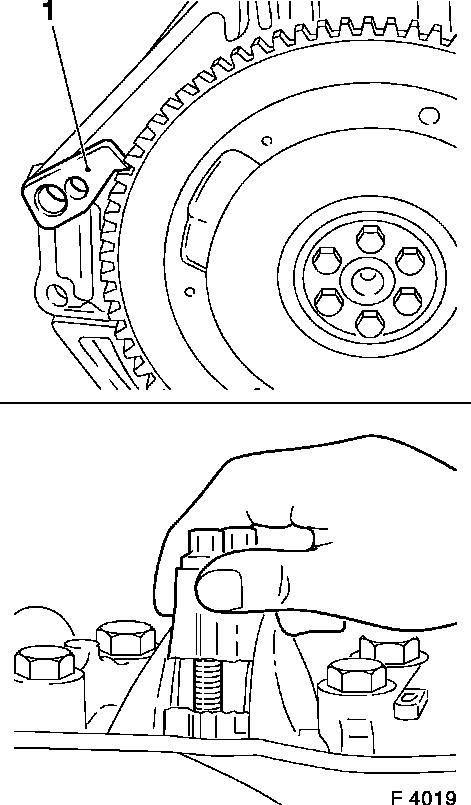
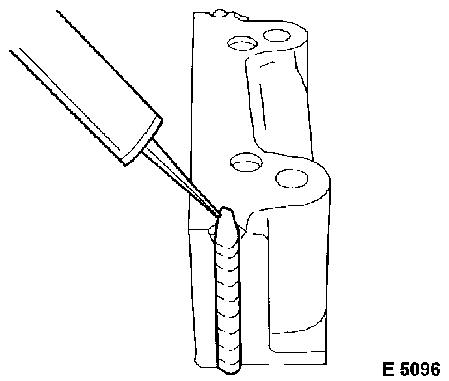
1 ) Use new fastening bolts.
2 ) After assembly of rear crankshaft bearing cap, press in adhesive sealing compound (black) from above again until it escapes from the joints

Related Literature Units
-
-
-
-
-
-
-
-

Crankshaft Bearing Play, Check (Determine Bearing Play Using Plastigage) > < Crankshaft Bearing Clearance, Check (with Micrometer and Inside Micrometer)