|
Oil Pan, Remove and Install
 Remove Remove
Disconnect wiring harness plug for dynamic oil level control.
Remove front exhaust pipe – see operation "Centre Muffler and
Front Exhaust Pipe, Remove and Install" in group "L".
Open oil drain bolt – place collecting basin
underneath.
|
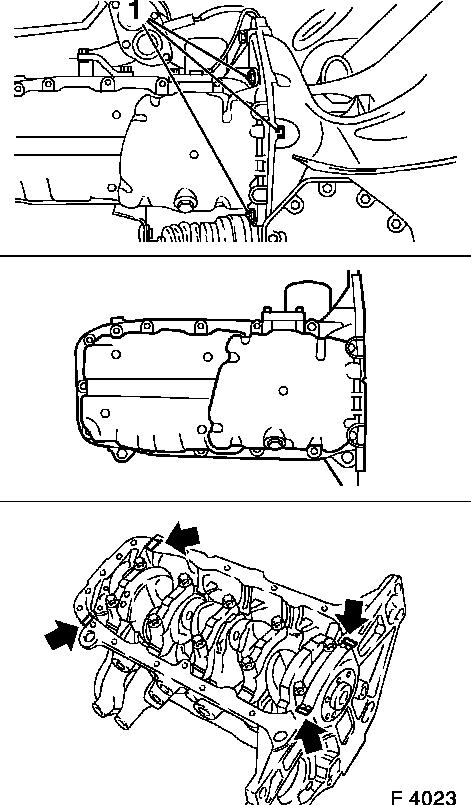
Remove fastening bolts (1) from transmission housing.
Remove oil pan from cylinder block and oil pump.
 Clean Clean
Clean sealing surfaces and remove gasket residues.
 Install
Apply a bead of adhesive sealing compound (black) to joints
(arrows) of oil pump and rear crankshaft bearing cap.
|
|
|
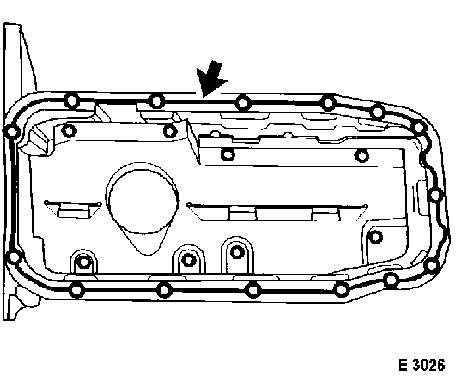
Attach oil pan with new gasket (arrow) to oil pump, cylinder
block and transmission. Attach oil drain bolt to oil pan with new
seal ring.
Note: For version
with oil pan from sheet steel and hex screw with copper seal ring
– tightening torque 55 Nm / 41 lbf.
ft .
For version with oil pan from aluminium and hex screw with
copper seal ring – tightening torque 45 Nm / 33 lbf. ft .
For version with oil pan from aluminium and inner torx screw
with O-ring insert – tightening torque 14 Nm / 10 lbf. ft. .
|
|
Caution
Installation sequence:
|
1.
|
Tighten all bolts loosely.
|
|
2.
|
Tighten bolts on cylinder block and oil pump – tightening
torque 10 Nm / 6 lbf. ft.
1) .
|
|
3.
|
Tighten bolts on transmission housing – tightening torque
40 Nm / 29.5 lbf. ft.
|
Install
Install front exhaust pipe with new gasket – see operation
"Centre Muffler and Front Exhaust Pipe, Remove and Install" in
group "L".
For version with hex bolts – tightening torque 35 Nm / 26
lbf. ft. 2) .
Attach con-rod bearing shell and con-rod bearing cap –
tightening torque 45 Nm / 33 lbf. ft. 3) .
Connect wiring harness plug for dynamic oil level control.
Fill engine oil up to "MAX" at dipstick.
1 ) Recut thread before re-use and install bolts
with screw locking compound – (red). Installation time
including the torque test is max. 10 min.
2 ) Insert bolts with assembly paste (white).
3 ) Use new nuts.
|
