|
Differential, Remove and Install (AF 20)
 Remove Remove
Remove transmission – see operation "Transmission, Remove
and Install (AF 20)". Secure converter against falling out.
|
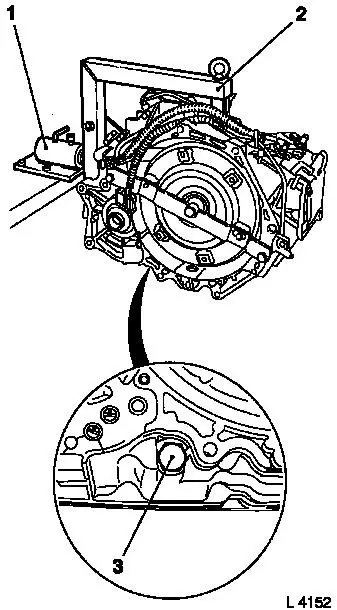
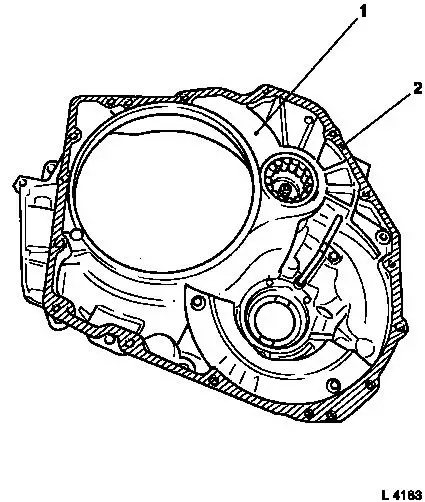
Attach transmission to KM-694-A (2). Attach assembly to KM-113-2
(1).
Remove fluid drain bolt (3), drain transmission fluid and
collect for damage diagnosis – see operation "Transmission
Fluid Condition, Check (AF 13-II/AF 17/AF 20/AF 22)".
Remove converter and fluid pump seal ring – see operation
"Converter and/or Fluid Pump Seal Ring, Replace (AF 13-II/AF 17/AF
20/AF 22)".
|
|
|
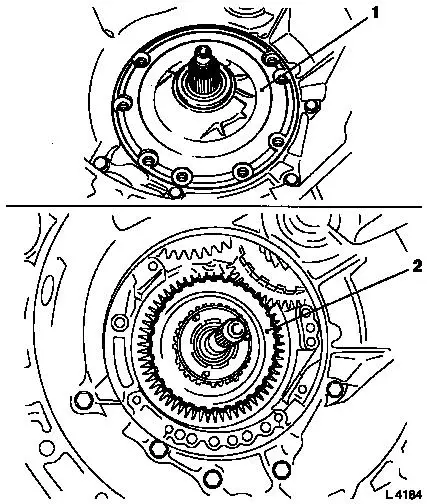
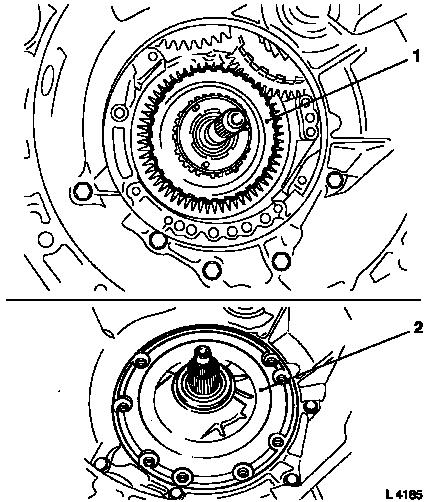
Remove fluid pump assembly (1) with multi-disc brake B1 and B2
– see operation "Fluid Pump Assembly with Multi-disc Brakes
B1 and B2, Remove and Install (AF 20)".
Remove freewheel F1 (2) – see operation "Freewheel F1,
Remove and Install (AF 20)".
|
|
|
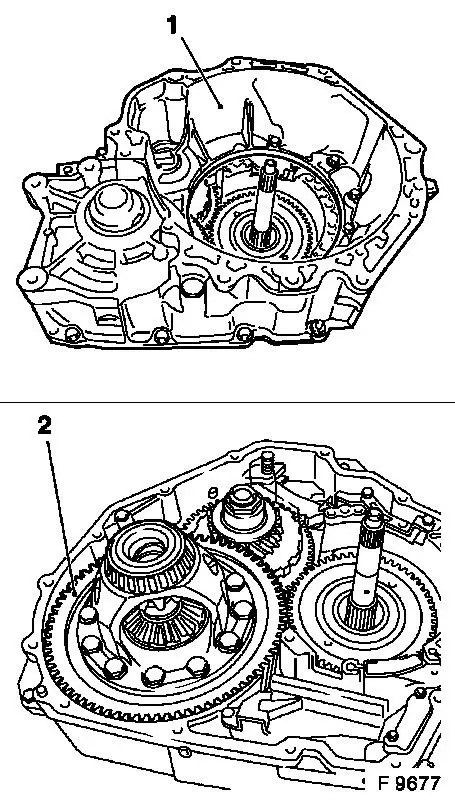
Remove auxiliary housing (1) from main housing – 15
fastening bolts, note different bolt lengths.
If necessary, detach housing parts with plastic hammer.
Remove differential (2) out of main housing.
 Clean Clean
Carefully clean all components and check for damage.
|
|
Caution
After replacing main housing or auxiliary housing, the
pretension of the differential tapered roller bearing must be
adjusted before installing the differential – see operation
"Pretension of Differential Tapered Roller Bearing, Adjust (AF
20)".
Clean
Remove gasket residue and carefully clean sealing surfaces of
main and auxiliary housing – ensure that no gasket residue
falls into the transmission housing.
 Install
|
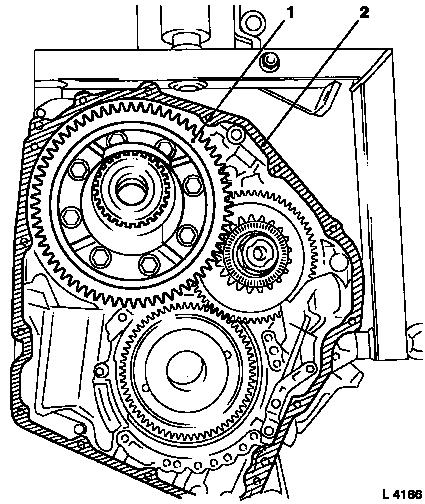
Insert differential (1) into main housing (2).
|
|
|
Coat sealing surface (2) with sealing compound. Attach auxiliary
housing (1) to main housing – 15 fastening bolts, note
different bolt lengths.
Note: Only use the
prescribed sealing compound as other sealing material leads to
errors in the transmission.
Torque
Auxiliary housing to main housing – 30 Nm / 22 lbf.
ft.
|
|
Install
|
Install freewheel F1 (1) – see operation "Freewheel F1,
Remove and Install (AF 20)".
Install fluid pump assembly (2) with multi-disc brake B1 and B2
– see operation "Fluid Pump Assembly with Multi-disc Brakes
B1 and B2, Remove and Install (AF 20)".
Install fluid pump seal ring and converter – see operation
"Converter and/or Fluid Pump Seal Ring, Replace (AF 13-II/AF 17/AF
20/AF 22)". Secure converter against falling out.
|
|
|
Attach fluid drain bolt (3) with new seal ring to transmission
– tightening torque 40 Nm / 29.5 lbf. ft.
Remove transmission assembly from KM-113-2 (1) with
KM-694-A.
Remove transmission from KM-694-A (2).
Install transmission – see operation "Transmission, Remove
and Install (AF 20)".
Charge transmission fluid.
 Inspect
Check and correct level of transmission fluid – see
operation "Transmission Fluid Level, Check and Correct (AF 13-II/AF
17/AF 20/AF 22)".
|
|
|
