|
Valve Body, Disassemble and Assemble (AF20)
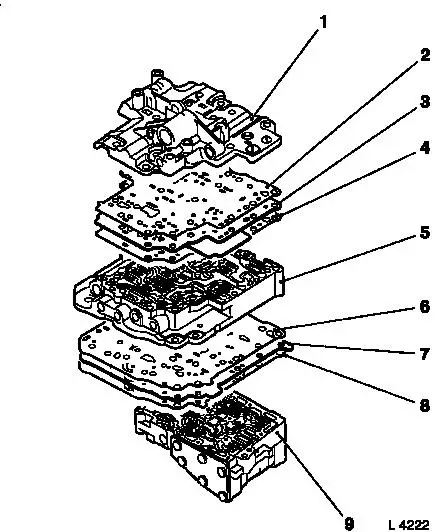
Valve Body Assembly – Survey
|
1
|
front valve body – without solenoid valves
|
|
2
|
Gasket – front valve body
|
|
3
|
Front valve body plate
|
|
4
|
Gasket – centre valve body
|
|
5
|
Centre valve body
|
|
6
|
Gasket – centre valve body
|
|
7
|
Plate – centre valve body
|
|
8
|
Gasket – rear valve body
|
|
9
|
Rear valve body
|
|
|
Caution
The valve body should only be disassembled for cleaning purposes
as the individual parts are not available from suppliers.
Therefore, do not damage inner parts, in particular the piston seal
rings and springs. Lay aside removed parts in accordance with
mounting direction and in such a way as to prevent confusion. If
damage is detected then the (entire) valve body must be
replaced.
 Remove Remove
Remove valve body – see operation "Valve Body, Remove and
Install (Transmission Removed) (AF 20)".
|
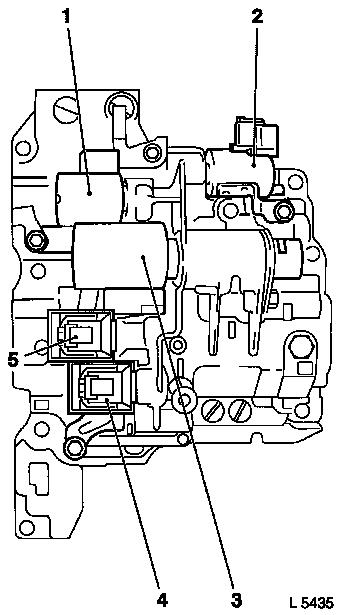
Remove 4 solenoid valves (1, 2, 4, and 5) – replace
O-rings. Remove pressure regulator (3) – remove mounting bolt
and retaining clamp.
 Inspect
Check function of solenoid valves – see operation
"Solenoid Valves, Check (AF 13-II/AF 17/AF 20/AF 22)".
|
|
Remove
|
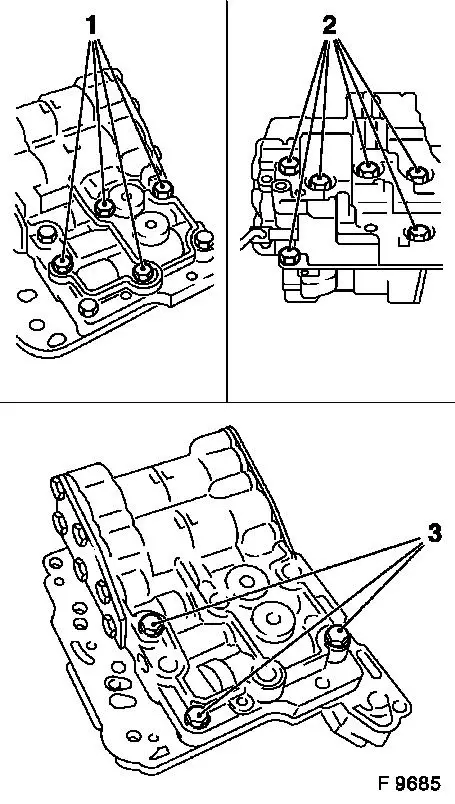
Remove 4 fastening bolts (1) from rear valve body. Turn valve
body up side down and remove 6 fastening bolts (2) from front valve
body.
Caution
Lay front valve body on its upper side. Detach centre and rear
valve body together with plate and gaskets from front valve body by
moving sideways, so that the lock balls remain in their ducts. Lay
assembly aside on the lower valve body, remove plate and gaskets by
moving sideways and lay aside in sequence of installation.
Remove
Remove centre valve body from lower valve body – 3
fastening bolts (3).
Caution
Turn assembly, remove centre valve body together with plate and
gaskets from lower valve body by moving sideways and set aside with
gasket underneath.
|
|
|
