|
Side Panel, Replace (Model L67)
Important: Before
replacing the side panel you must check that the folding roof
dimensions are correct
Important: Note
specification for welded, brazed and riveted joints  and body repair
with structural adhesive ! and body repair
with structural adhesive !
 Remove Remove
| 1. |
Detach attaching parts
|
|
| 2. |
Detach and drill away exterior rear panel
| • |
Grind through MIG-brazing seams (1)
|
| • |
Observe cutting line (2)
|
|
|
|
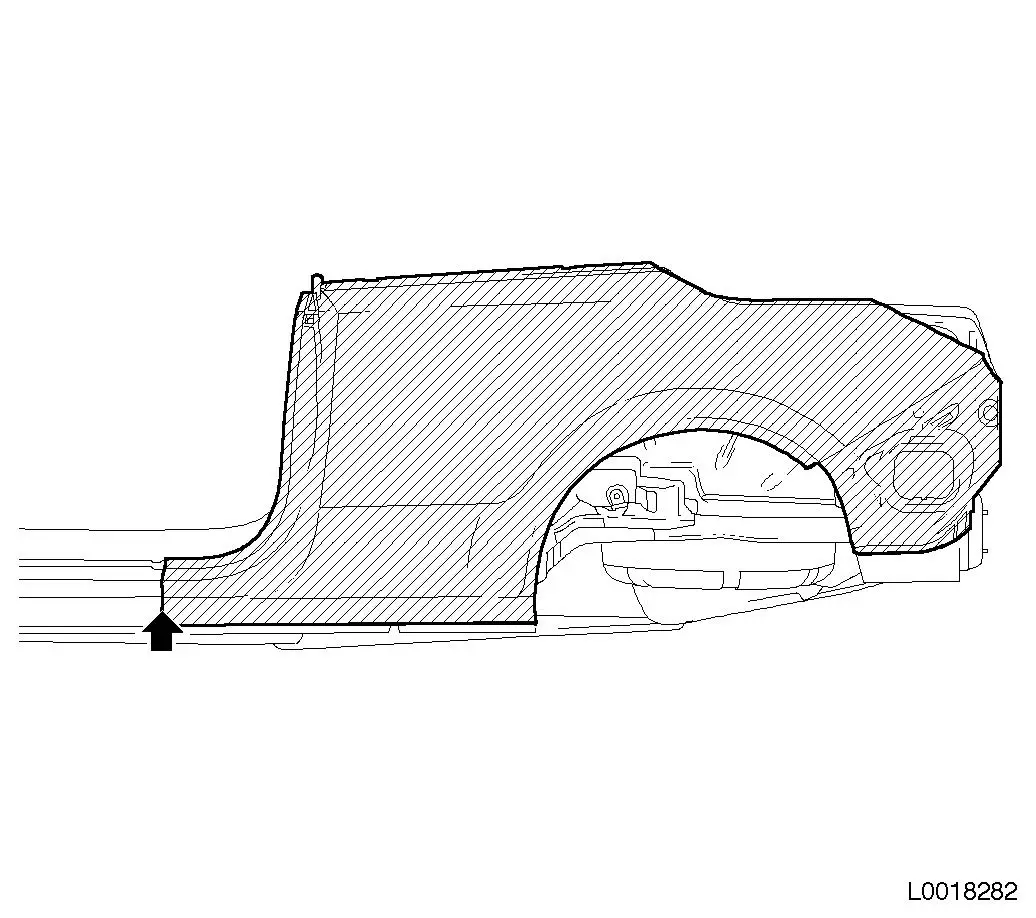
| 3. |
Drill off side panel
| • |
Separate the MIG brazed joints (arrow)
|
| • |
Grind through the flange in the wheel arch area or use the
chisel from the flanging tool kit MKM-6392 to remove it.
|
| • |
Drill out the spot welds
|
|
|
 Install
|
| 4. |
Adjust and remove new side panel reinforcement part on side
panel
|
| 5. |
Apply corrosion protection adhesive system to side panel
reinforcement
|
| 6. |
Apply 1K adhesive to side panel reinforcement (1)
|
|
|
| 7. |
Weld side panel reinforcement to new side panel part
|
|
|
| 8. |
Prepare new side panel part
| • |
Incorporate 5x ( 5x18 mm )
slot
|
|
| 9. |
Fit the new side panel
|
| 10. |
Remove the new side panel
|
|
|
| 11. |
Apply corrosion protection adhesive system
|
| 12. |
Adjust side panel to fit
|
|
|
| 14. |
MIG-braze side panel.
|
|
|
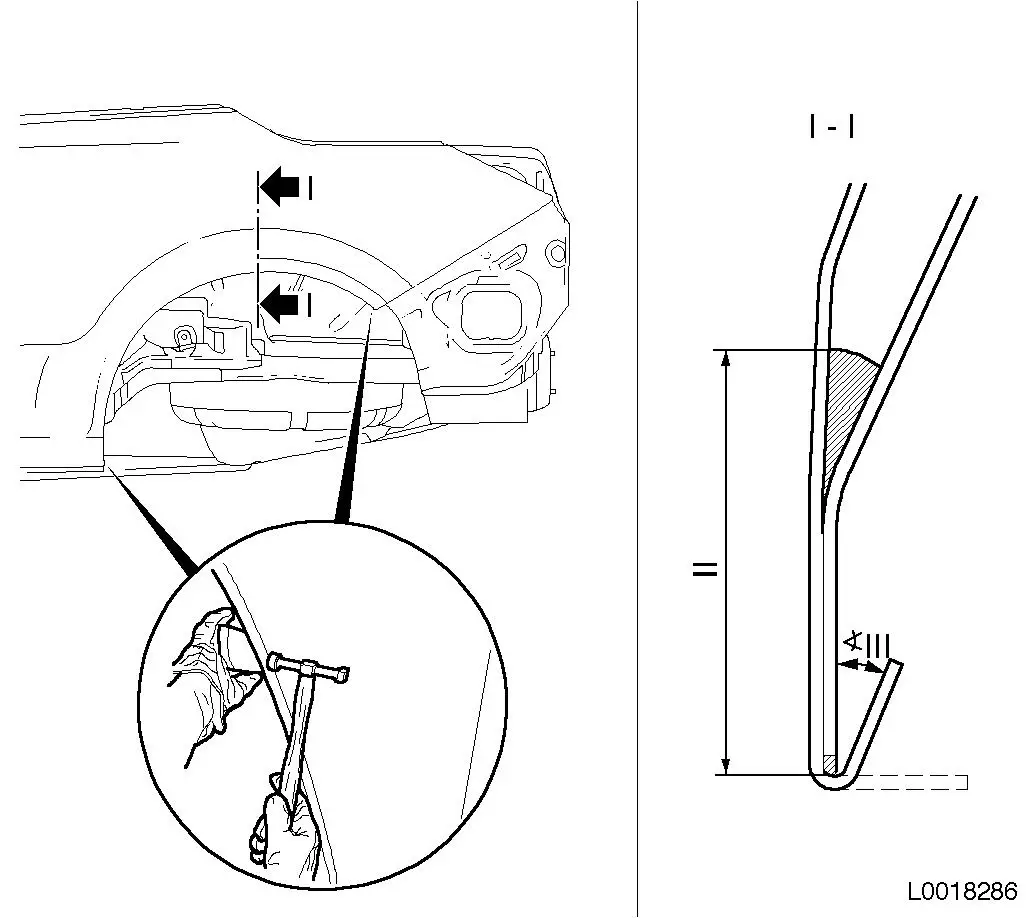
| 15. |
Pre-flange wheel housing
| • |
Pre-bend the flanged edge with a suitable hammer, using a fist
or a block behind it, or use the folding iron from the flanging
tool kit MKM-6392
| – |
Use structural adhesive in area (II)
|
|
|
|
|
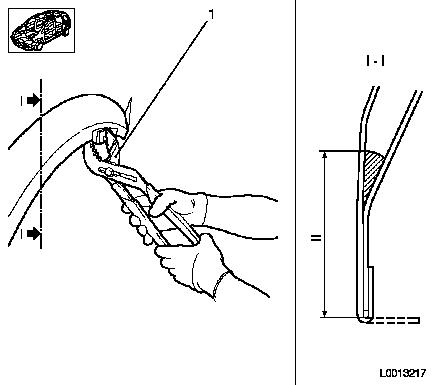
| 16. |
Bend the wheel arch
| • |
Bend over flanged edge using bending pliers (1) KM-6396
|
| • |
Apply excess adhesive as a seam seal and corrosion protection
using a spatula or flat paintbrush
| – |
Use structural adhesive in area (II)
|
|
|
|
| 18. |
Grind down MIG-brazed seam in the area of the sill
| • |
Grind the depression, following the seam
Note: Do not grind
through the weld!
|
|
|
| 19. |
Draw a cut line on the new rear panel.
|
|
| 20. |
Cut and fit new exterior rear panel
| • |
Cut new part along drawn cut line
|
|
| 21. |
Remove new partial replacement of exterior rear panel
|
|
| 22. |
Apply corrosion protection adhesive system
|
|
| 23. |
Fit new partial replacement of exterior rear panel
|
|
| 24. |
Weld and MIG-braze new partial replacement of exterior rear
panel
|
|
| 25. |
Grind MIG-brazing seams on contact surface
|
| 26. |
Seal body, weld and brazing seams
Note: Observe corrosion
protection measures for seam seals.
|
| 27. |
Apply underseal.
Note: Observe corrosion
protection measures for PVC protection.
|
| 28. |
Seal cavity
Note: Observe
protective wax corrosion protection measures.
|
|
