|
Replace oil separator
 Remove Remove
| 2. |
Disconnect battery
| • |
Detach earth connection from earth terminal
|
|
| 3. |
Raise vehicle by its full height
|
| 4. |
Remove lower engine compartment cover and/or right-hand engine
splash guard
|
| 5. |
Place collecting basin underneath.
|
| 6. |
Drain coolant
| • |
Open drain bolt on radiator (1)
|
|
|
|
| 7. |
Detach 2x coolant hoses (1) from heat exchanger
|
|
|
| 8. |
Lower vehicle by its full height
|
| 10. |
Remove battery
| • |
Detach positive terminal (3) from positive pole
|
|
|

|
| 11. |
Remove battery support.
| • |
Remove pre-glow system control unit (4)
|
| • |
Remove wiring harness plug (3)
|
| • |
Unclip coolant hose bracket
|
|
|
|
| 12. |
Remove cowl trim seal (1)
|
| 13. |
Remove windscreen wiper arms (2)
| • |
Remove 2x covering caps
|
| • |
Pull 2x windscreen wiper arms from shaft
|
|
|

|
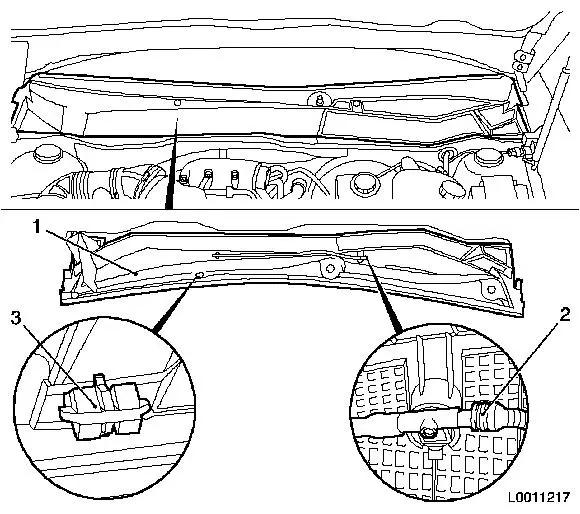
|
| 14. |
Detach cowl trim (1)
Important: Carefully release
clips from upper bulkhead bracket from the inside
|
| • |
Lift cowl trim in vicinity of bulkhead
|
| • |
Detach windscreen washer system hose (2)
|
|
|
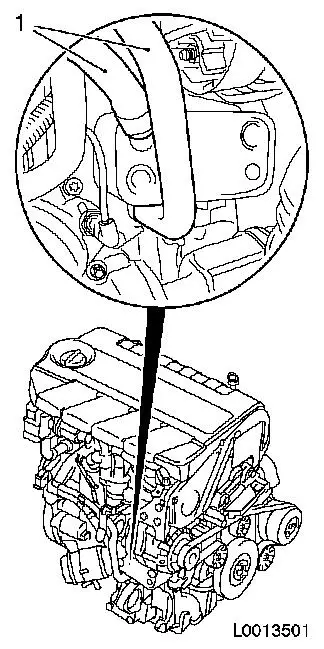
| 15. |
Detach engine vent hose (2)
| • |
Unclip from bracket (1)
|
|
|
|
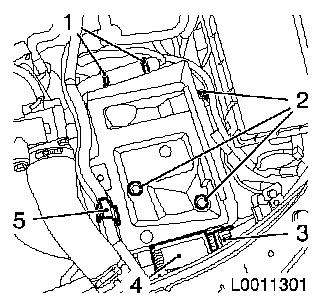
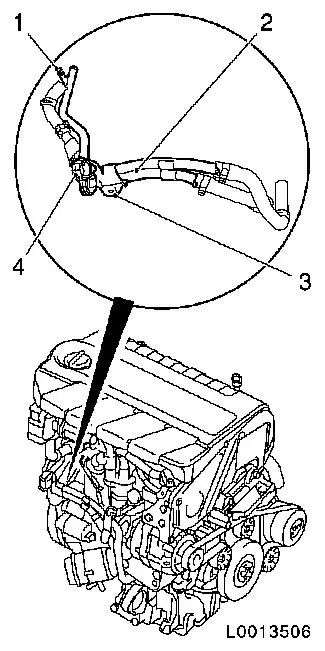
| 16. |
Remove vacuum line (1)
| • |
Detach 4x vacuum hoses
Note: Mark vacuum
hoses
|
|
|
|
| 17. |
Disconnect 2x wiring harness plugs
| • |
Disconnect wiring harness plug for fuel preheating
|
| • |
Disconnect wiring harness of fluid level indicator
|
|
| 18. |
Place collecting basin underneath.
|
| 19. |
Detach fuel supply lines from fuel filter housing
| • |
Disconnect 2x fuel lines with KM-796-A
Note: Seal fuel lines
with KM-807 , KM-6015 or KM-6320
|
|
| 20. |
Detach fuel filter housing from crash box
|
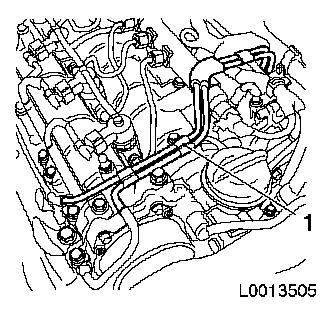
| 21. |
Remove crash box
| • |
Unclip 2x wiring harnesses
|
| • |
Unclip wiring harness plug
|
|
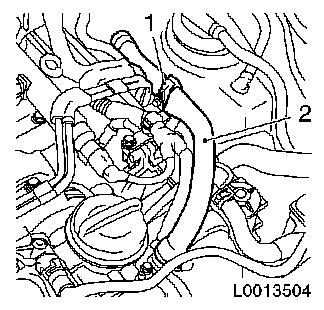
| 22. |
Remove coolant pipe (2)
| • |
Unclip 2x coolant hoses from bracket (4)
|
| • |
Detach 2x coolant hoses
| – |
From thermostat housing
|
| – |
Undo 2 clamps
Note: Remove coolant
pipe at intake pipe upwards
|
|
|
|
|
| 23. |
Remove oil separator/vacuum reservoir bracket (1)
| • |
Detach engine vent hose
|
| • |
Unclip wiring harness bracket
|
|
|
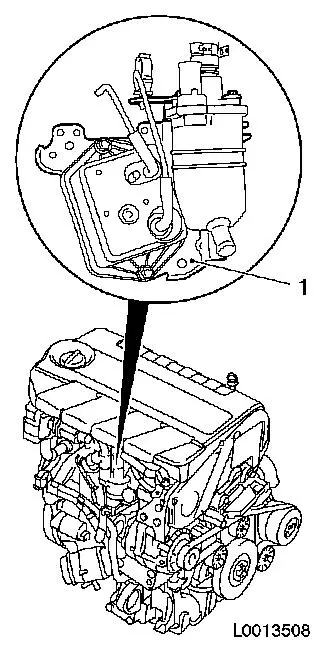
|
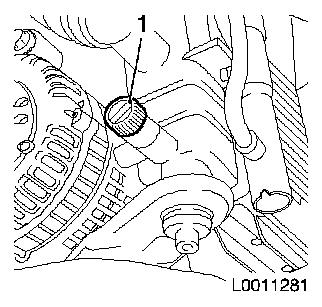
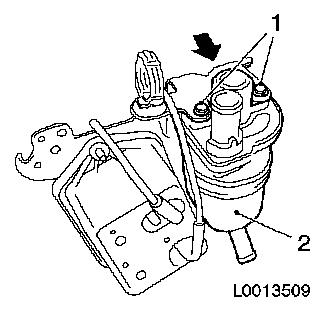
| 24. |
Detach oil separator (2) from bracket
| • |
Unscrew 3x bolts (1) and (arrow)
|
|
|
|
 Install
| 25. |
Attach oil separator to bracket
|
| 26. |
Install oil separator/vacuum reservoir bracket
| • |
Connect engine vent hose
|
| • |
Clip in wiring harness cover
|
|
| 27. |
Install coolant pipe
| • |
Attach 2x coolant hoses
|
| • |
Clip 2x coolant hoses into bracket
|
|
| 28. |
Install crash box
| • |
Clip in wiring harness plug
|
| • |
Clip in 2x wiring harnesses
|
|
| 29. |
Install fuel filter housing in crash box
|
| 30. |
Attach fuel supply lines to fuel filter housing
Important: The fuel lines must
engage audibly
|
| • |
Connect 2x fuel lines
|
|
| 31. |
Connect 2x wiring harness plugs
| • |
Connect wiring harness plug for fuel preheating
|
| • |
Connect wiring harness for fluid level indicator
|
|
| 32. |
Attach vacuum line
| • |
Connect 4x vacuum hoses
Note: Pay attention to
marks
|
|
| 33. |
Attach engine venting hose
|
| 34. |
Fit cowl trim
| • |
Attach windscreen washer system hose
|
|
| 35. |
Install 2x windscreen wiper arms
| • |
Install 2x covering caps
|
|
| 36. |
Remove cowl trim seal
|
| 37. |
Install battery holder
| • |
Attach pre-glow system control device
|
| • |
Attach wiring harness plug
|
| • |
Clip on coolant hose bracket
|
|
| 38. |
Install battery
| • |
Insert battery insulation
|
| • |
Attach positive connection to positive terminal
|
| • |
Attach positive cable to positive terminal
|
|
| 40. |
Raise vehicle by its full height
|
| 41. |
Attach 2x coolant hoses to heat exchanger
|
| 42. |
Install lower engine cover and right engine splash guard
|
| 43. |
Lower vehicle by its full height
|
| 44. |
Connect battery
| • |
Attach ground connection to ground terminal
|
|
| 45. |
Top up coolant or ensure correct quantity is present. 
|
| 46. |
Program volatile memories
|
|
