|
Front Crankshaft Seal Ring, Replace
 Remove Remove
| 2. |
Disconnect battery
| • |
Detach ground connection from ground terminal
|
|
| 4. |
Remove air cleaner housing
|
| 5. |
Raise vehicle by its full height
|
| 6. |
Remove lower engine cover and right engine splash guard
|
| 7. |
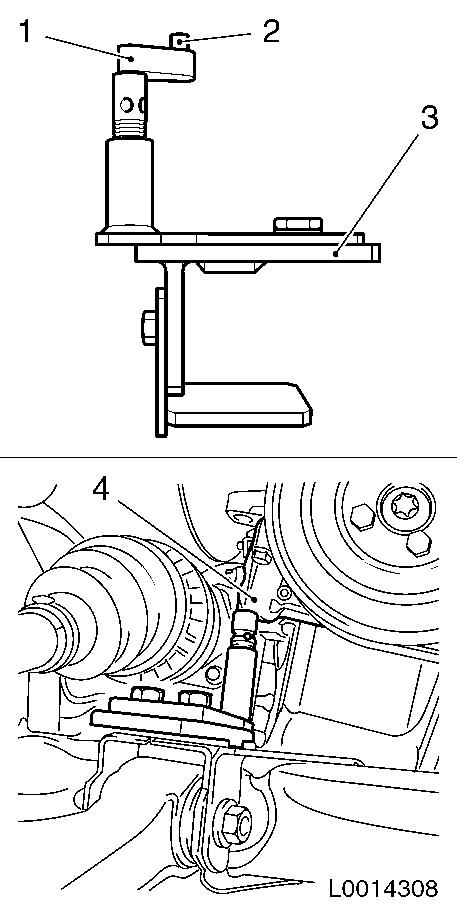
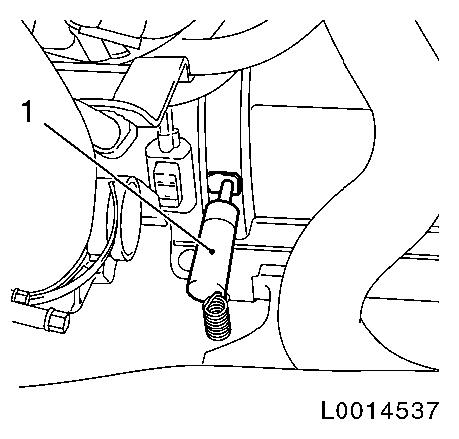
Insert KM-6173 (3)
| • |
Align support bearing (1)
|
| • |
Raise support bearing until journal (2) sits flush in mount
(4)
|
|
|
|
|
| 8. |
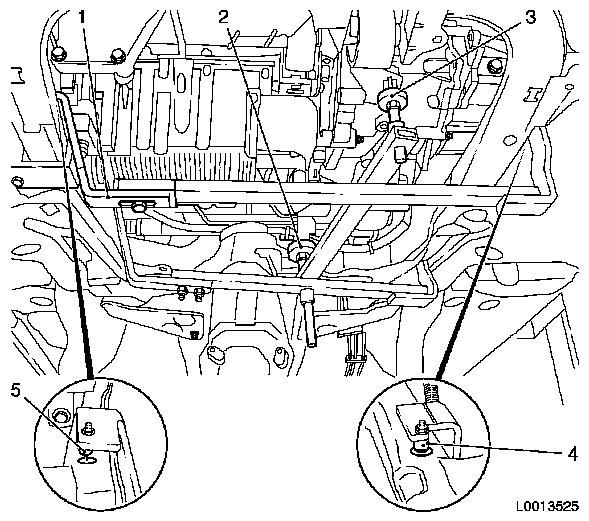
Fit KM-6001-A
Note: Attaching KM-6001-A guarantees perfect alignment of the
drive unit with the front axle body
| • |
Detach front right bracket (1)
|
| • |
Attach front right bracket
|
| • |
Insert journals (4) and (5) in guide holes in front axle
body
|
| • |
Fasten 3x screw connection on guide rail
|
| • |
Adjust support bearings (2) and (3)
Note: The guide
journals must be seated free from play in the support bearings
|
|
|
| 9. |
Lower vehicle by its full height
|
| 10. |
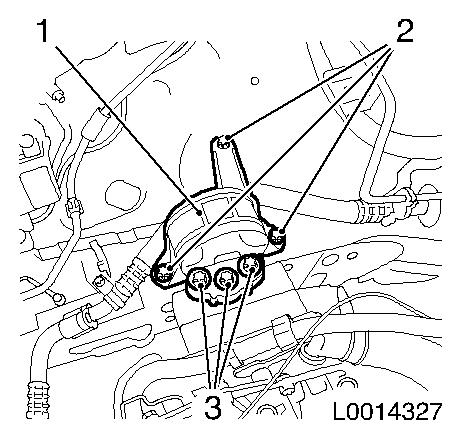
Remove engine damper block (1)
| • |
Unscrew 6x bolts (2) and (3)
|
| • |
Remove with engine damping block bracket
|
|
|
|
| 11. |
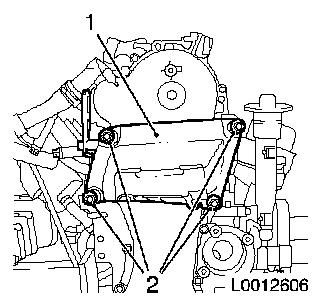
Remove engine damping block adapter (1)
|
|
|
| 13. |
Remove ribbed V-belt tensioner 
|
| 14. |
Remove torsional vibration damper
|
| 15. |
Remove air intake pipe
|
| 16. |
Remove air intake hose
|
|
|
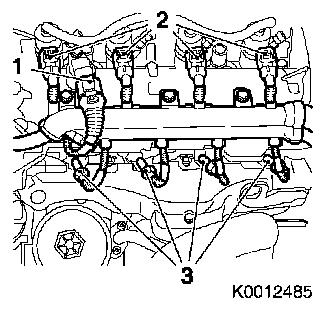
| 17. |
Detach engine management wiring harness
| • |
Disconnect 4x wiring harness plugs for injector (2)
|
| • |
Disconnect 4x wiring harness plugs, sheathed glow plug (3)
|
| • |
Disconnect wiring harness plug for camshaft sensor (1)
|
|
|
|
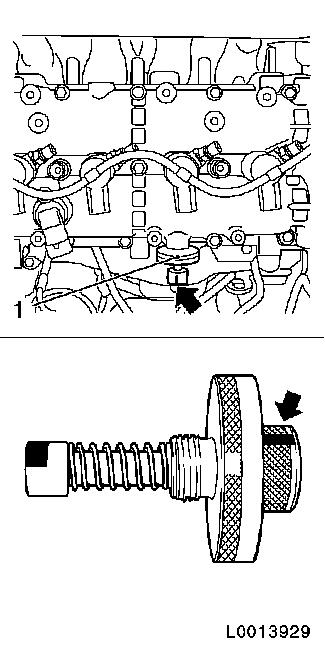
| 18. |
Remove closure bolt from camshaft housing exhaust side
|
|
|
| 20. |
Disconnect exhaust camshaft
| • |
Screw in camshaft reference drift EN-46781 (1)
|
| • |
Ensure correct installation position
Note: Fixing for
reference drift must be installed in the horizontal position. To do
this, apply marking to reference drift as an aid (arrow)
|
|
|
|
| 21. |
Lock exhaust camshaft
| • |
Turn crankshaft in the direction of engine rotation by the bolt
on the torsional vibration damper flange until EN-46781 engages in the exhaust camshaft
|
|
| 22. |
Lock crankshaft, insert EN-46785 (1)
through bore in transmission housing
| • |
Turn crankshaft carefully at bolt for torsional vibration
damper flange until EN-46785 engages in
flywheel
|
|
|
|
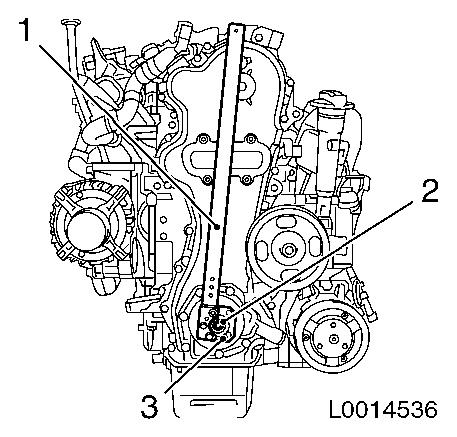
| 23. |
Detach torsional vibration damper flange (3)
Note: Left-handed
thread
| • |
Unscrew bolt (2)
| – |
Counterhold with KM-662-C (1)
|
|
|
|
|
| 24. |
Raise vehicle by its full height
|
| 25. |
Remove front crankshaft seal ring from timing case
Note: Prise out with a
suitable tool
|
 Install
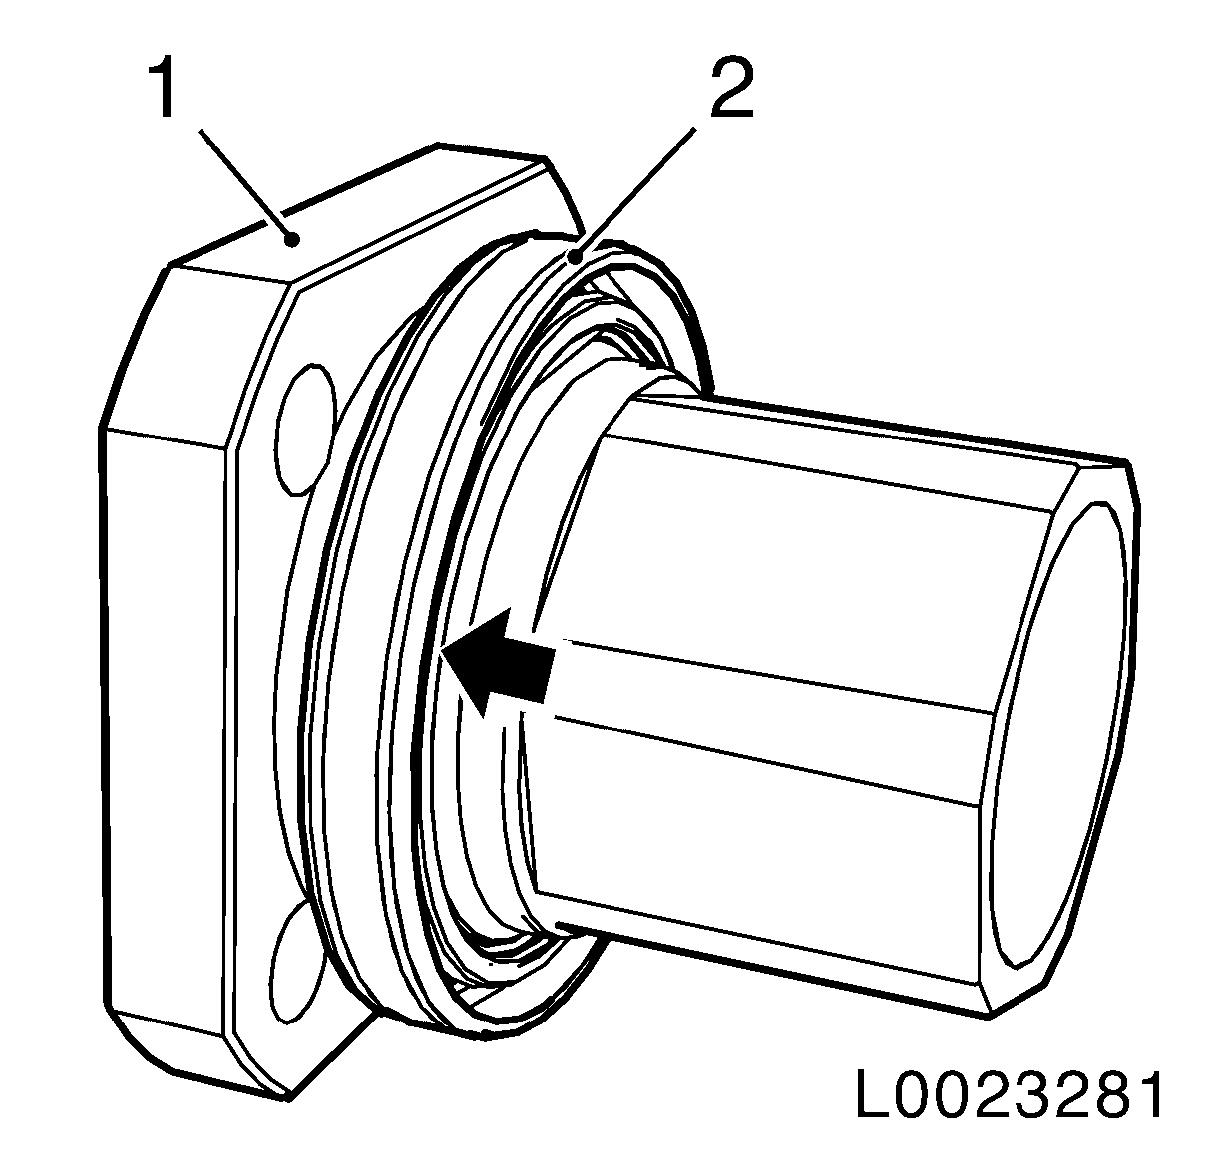
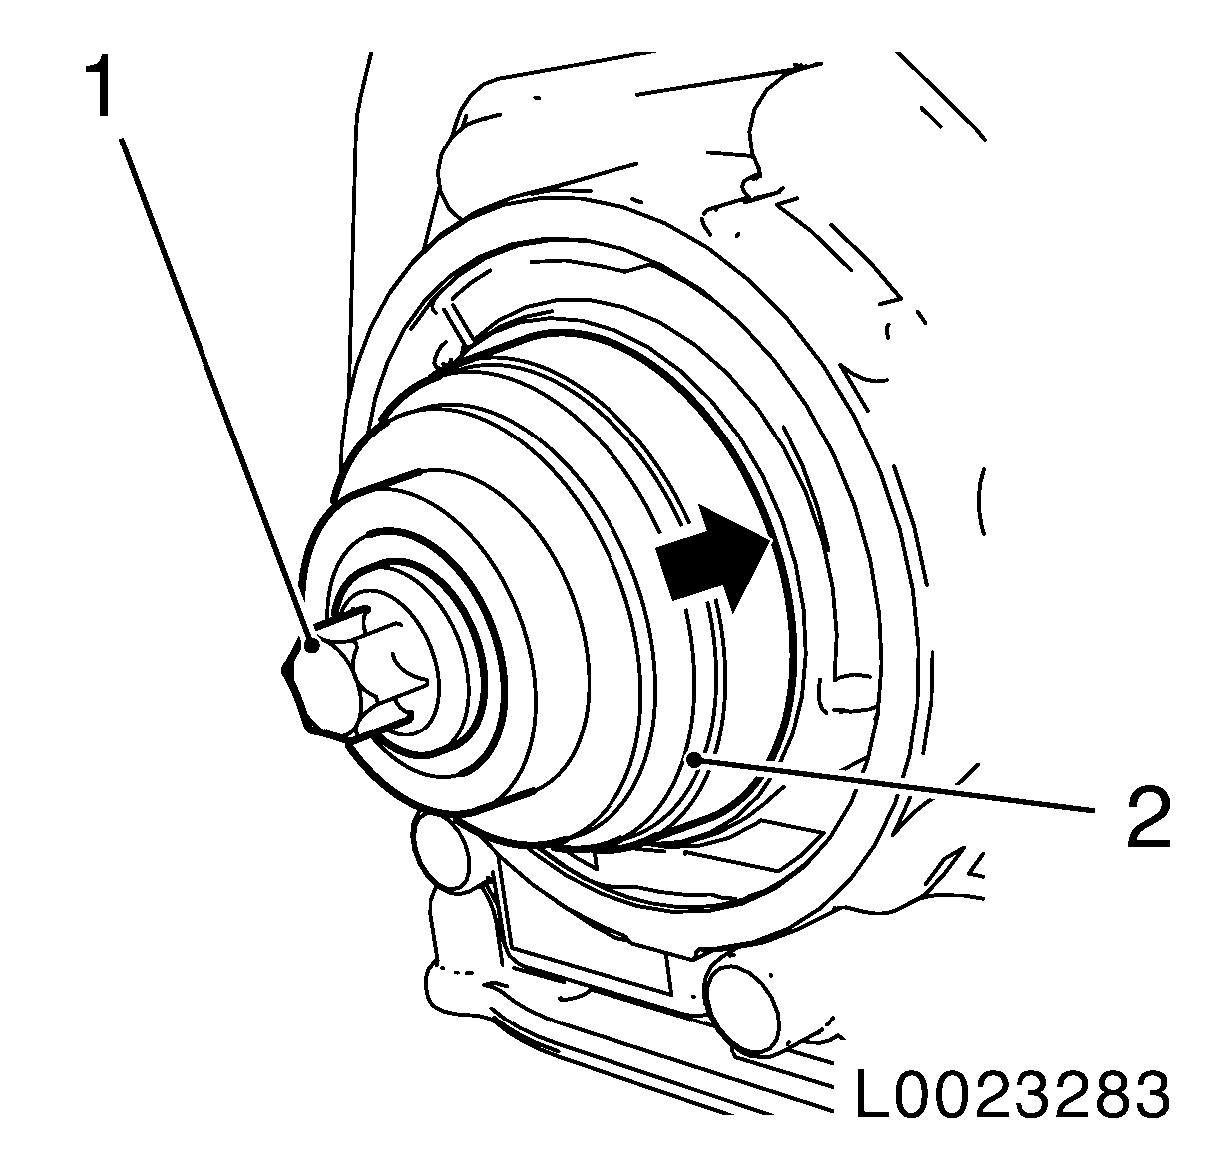
| 26. |
Push front crankshaft seal ring (2) onto sealing surface
torsional vibration damper flange (1) (arrow)
|
|
|
| 27. |
Install torsional vibration damper flange (2) with front
crankshaft seal ring (1).
| • |
Carefully tighten bolt to crankshaft stop
|
| • |
Remove torsional vibration damper flange
|
|
|
|
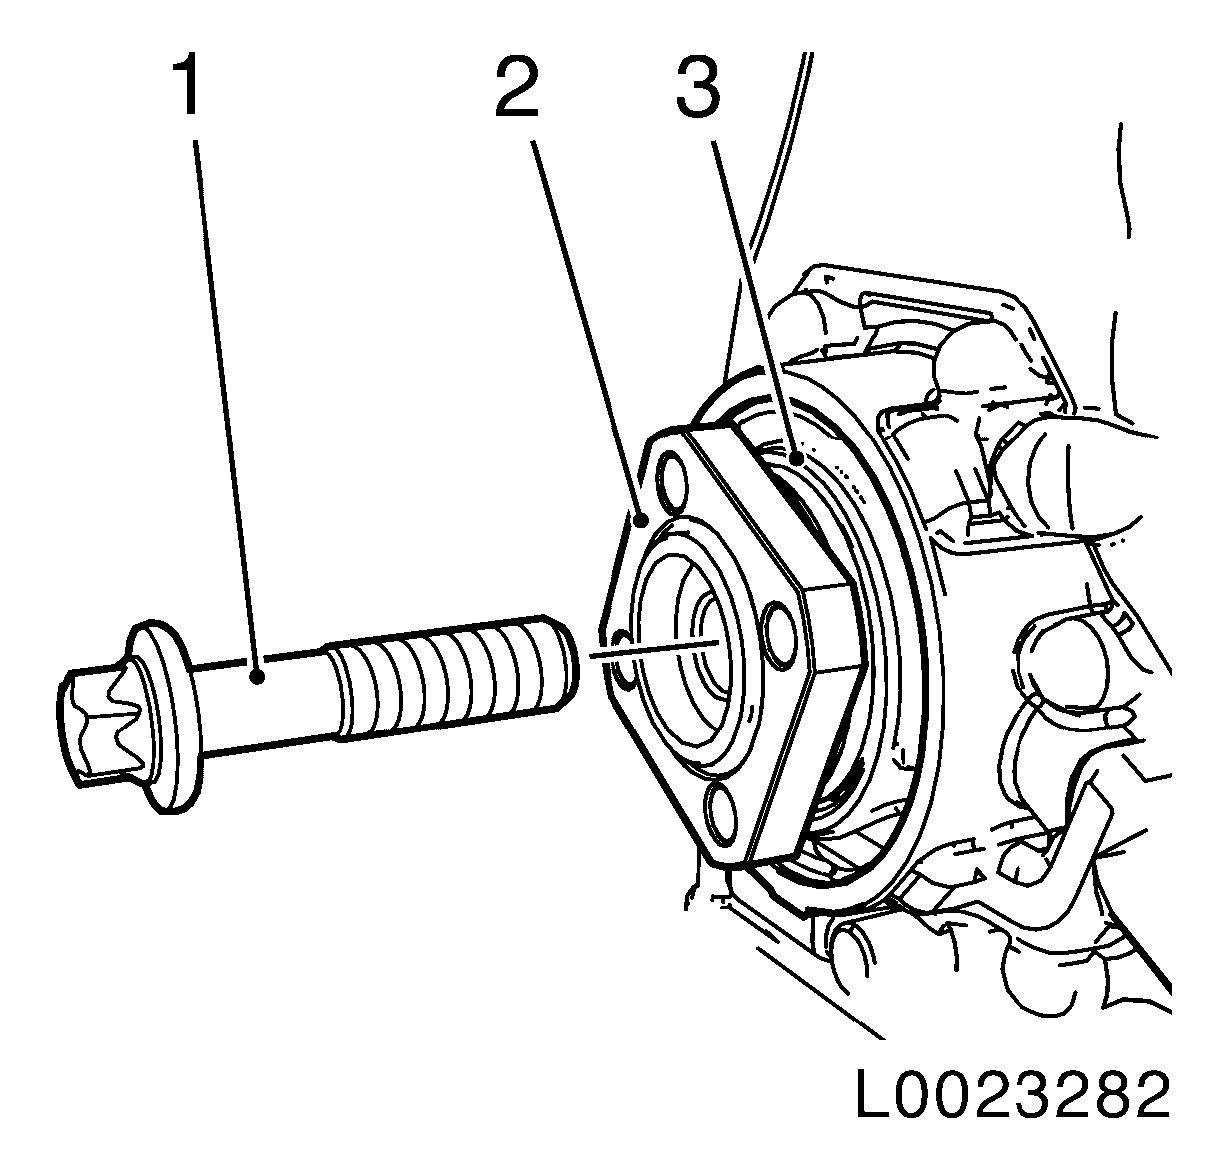
| 28. |
Press in seal ring with flat side of EN-46775 (2)
| • |
Carefully tighten bolt (1) until EN-46775 lies on timing case (arrow)
|
|
|
|
| 30. |
Lower vehicle by its full height
|
| 31. |
Attach torsional vibration damper flange
Note: Left-handed
thread
| • |
Tighten bolt 230 Nm
| – |
Counterhold with KM-662-C
|
|
|
| 32. |
Remove EN-46785 and EN-46781
|
| 33. |
Timing, Check
| • |
Turn crankshaft 700° in the
direction of engine rotation by the bolt on the torsional vibration
damper flange
|
| • |
Turn crankshaft in the direction of engine rotation until EN-46781 engages in the exhaust camshaft
|
| • |
Turn crankshaft until EN-46785
engages in the flywheel
|
| • |
If EN-46785 does not engage in the
flywheel, the procedure "Set Timings" must be repeated
|
|
| 34. |
Remove EN-46785 and EN-46781
|
| 35. |
Install closure bolt
| • |
Coat bolt with screw locking compound (red) and insert
Note: Complete assembly
work within 10 minutes.
|
| • |
Tighten closure bolt 15 Nm
|
|
| 36. |
Attach engine management wiring harness
| • |
Connect 4x injector wiring harness plug
|
| • |
Connect wiring harness plug, camshaft sensor
|
|
| 37. |
Install air intake hose
|
| 38. |
Install air intake pipe
|
| 39. |
Install torsional vibration damper
|
| 40. |
Install ribbed V-belt tensioner
|
| 41. |
Install ribbed V-belt
|
| 42. |
Install engine damping block adapter
|
| 43. |
Install engine damper block
| • |
Attach to engine damping block bracket
|
|
| 44. |
Raise vehicle by its full height
|
| 45. |
Remove engine mount KM-6173
|
| 46. |
Remove engine mount KM-6001-A
|
| 47. |
Install lower engine cover and right engine splash guard
| • |
Install 2x body-bound rivets
|
|
| 48. |
Lower vehicle by its full height
|
| 49. |
Install air cleaner housing with air intake hose
|
| 51. |
Program volatile memories
|
|
