|
Hydraulic Chain Tensioner, Replace (Primary)
 Remove Remove
| 2. |
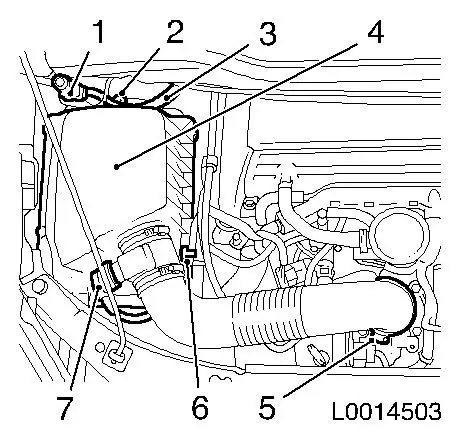
Remove air cleaner housing (4)
| • |
If present: unclip bonnet contact switch (1)
|
| • |
Unclip tank vent line (3)
|
| • |
Release and disconnect wiring harness plug of hot film mass air
flow meter (7)
| – |
Unclip wiring harness (6) from bracket
|
|
|
|
|
| 3. |
Detach cylinder head cover
|
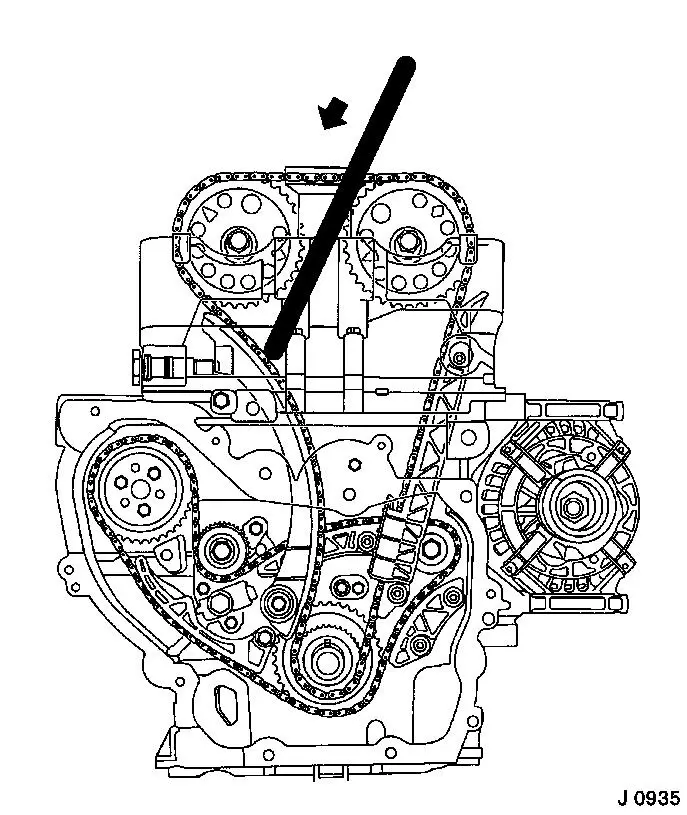
| 4. |
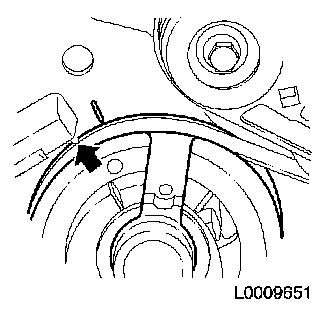
Set up crankshaft
| • |
Turn crankshaft in the direction of rotation of the engine to
10° before TDC (arrow)
Note: This results in
an untensioned timing chain drive state which prevents the timing
chain from jumping off
|
|
|
|
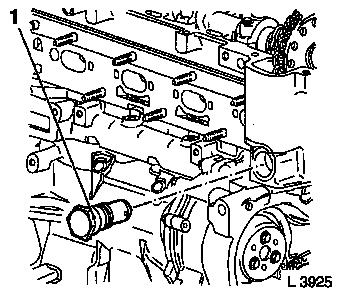
| 5. |
Remove chain tensioner of camshaft timing chain (1)
|
|
|
 Install
| 6. |
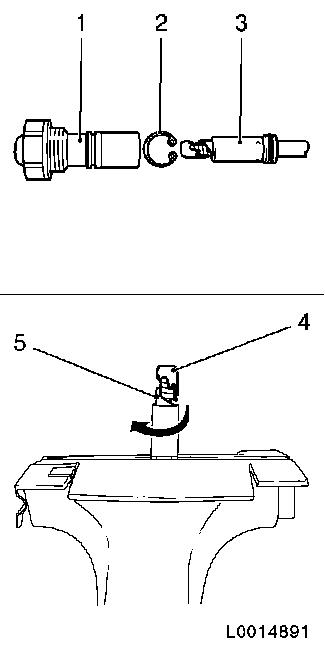
Pre-tension chain tensioner
| • |
Detach retaining ring (2)
|
| • |
Pull piston (3) out of housing (1)
| – |
Tension piston at square in vice
|
| – |
Lock inner piston (4) to last detent (5) by turning
clockwise
|
|
| • |
Insert piston into housing
|
|
|
|
| 7. |
Tension chain tensioner 75 Nm
| • |
Tension chain tensioner
Note: Undo lock by
pressing down the chain in the area of the tension rail for the
camshaft timing chain.
|
|
|
|
| 8. |
Attach cylinder head cover
|
| 9. |
Install air cleaner housing
| • |
Attach air cleaner housing to wheelhouse
|
| • |
Attach air intake hose to throttle valve module
|
| • |
Attach engine vent hose to timing case
|
| • |
Attach wiring harness plug to hot film mass air flow meter
|
| • |
If present: clip in bonnet contact switch
|
|
| 10. |
Check and correct engine oil level
| • |
Observe specified engine oil quantity
|
| • |
Start engine and allow to run until oil pressure control
indicator goes off
|
| • |
Check engine oil level, correct if necessary
|
|
|
