|
Replace high-pressure pump
Important: When
working on the fuel system it is essential to pay attention to
cleanliness as even the smallest dirt particles can lead to faults
in engine operation or in the fuel system. Open fuel connections
must be sealed with appropriate plugs from the Opel Parts Catalogue
(catalogue number: 45 06 154 / part number: 9201697). Sealing plugs
are only intended to be used once.
 Remove Remove
| 2. |
Disconnect battery
| • |
Detach earth connection from earth terminal
|
|
| 3. |
Raise vehicle by its full height
|
| 4. |
Remove lower engine compartment cover and/or right-hand engine
splash guard
|
| 5. |
Place collecting basin underneath.
|
| 6. |
Lower vehicle by its full height
|
| 8. |
Remove air cleaner housing
|
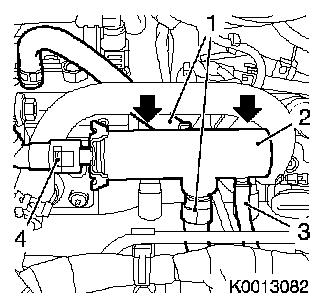
| 9. |
Detach fuel return damping case (2)
| • |
Remove fuel return line (4) with KM-796-A
|
| • |
Disconnect oil leak line (3)
|
| • |
Unscrew 2x bolts (arrows)
|
|
|
|
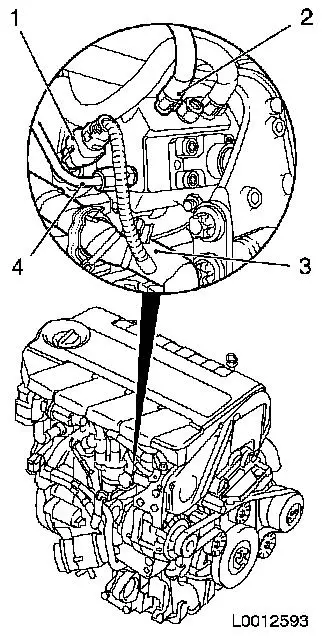
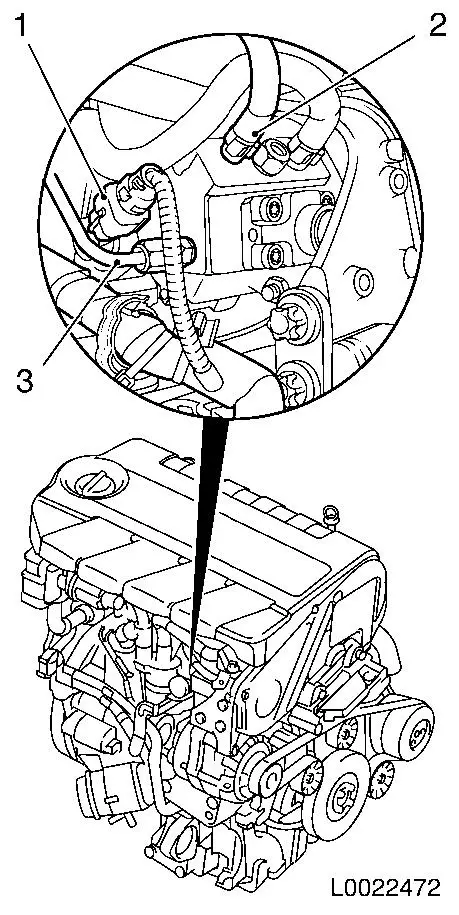
| 10. |
Disconnect high-pressure pump wiring harness plug (1)
|
Important: After detaching the
pressure lines, seal off injector and pressure chamber openings
with protective caps
1)
|
| 11. |
Remove high pressure line (4) from high pressure pump to
pressure chamber
| • |
Unscrew 2x union nuts
Note: Seal pressure
chamber, high-pressure pump and high-pressure line with sealing cap
from kit (part number 9 20 16 97)
|
|
| 12. |
Detach high-pressure pump fuel supply line (2)
|
|
|
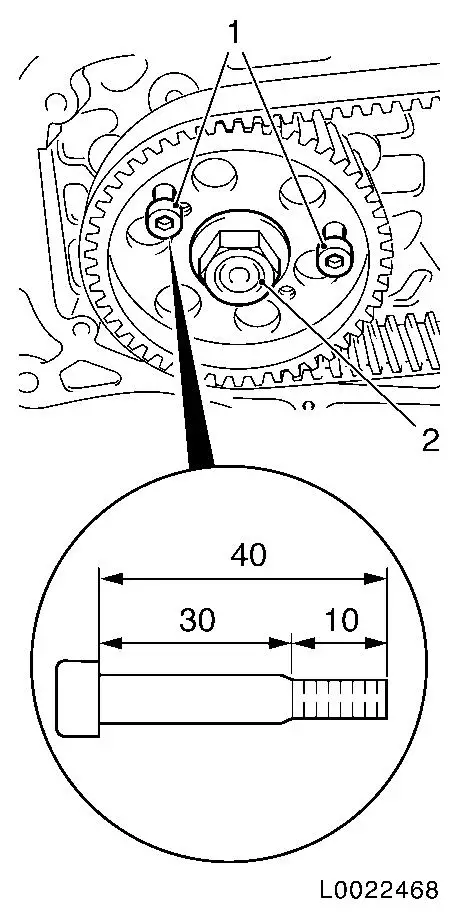
| 13. |
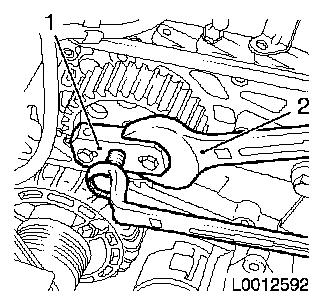
Remove upper toothed belt cover
| • |
Unscrew 5x bolts (1) with EN-47631
|
|
|
|
Important: The retaining bolts
must be 40 mm long. Threads may be no more than 10 mm. Otherwise
the sliding of the high pressure pump drive gear on the bolts
cannot be guaranteed.
|
| 14. |
Adjust high-pressure pump
| • |
Turn the steering wheel to the right
|
| • |
Rotate the engine at the crankshaft in the direction of engine
rotation until the retaining bolts (1) M6x40 in the high-pressure
pump bracket can be turned
|
|
| 15. |
Release high-pressure pump drive gear
|
|
|
| 16. |
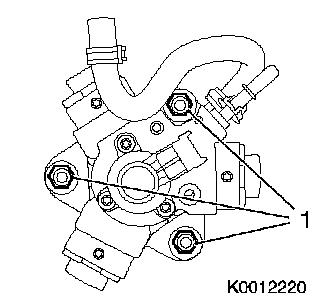
Slacken high pressure pump
| • |
Unscrew 3x nuts (1)
Note: Place cloths
under the high-pressure pump to prevent the loss of nuts or
wedges
|
|
|
|
Important: Make absolutely
certain that the feather key is also removed.
.
|
| 17. |
Remove high pressure pump
| • |
Using EN-46790 , press out the
assembly from the high-pressure pump gear
| – |
Counterhold with open-ended wrench (2)
|
|
|
|
|
 Install
Important: The spring key must be
attached when the high-pressure pump is replaced. The shaft of the
high-pressure pump must be set so that the spring key can be
inserted in the designated opening of the high-pressure pump drive
gear.
Important: Make
absolutely certain that the spring key does not fall out during
installation.
|
| 18. |
Install high pressure pump
| • |
Tighten 3x new nut 25 Nm
|
|
Important: Slide the
high-pressure pump drive gear onto the high-pressure pump shaft by
hand
|
| 19. |
Fasten the high-pressure pump drive gear
Note: Use new nuts
|
| 20. |
Unscrew the retaining bolt from the high-pressure pump drive
gear
|
Important: Check the
high-pressure pump drive gear for fractures and cracks
|
| 21. |
Install upper toothed belt cover
| • |
Tighten 5x bolts with EN-47631
|
|
| 22. |
Install high-pressure line of high-pressure pump to pressure
chamber
| • |
Tighten 2x retaining nut
|
|
| 23. |
Connect high-pressure pump wiring harness plugs
|
| 24. |
Attach high-pressure pump fuel supply line
|
| 25. |
Attach fuel return damping case
| • |
Attach fuel return line
| – |
Connect quick release fitting
Note: Must engage
audibly
|
|
|
| 26. |
Install air cleaner housing 
|
| 28. |
Raise vehicle by its full height
|
| 29. |
Attach water drain hose of air cleaner housing
|
| 30. |
Install lower engine cover and right engine splash guard
|
| 31. |
Lower vehicle by its full height
|
| 32. |
Connect battery
| • |
Attach ground connection to ground terminal
|
|
| 33. |
Program volatile memories
|
1 ) Protective caps are available from the Opel
parts catalogue under catalogue number 45 06 154 / part number:
9201697
|
