|
Multi-disc Brakes B3 and Freewheel F2, Remove and
Install (AF22)
 Remove Remove
Important: Secure converter so it
does not fall out
|
| 1. |
Remove transmission
|
| 2. |
Attach transmission to KM-694-A
(2)
| • |
Attach assembly to KM-113-2 (1)
|
|
| 3. |
Remove oil drain bolt (3)
| • |
Drain transmission fluid and collect for damage diagnosis 
|
|
|

|
|
| 6. |
Remove drive shaft assembly (2) with multi-plate clutch C1 and
C2
|
| 7. |
Remove planetary gear set P1 (3)
|
|
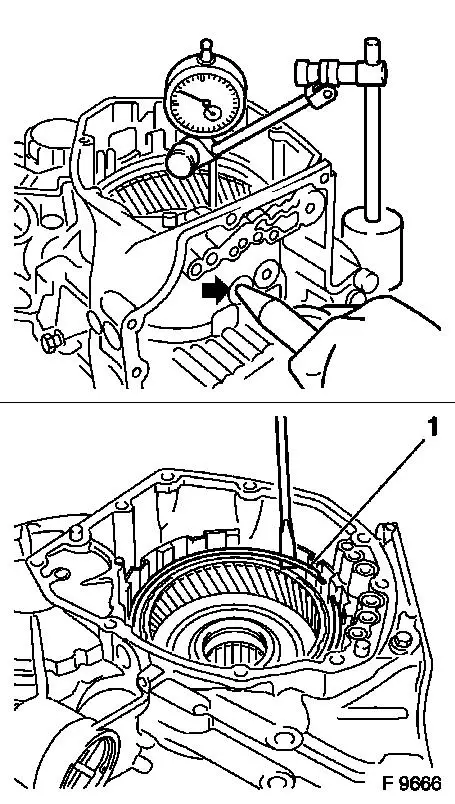
| 9. |
Measure piston stroke of multi-disc brakes B3 using dial gauge
MKM-571-B
Note: Replace liner
plates if necessary and correct piston stroke by installing a
suitable compensating flange from the "Service" Department.
| • |
Cut off the end of KM-994 and insert
KM-994 in hole
|
| • |
Blow in air at low pressure (4 bar) (arrow)
|
| • |
Place button on plate
Note: Measured value:
1.75 to 2.55 mm
|
|
| 10. |
Measure clearance between piston and set of discs using feeler
gauge
Note: Replace set of
discs if necessary.
| • |
Measured value: 0.6 to 1.9 mm
|
|
| 11. |
Prise off retainer (1) for front ring gear with screwdriver and
remove
|
|
|
|
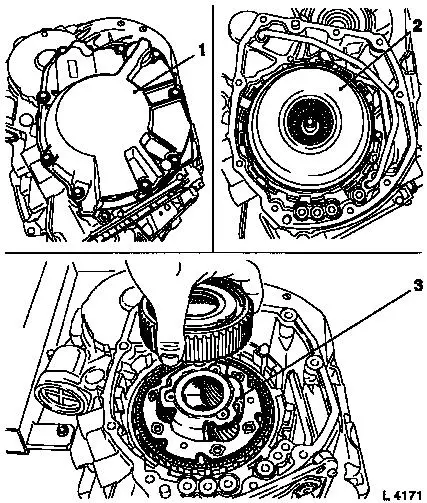
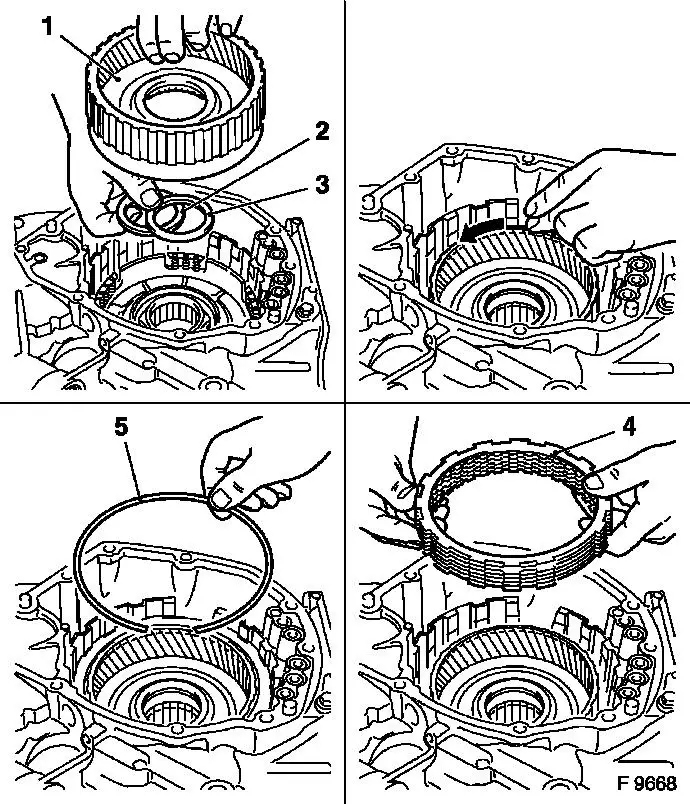
| 12. |
Remove assembly (2) with steel plates, liner plates and flange
(1) for multi-disc brakes B3
|
| 13. |
Remove thrust bearing (4) with ball race (3)
|
| 14. |
Check steel and liner plates for damage and wear
Note: Place new liner
plates in transmission fluid for at least 2 hours before
fitting.
|
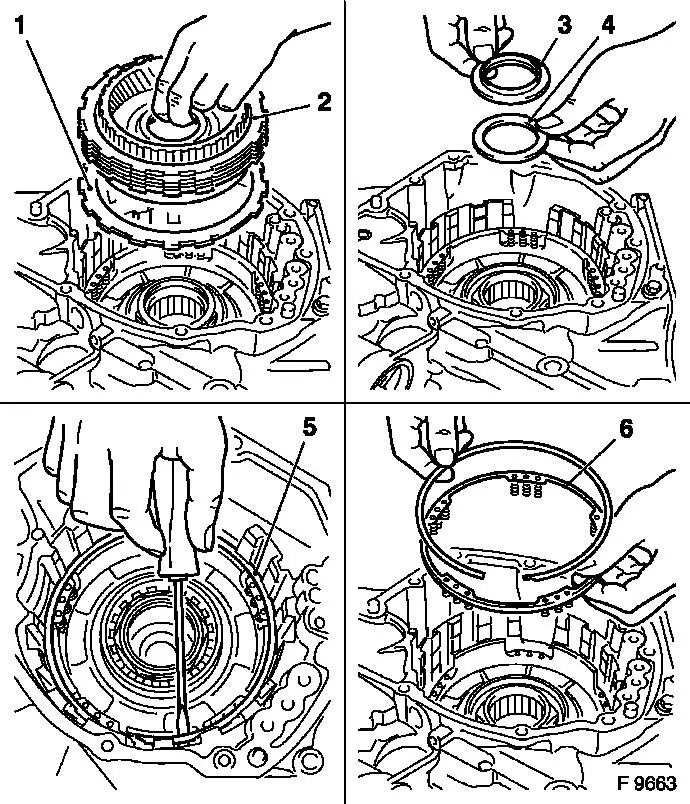
| 15. |
Remove return spring assembly
| • |
Prise off screwdriver (5) for return spring assembly (6) with
screwdriver
|
| • |
Remove return spring assembly
|
|
|
| 16. |
Remove piston (1) for multi-disc brakes B3
| • |
Cut off the end of KM-994 and insert
KM-994 in oil hole
|
| • |
Blow air at low pressure (4 bar) (arrow) into oil hole
|
| • |
Press out piston evenly without jamming
Note: Assist with
pliers if necessary
|
|
| 17. |
Replace seal rings on piston, inside and out
|
| 18. |
Clean components and check for damage
Note: Replace if
necessary.
|
| 19. |
Insert piston for multi-disc brakes B3 evenly in transmission
without jamming
Note: Spring mounting
faces upwards.
|
| 20. |
Insert return spring assembly in spring mounting of piston
B3.
|
|
|
 Install
|
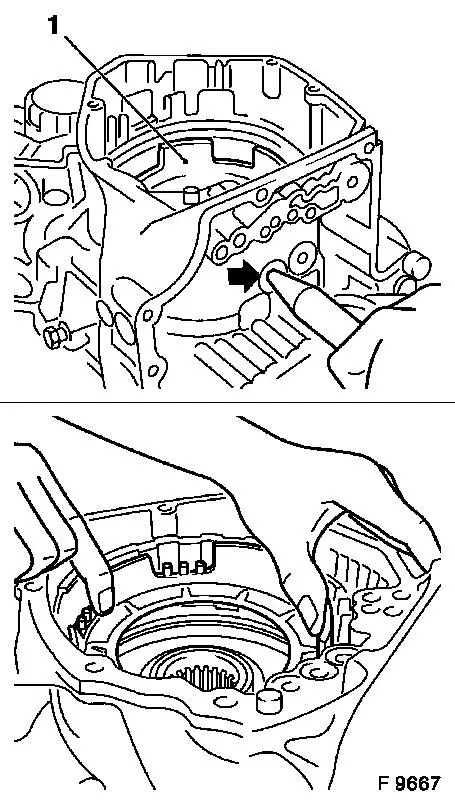
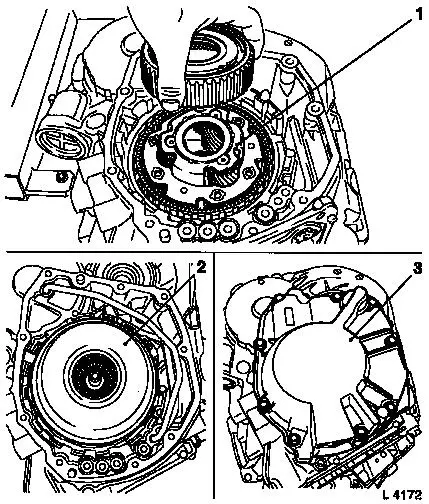
| 21. |
Insert thrust bearing (2) with ball race (3) - for allocation
and direction of installation, see illustration "Thrust bearing
installation"
| • |
Install front ring gear assembly (1) with freewheel F2 in
transmission
Note: Front ring gear
must be rotatable in counterclockwise direction (arrow)
|
|
| 22. |
Install set of discs B3 (4) in transmission
| • |
Insert 6x liner plate and 5x steel plate, alternating
Note: Steel plate dogs
must be flush with the cut-outs in the transmission.
|
| • |
Insert new retainer (5)
Note: Ensure it is
seated perfectly.
|
|
|
|
| 24. |
Install planetary gear set P1 (1)
|
| 25. |
Install drive shaft assembly (2) with multi-plate clutch C1 and
C2
|
| 26. |
Install rear cover (3)
|
|
Important: Secure converter so it
does not fall out
|
| 27. |
Install converter
|
| 28. |
Attach oil drain bolt (3) to transmission with seal ring
Note: Use new seal
ring.
| • |
Tighten oil drain bolt 40 Nm
|
|
| 29. |
Detach transmission assembly with KM-694-A from KM-113-2
(1)
| • |
Detach transmission from KM-694-A
(2)
|
|
| 30. |
Install transmission
| • |
Top up with transmission fluid
|
|
| 31. |
Check and correct transmission fluid level
|
|
|
|
