|
Multi-plate Clutch C3, Freewheel F3 and Brake Band
B4, Remove and Install (AF22)
 Remove Remove
Important: Secure converter so it
does not fall out
|
| 1. |
Remove transmission
|
| 2. |
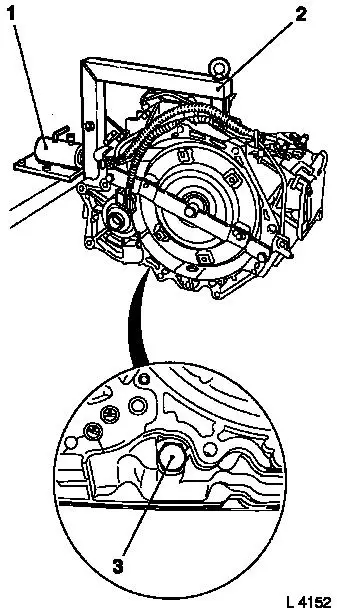
Attach transmission to KM-694-A
(2)
| • |
Attach assembly to KM-113-2 (1)
|
|
| 3. |
Remove oil drain bolt (3)
| • |
Drain transmission fluid and collect for damage diagnosis 
|
|
| 4. |
Remove converter and fluid pump seal ring 
|
|
|
|
| 5. |
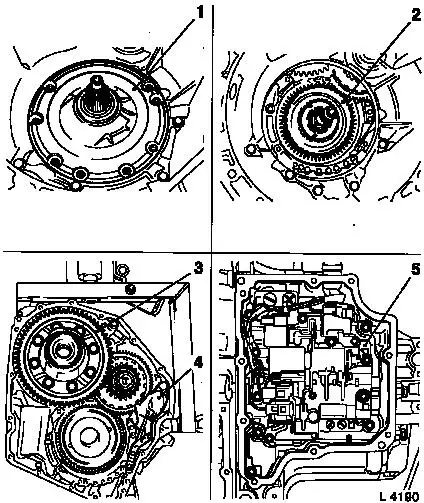
Remove fluid pump assembly (1) with multi-disc brakes B1 and B2
|
| 6. |
Remove freewheel F1 (2)
|
| 7. |
Remove differential gear (3) 
|
| 8. |
Remove parking lock (4)
|
|
| 10. |
Remove planetary gear set P2 (1) 
|
| 11. |
Remove multi-plate clutch C3 (2)
| • |
Rotate multi-plate clutch counterclockwise and raise
|
|
|

|
| 12. |
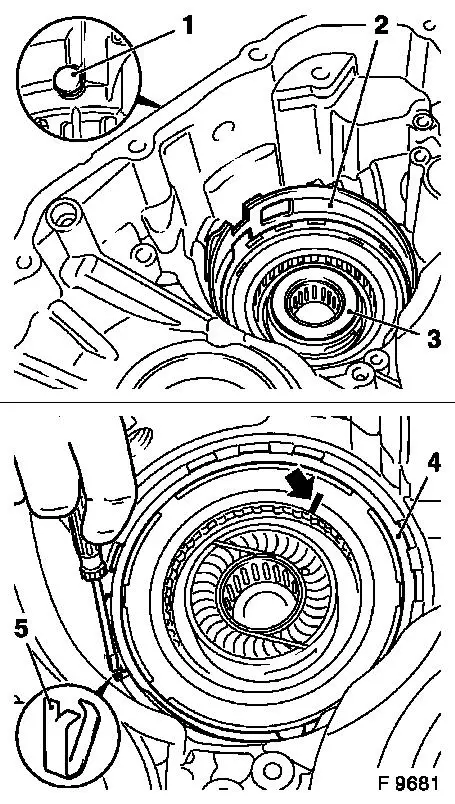
Remove anchor bolt (1) and brake band B4 (2) from primary
housing
Note: Note installation
position.
|
| 13. |
Remove thrust bearing (3)
Note: Note installation
position.
|
| 14. |
Mark top of freewheel F3 (arrow)
|
| 15. |
Prise off retainer (4) with screwdriver
|
| 16. |
Remove freewheel F3 from primary housing
Note: Note freewheel
outer ring (5) on bracket.
|
| 17. |
Check brake band B4 for damage and wear
Note: Place new brake
band in transmission fluid for at least 2 hours before fitting
|
|
|
 Install
| 18. |
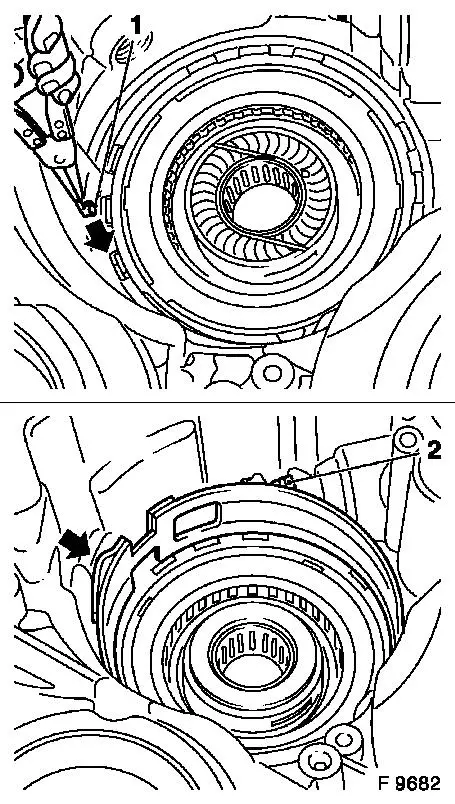
Insert freewheel F3 in primary housing with mark applied during
removal upwards
| • |
Insert freewheel outer ring bracket (1) using pliers
Note: Note installation
position.
|
|
| 19. |
Insert brake band B4
Note: Actuation of
brake band must be located centrally in front of the piston rod
(2)
|
| 20. |
Attach anchor bolt to primary housing using new seal ring
Note: Check correct
seating of brake band (arrow).
|
|
|
| 21. |
Place thrust bearing (2) on pin in primary housing
Note: Note installation
position.
|
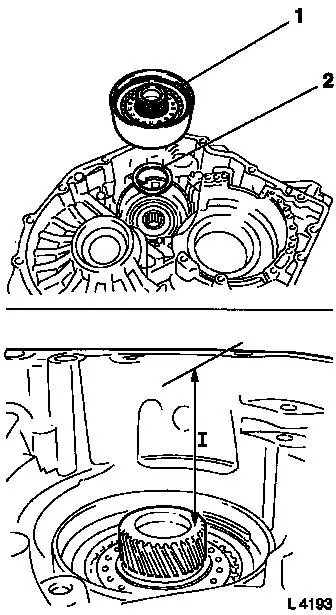
| 22. |
Install multi-plate clutch C3 (1)
| • |
Rotate multi-plate clutch counterclockwise and insert
|
|
| 23. |
Measure distance from clutch body to primary housing upper
edge
Note: When fitted
correctly, dimension (I) is 90.5 to 91 mm.
|
|
|
|
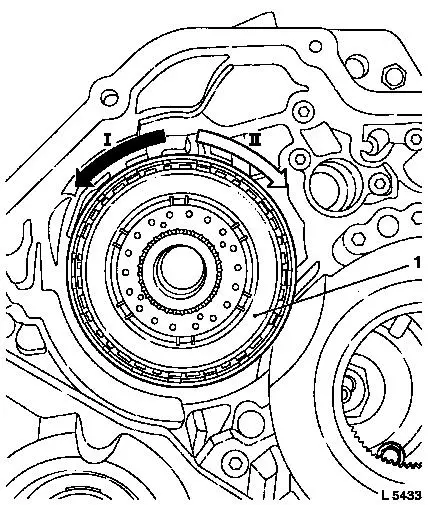
| 24. |
Rotate on multi-plate clutch C3 (1)
Note: Freewheel must
lock clockwise (II). The multi-plate clutch must be rotatable
counterclockwise (I).
|
|
| 25. |
Install planetary gear set P2 
|
| 26. |
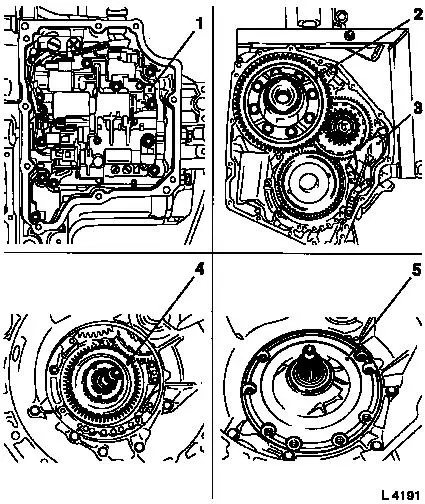
Install valve body (1)
|
|
| 27. |
Install parking lock (3)
|
| 28. |
Install differential gear (2) 
|
| 29. |
Install freewheel F1 (4)
|
| 30. |
Install fluid pump assembly (5) with multi-disc brakes B1 and
B2
|
|
Important: Secure converter so it
does not fall out
|
| 31. |
Install fluid pump seal ring and converter 
|
| 32. |
Attach oil drain bolt (3) to transmission with seal ring
Note: Use new seal
ring.
| • |
Tighten oil drain bolt 40 Nm
|
|
| 33. |
Detach transmission assembly with KM-694-A from KM-113-2
(1)
|
| 34. |
Detach transmission from KM-694-A
(2)
|
| 36. |
Top up with transmission fluid
|
| 37. |
Check and correct transmission fluid level 
|
|

|
|