|
Remove and install gear shift assembly (F23)
 Remove Remove
| 2. |
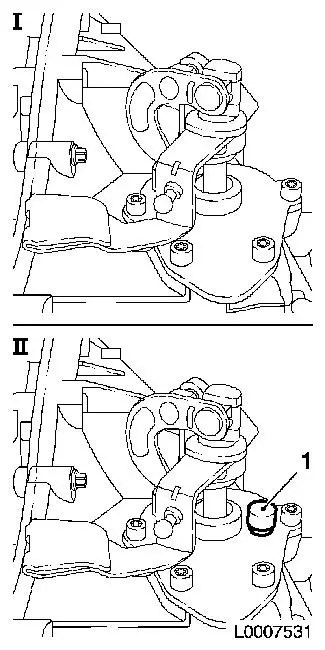
Overview
- Gear shifting assembly without transmission venting (up to
model year 2002)
- Gear shifting assembly with transmission venting (1) (from
model year 2002)
Note: Changing the
transmission venting in the "gear shifting assembly" is not
significant in this operation. The following is still therefore the
previous version.
|
|
|
|
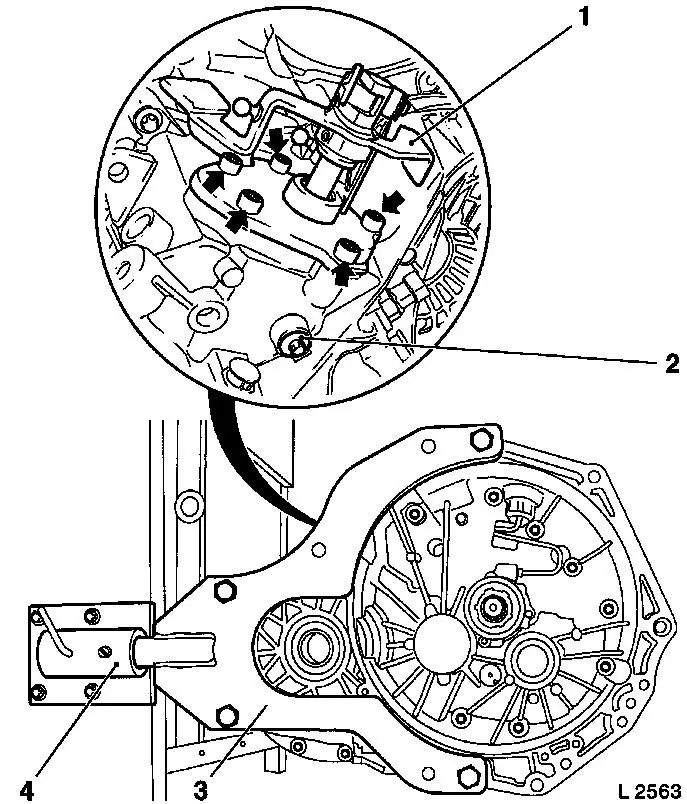
| 3. |
Attach transmission to KM-113-2
(4)
| • |
Attach KM-6115 (3) to
transmission.
|
|
| 4. |
Remove gear shift assembly (1)
| • |
Unscrew 5x bolt (arrows)
|
| • |
Remove gear shift assembly
|
|
|
| 5. |
Clean sealing surfaces and thread
|
| 6. |
Test all dismantled parts and replace if necessary.
|
 Install

|
| 7. |
Apply a thin layer of sealing compound to area (1) on the
transmission housing
Note: Max. thickness
2mm
|
| 8. |
Install gear shift assembly (2)
| • |
Align gear shifting assembly with the internal gear shifting
parts
|
| • |
Insert gear shifting assembly into transmission
|
|
|
|
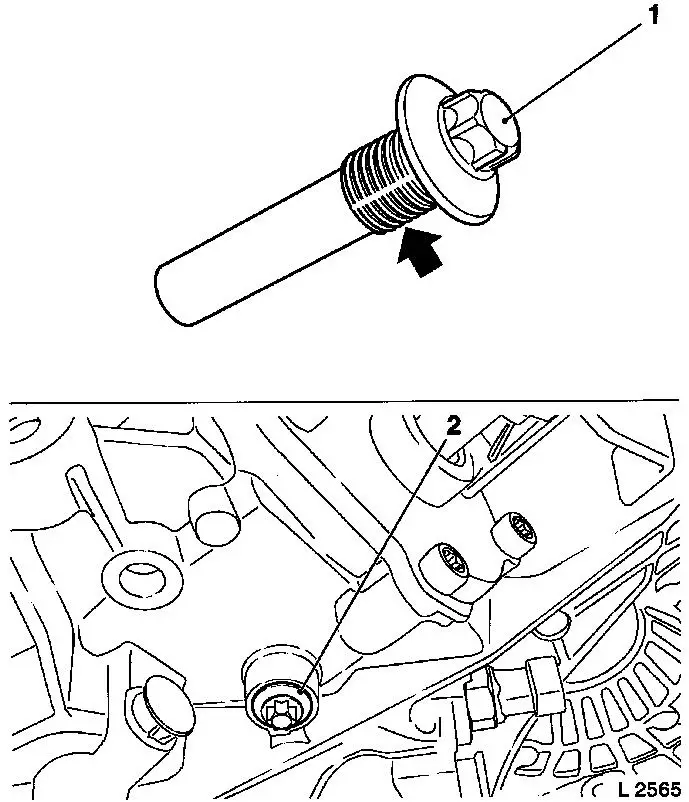
| 9. |
Unscrew setscrew (2) 25 Nm
Note: Coat thread
(arrow) of setscrew (1) with locking compound
|
| 10. |
Detach transmission from KM-6115
| • |
Detach transmission from KM-113-2
using KM-6115
|
|
|
|
