Plastic Collar Quick Connect Fitting Service
Plastic Quick Connect Fitting Type Identification
General Instructions for Handling the Connectors
Before Disconnection
|
Warning:
Wear safety glasses when using compressed air, as
flying dirt particles may cause eye injury. |
Note: The following
instructions apply to all of these types of fittings.
Using compressed air, to blow any dirt out of the
quick connect fitting.
After Disconnection
| • |
Wipe off the male pipe end
using a clean shop towel. |
| • |
Inspect both ends of the
fitting for dirt and burrs. |
| • |
Clean components as
required. |
| • |
Replace damaged
components. |
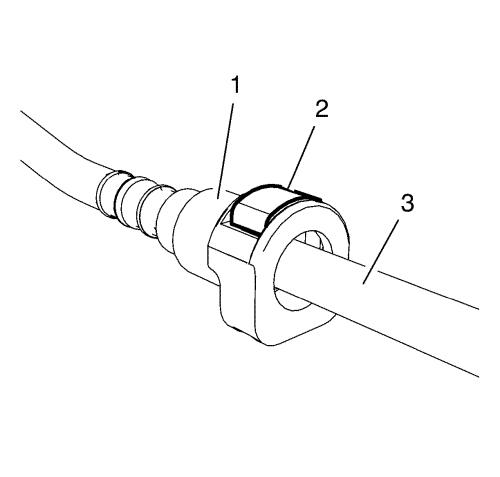
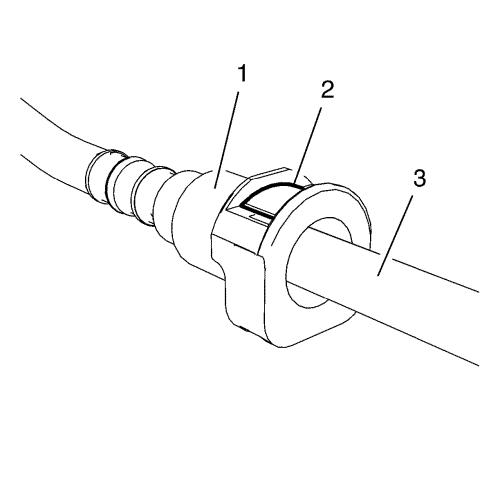
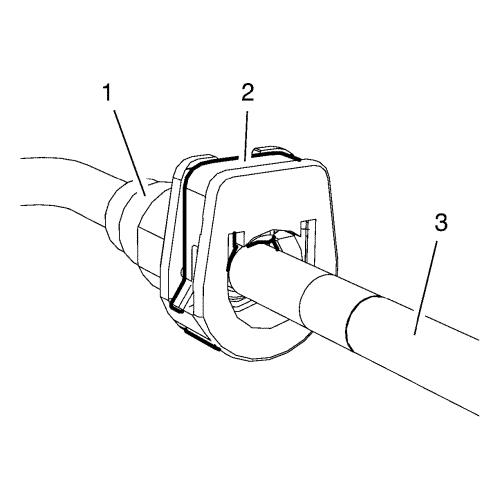
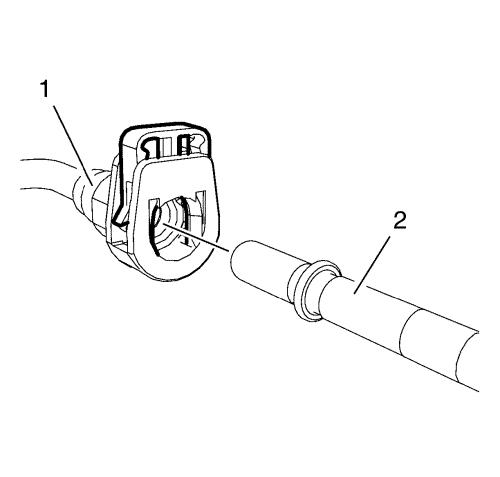
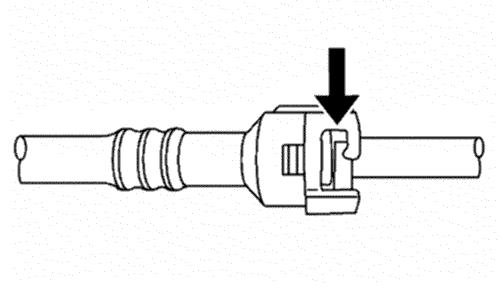
Type A - Disconnect/Connect
Disconnect
|
Note: Mechanical
violence is not necessary for a successful
disconnection/connection.
|
| 1. |
Push the tube (3) into the
connector (1) and push down the latch (2). |
| 2. |
Push the latch (2) into the
connector (1). |
| 3. |
Pull the pipe (3) out of the
connector (1). |
| 4. |
Release the latch (2).
|
Connect
| 1. |
Push the pipe (3) into the
connector (1). |
| 2. |
When the connector is locked
correctly, the latch (2) must align to the connector (1).
|
| 3. |
Do not rely only on the
audible click to confirm a secure connection has been made.
|
| 4. |
Pull on both sides of the
quick connect fitting in order to make sure the connection is
secure. |
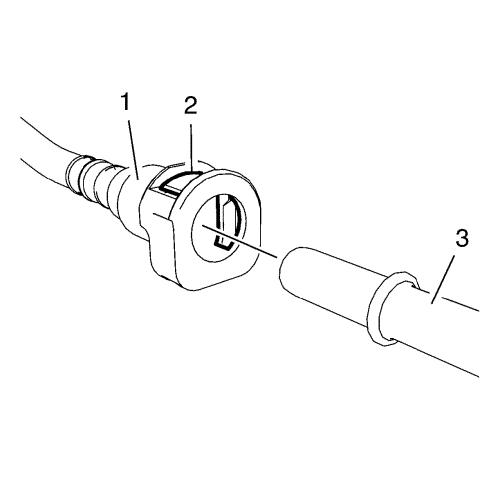
Type B - Disconnect/Connect
Disconnect
|
Note: Mechanical
violence is not necessary for a successful
disconnection/connection.
|
| 1. |
Unlock the connector by
pulling the latch (1) out of the connector. Use a suitable tool if
necessary. |
| 2. |
Push the pipe (3) into the
connector (1). |
| 3. |
Push the latch (1) into the
connector. |
| 4. |
Pull the pipe (2) out of the
connector (1). |
Connect
| 1. |
Push the pipe (2) into the
connector (1). |
| 2. |
When the connector is locked
correctly, the latch (1) must align to the connector. |
|
Note: The latch (2)
can only pushed into the connector (1) when the pipe (3) is
connected correctly.
|
| 3. |
Push the latch (2) into the
connector (1) to secure the connection. |
| 4. |
Do not rely only on the
audible click to confirm a secure connection has been made.
|
| 5. |
Pull on both sides of the
quick connect fitting in order to make sure the connection is
secure. |
Type C - Disconnect/Connect
Disconnect
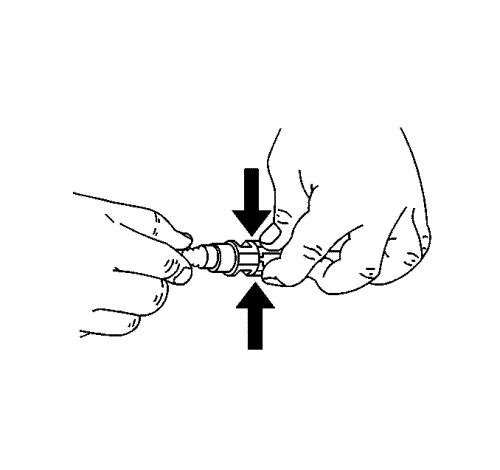
|
Note: Mechanical
violence is not necessary for a successful
disconnection/connection.
|
| 1. |
Squeeze the plastic quick
connect fitting release tabs. |
| 2. |
Pull the connection
apart. |
Connect
| 1. |
Push both sides of the quick
connect fitting together in order to cause the retaining feature to
snap into place. |
| 2. |
Do not rely only on the
audible click to confirm a secure connection has been made.
|
| 3. |
Once installed, pull on both
sides of the quick connect fitting in order to make sure the
connection is secure. |
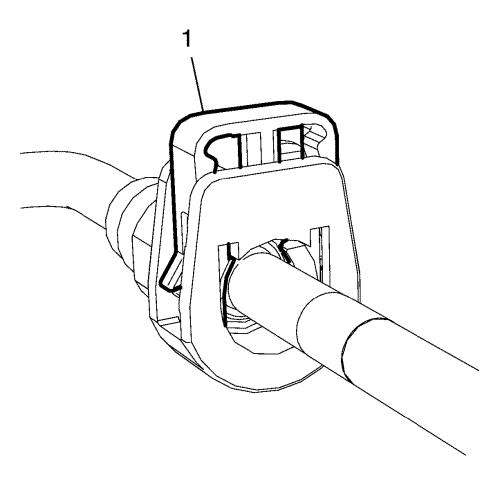
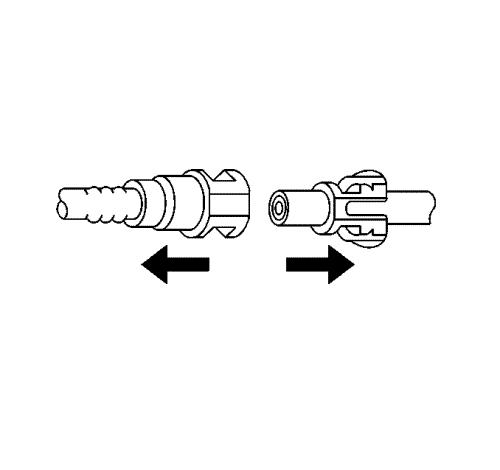
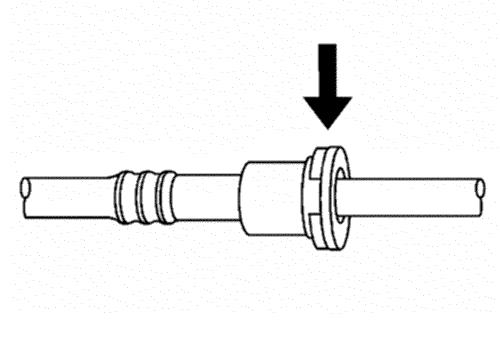
Type D- Disconnect/Connect
Disconnect
|
Note: Mechanical
violence is not necessary for a successful
disconnection/connection.
|
| 1. |
Release the fitting by pushing
the tab toward the other side of the slot in the fitting.
|
| 2. |
Pull the connection
apart. |
Connect
| 1. |
Push both sides of the quick
connect fitting together in order to cause the retaining feature to
snap into place. |
| 2. |
Do not rely only on the
audible click to confirm a secure connection has been made.
|
| 3. |
Once installed, pull on both
sides of the quick connect fitting in order to make sure the
connection is secure. |
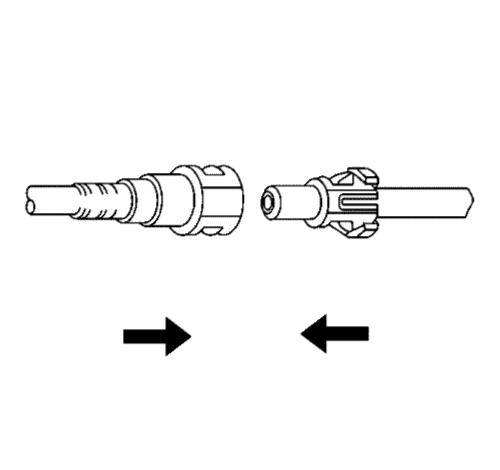
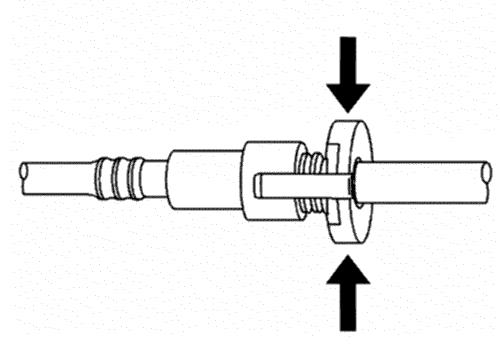
Type E- Disconnect/Connect
Disconnect
|
Note: Mechanical
violence is not necessary for a successful
disconnection/connection.
|
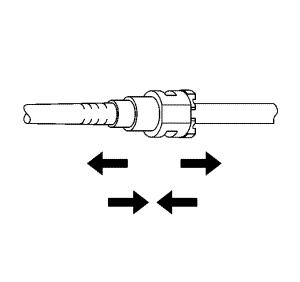
| 1. |
Squeeze where indicated by
arrows on both sides of the plastic ring surrounding the quick
connect fitting. |
| 2. |
Pull the connection
apart. |
Connect
| 1. |
Push both sides of the quick
connect fitting together in order to cause the retaining feature to
snap into place. |
| 2. |
Do not rely only on the
audible click to confirm a secure connection has been made.
|
| 3. |
Once installed, pull on both
sides of the quick connect fitting in order to make sure the
connection is secure. |
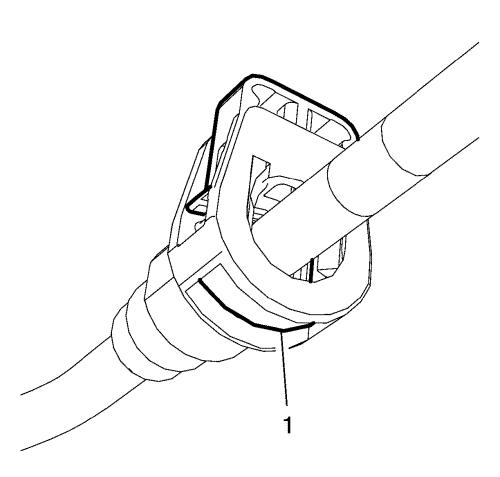
Type F- Disconnect/Connect
Disconnect
|
Note: Mechanical
violence is not necessary for a successful
disconnection/connection.
|
| 1. |
Release the fitting by
pressing on one side of the release tab causing it to push in
slightly. If the tab does not move, try pressing the tab in from
the opposite side. The tab will only move in one direction.
|
| 2. |
Pull the connection
apart. |
Connect
| 1. |
Push both sides of the quick
connect fitting together in order to cause the retaining feature to
snap into place. |
| 2. |
Do not rely only on the
audible click to confirm a secure connection has been made.
|
| 3. |
Once installed, pull on both
sides of the quick connect fitting in order to make sure the
connection is secure. |
|