Battery Positive and Negative Cable Replacement
Removal Procedure
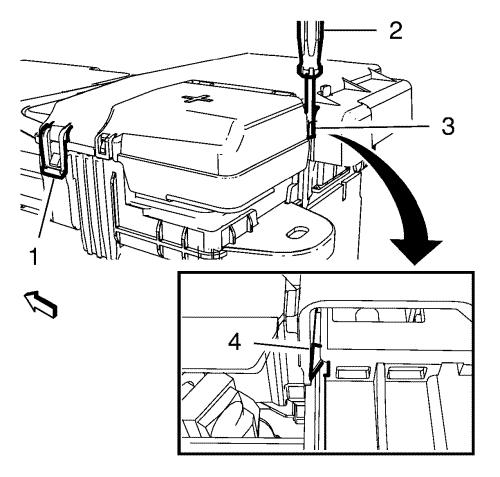
| 2. |
Unlock the retaining tab (1)
on the battery fuse box cover. |
| 3. |
Use a suitable screw driver
(2) to unlock the clip (4) through the window (3). |
|
Note: Pull the
battery fuse box housing. DO NOT pull the flap.
|
| 4. |
Open the battery fuse box
cover (1). |
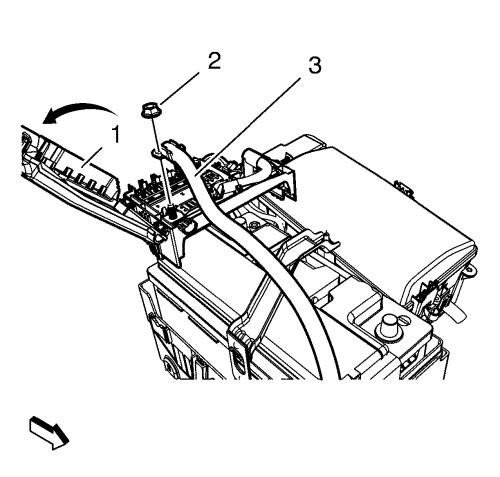
| 5. |
Remove the battery positive
cable to starter nut (2). |
| 6. |
Remove the battery positive
cable to starter (3) from the battery. |
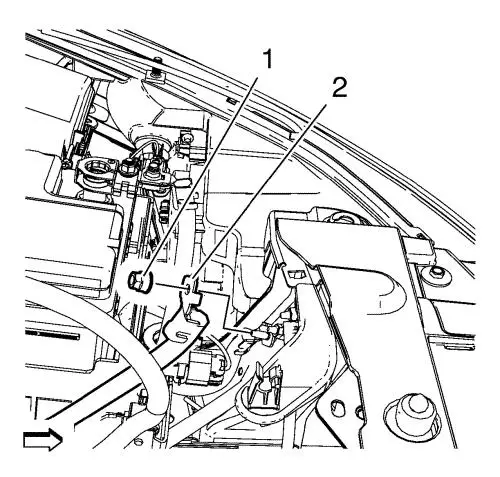
| 7. |
Remove the battery ground
cable nut (1). |
| 8. |
Remove the battery negative
cable (2). |
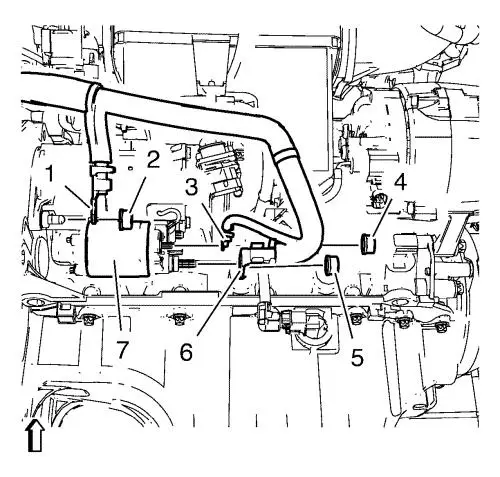
| 9. |
Remove the starter ground
cable nut (2) from the starter motor (7). |
| 10. |
Remove the negative cable
(1). |
| 11. |
Remove the starter and
generator positive cable nut (5) and the starter positive cable nut
(4). |
| 12. |
Remove the 2 positive cables
(3, 6). |
| 13. |
Remove the rubber cap from the
positive cable generator connector. |
| 14. |
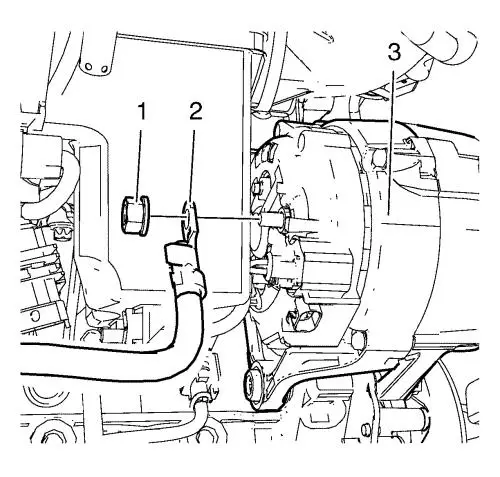
Remove the positive cable nut
(1) from the generator (3). |
| 15. |
Remove the generator positive
cable (2) from the generator (3). |
Installation Procedure
| 1. |
Install the positive cable (2)
to the generator (3). |
| 2. |
Install the generator positive
cable nut (1) to the generator (3) and tighten to 20
N·m (15 lb ft) . |
| 3. |
Install the rubber cap to the
positive cable generator connector. |
| 4. |
Install the 2 positive cables
(3, 6). |
| 5. |
Install the starter and
generator positive cable nut (5) and the starter positive cable nut
(4) and tighten to 12.5 N·m (111 lb in)
. |
| 6. |
Install the negative cable
(1). |
| 7. |
Install the starter ground
cable nut (2) to the starter motor (7) and tighten to 12.5
N·m (111 lb in) . |
| 8. |
Install the battery ground
cable (2). |
| 9. |
Install the battery negative
cable nut (1) and tighten to 9 N·m (80 lb
in) . |
| 10. |
Install the battery positive
cable to starter (3) at the battery. |
| 11. |
Install the battery positive
cable to starter nut (2) and tighten to 12 N·m (106
lb in) . |
| 12. |
Close the battery fuse box
cover and lock the retaining tabs (1) and (4). |
|
