Camshaft Timing Chain Replacement
Special Tools
EN-955-1 Fixing Pin from EN-955 Kit
For equivalent regional tools, refer to
Special Tools .
Removal Procedure
|
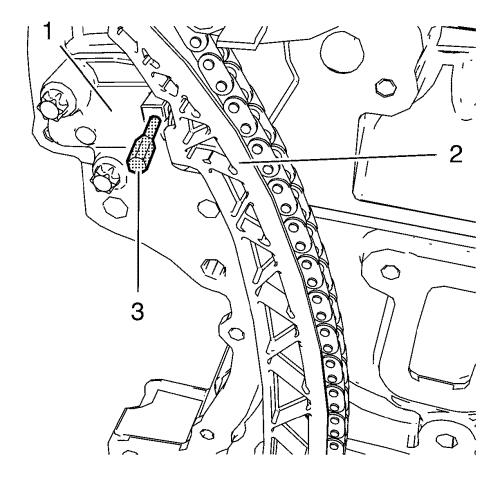
Note: If
EN-955-1 fixing pin can not be inserted, compress
the timing chain tensioner further with the aid of a flat bladed
tool to allow complete insertion of the pin.
|
| 3. |
Push the timing chain (2) in
direction to the timing chain tensioner (1) and secure the
tensioner with EN-955-1 fixing pin (3).
|
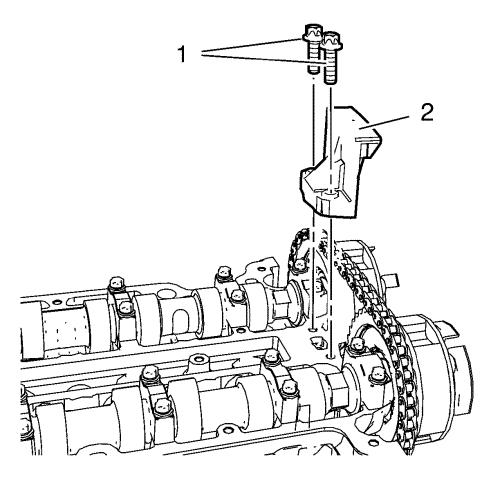
| 4. |
Remove the 2 upper timing
chain guide bolts (1). |
| 5. |
Remove the upper timing chain
guide (2). |
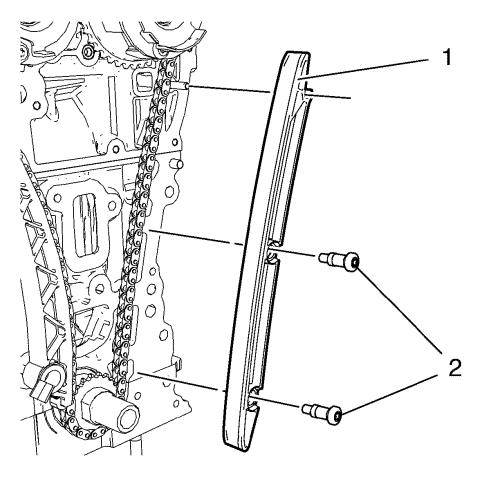
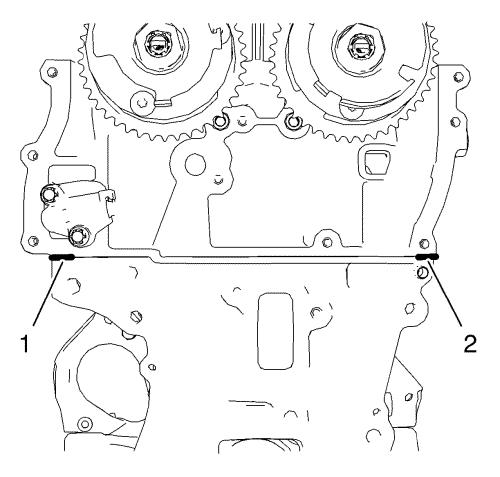
| 6. |
Remove the 2 timing chain
guide right side bolts (2). |
| 7. |
Remove the timing chain guide
right side (1). |
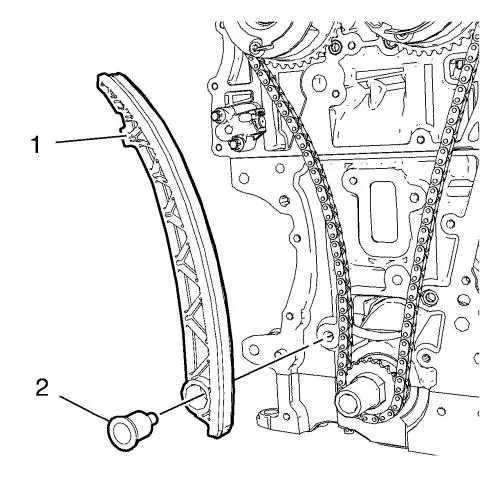
| 8. |
Remove the timing chain
tensioner shoe bolt (2). |
| 9. |
Remove the timing chain
tensioner shoe (1). |
| 10. |
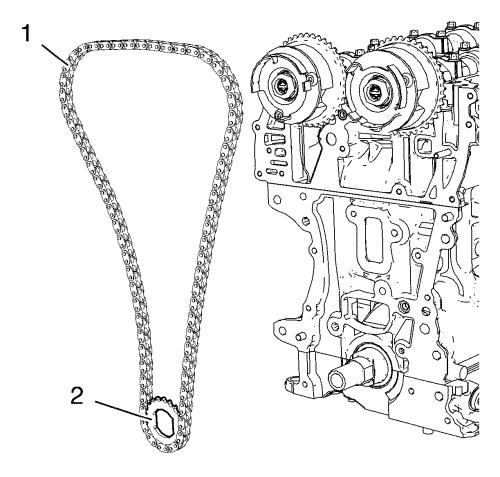
Remove the timing chain (1)
along with the crankshaft sprocket (2). |
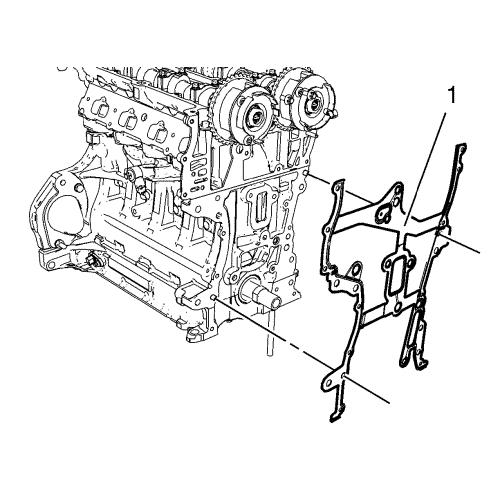
| 11. |
Remove the engine front cover
gasket (1). |
Installation Procedure
| 1. |
Clean the engine front cover
sealing surfaces on the engine block and the cylinder head.
|
|
Note: The thickness
of the sealing bead should be 2 mm (0.0787 in)
.
|
|
Note: Mind the guide
sleeves.
|
| 3. |
Install the engine front cover
gasket (1). |
| 4. |
Install the timing chain (1)
along with the crankshaft sprocket (2). |
| 5. |
Install the timing chain
tensioner shoe (1). |
| 6. |
Install the timing chain
tensioner shoe bolt (2) and tighten to 20 N·m (15 lb
ft) . |
| 7. |
Install the timing chain guide
right side (1). |
| 8. |
Install the 2 timing chain
guide right side bolts (2) and tighten to 8 N·m (71
lb in) . |
| 9. |
Push the timing chain (2) in
direction to the timing chain tensioner (1) and Remove
EN-955-1 fixing pin (3). |
|
