Cylinder Leakage Test (1.6L LLU)
Removal Procedure
| 7. |
Detach the engine management
wiring harness from intake manifold, cylinder head cover.
|
| 8. |
Remove the engine management
wiring harness from bracket. |
| 9. |
Remove the coolant expansion
tank closure cap. |
| 10. |
Remove the oil
dipstick. |

| 11. |
Move the crankshaft in the
direction of the engine rotation to the first cylinder TDC position
(mark 1). |
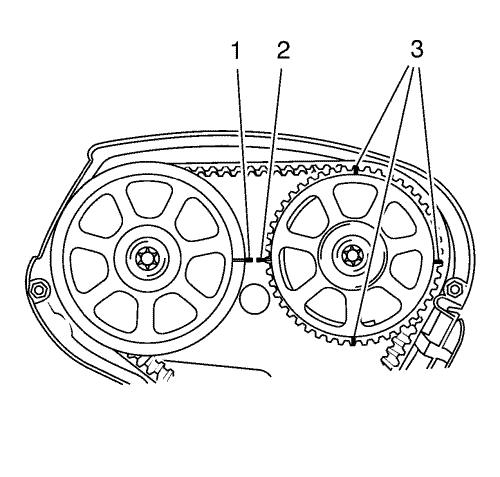
| 12. |
Apply guidance marks.
|
| |
Attach 3 markings (3) as an aid to one of the camshaft
adjusters, each one offset by 90 degrees to the marking applied (1,
2). |
Test Procedure
|
Note: Follow
manufacturer instructions.
|
| 1. |
Calibrate the pressure loss
tester. |
| |
Connect the pressure loss tester to the compressed air
system. |
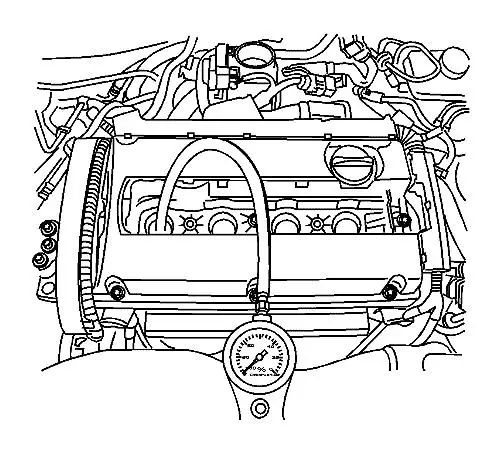
| 2. |
Install the pressure loss
tester. |
|
Note: Wheels must be in
contact with the ground.
|
| |
|
|
| |
• |
Engage first gear and apply
the parking brake. |
| |
• |
Install the connecting piece
into the spark plug thread of cylinder number 1. |
| |
• |
Apply compressed air to
cylinder number 1. |
| |
• |
Take pressure loss
reading. |
| |
|
- |
The maximum permissible pressure differential between cylinders
is approximately 10 percent. |
| |
|
- |
Maximum pressure loss of a cylinder is 25 percent. |
| |
• |
Take note of any visible
escape of compressed air. |
| |
• |
Intake manifold, exhaust
manifold, crankcase |
| |
• |
Take note of any bubble
formation in the coolant compensation tank. |
| 4. |
Perform pressure loss test by
analogy on cylinders 3, 4 and 2. |
Installation Procedure
| 1. |
Remove the pressure loss
tester. |
| 2. |
Remove the connection piece
from the spark plug thread. |
| 3. |
Put the vehicle in
neutral. |
| 4. |
Insert the oil
dipstick. |
| 5. |
Install the coolant expansion
tank closure cap. |
| 7. |
Install the engine management
wiring harness to the intake manifold. |
|
