Camshaft Installation
Special Tools
EN-422 Installer
For equivalent regional tools, refer to
Special Tools .
| 1. |
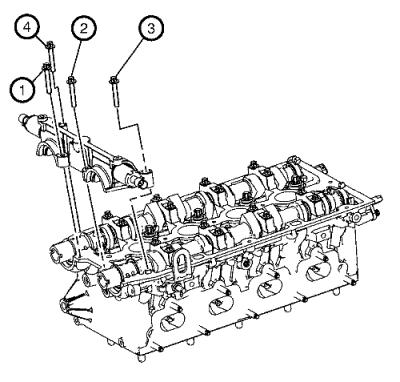
Install the intake camshaft
(1). |
|
Note: Note the
identification marking on the camshaft bearing cover.
|
| 2. |
Install the 4 intake camshaft
bearing cover number 2-5. |
| 3. |
Install the 8 intake camshaft
bearing cover bolts and tighten in a spiral from the inside to the
outside to 8 N·m (71 lb in) . |
| 4. |
Install the exhaust camshaft
(1). |
|
Note: Note the
identification marking on the camshaft bearing cover.
|
| 5. |
Install the 4 exhaust camshaft
bearing cover number 6-9. |
| 6. |
Install the 8 exhaust camshaft
bearing cover bolts and tighten in a spiral from the inside to the
outside to 8 N·m (71 lb in) . |
|
Note: Sealing
surfaces must be free from oil and grease.
|
| 7. |
Clean sealing surfaces of the
first camshaft bearing support and the cylinder head with a
suitable tool. |
| |
Clean oil duct from any sealant residue. |
|
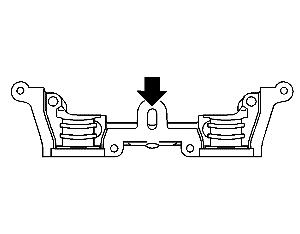
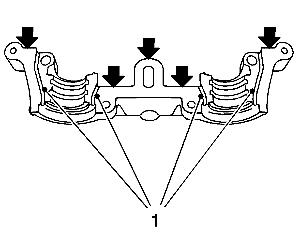
Note:
| • |
Sealing surfaces
(arrows) must be free from oil and grease. |
| • |
It is essential to
ensure that no sealant is applied outside the marked sealing areas
(1). |
| • |
The grooves
adjacent to the sealing surfaces must remain free from
sealant. |
|
| 8. |
Apply surface sealant to
sealing surfaces of the first camshaft bearing cap thinly and
evenly. |
| 9. |
Position the first camshaft
bearing cap on the cylinder block and tighten the bolts
approximately to 2 N·m (18 lb in) .
|
|
Note: No sealant may
reach the camshafts.
|
| 10. |
Install the first camshaft
bearing cap. |
|
Note: Note
installation sequence 1-4.
|
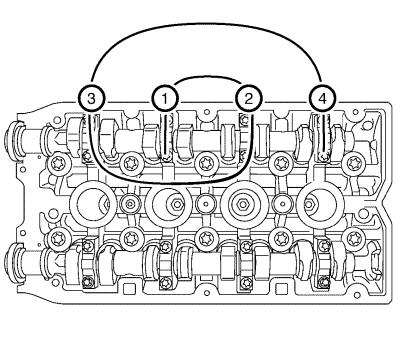
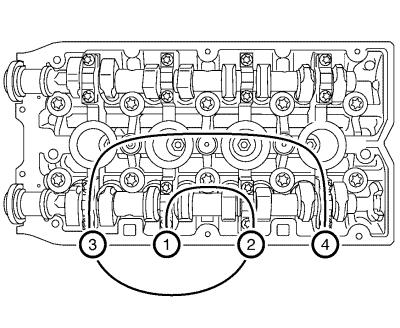
| 11. |
Install the first camshaft
bearing cap (1) bolts and tighten to 8 N·m (71 lb
in) . |
| 12. |
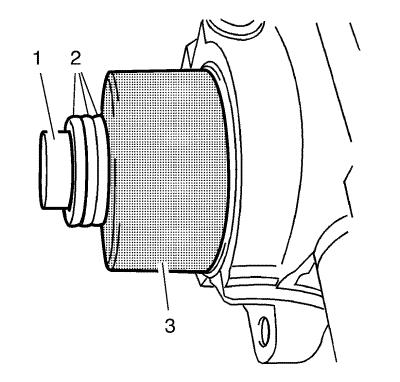
Install 2 NEW sealing rings to
the camshafts. |
| 13. |
Tighten the seal ring with
EN-422 installer (3) on the camshaft until this is
in contact with the cylinder head. |
| 14. |
To install, use camshaft
sprocket bolt (1) in conjunction with shims (2) with a total
thickness of approximately 10 mm. |
| 15. |
Remove the EN-422
installer (3). |
|
