Oil Pan Replacement
Removal Procedure
| 3. |
Place collecting basin
underneath. |
| 4. |
Remove the oil drain
bolt. |
| 5. |
Collect the engine oil.
|
| 6. |
Install the NEW seal ring and
the oil drain bolt, tighten to 14 N·m (124 lb
in) . |
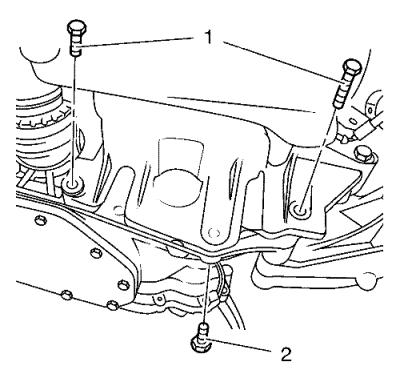
| 12. |
Remove the 3 oil pan bolts (1,
2) from the transmission. |
|
Note: Remove the oil
pan evenly all the way around with a suitable tool.
|
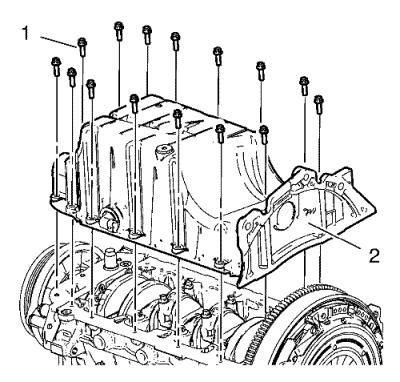
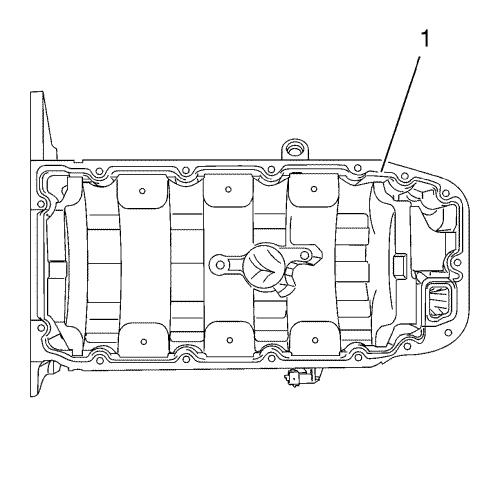
| 13. |
Remove the 15 oil pan bolts
(1) and remove the oil pan (2). |
|
Note: Use a
screwdriver or another suitable tool.
|
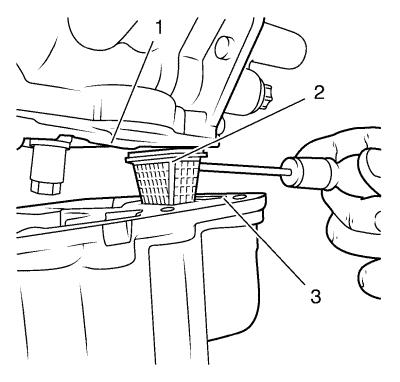
| 14. |
To prevent damage to the oil
screen, ensure that the oil screen (2) remains in the oil pan (3).
If the oil screen gets caught on the cylinder block (1), push it
into the oil pan. |
Installation Procedure
| 1. |
Clean the sealing
surfaces. |
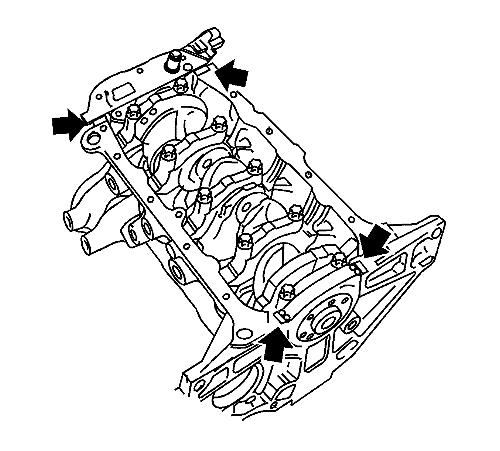
| 2. |
Apply an approximately
3.5 mm (0.14 in) thick bead of oil pan sealant to the joints
(arrows). |
|
Note: The assembly
time including torque check must take no longer than 10
minutes.
|
| 3. |
Apply an approximately
3.5 mm (0.14 in) thick bead of oil pan sealant (1) as
illustrated. |
| 4. |
Install the 15 oil sump bolts
(1) to the oil sump (2) and tighten to 10 N·m (89 lb
in) . |
| 5. |
Install the 3 oil sump bolts
(1, 2) to the transmission and tighten to 40 N·m (30
lb ft) . |
|
Note: Inspect the
engine oil level and correct if necessary.
|
| 10. |
Refill the collected engine
oil. |
|
