Piston, Connecting Rod, and Bearing Removal
| 1. |
Install the crankshaft
balancer bolt. |
| 2. |
Set the pistons 1 and 4 to TDC
in direction of engine rotation. |
|
Note: Note cylinder
sequence.
|
| 3. |
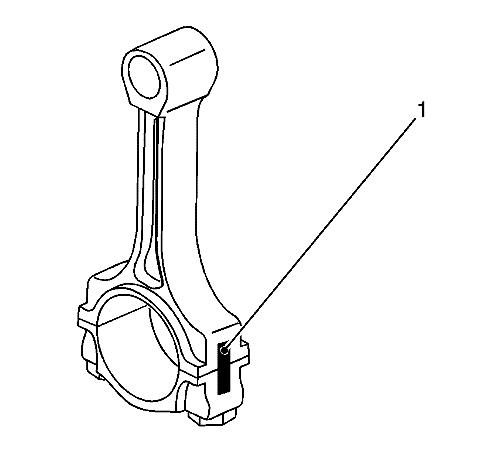
Mark the connecting rod with
the connecting rod bearing cover (1). |
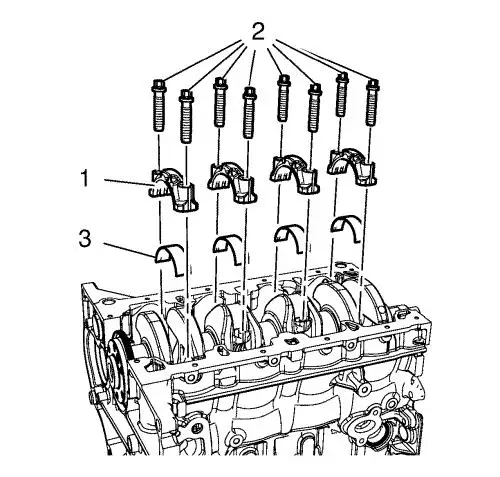
| 4. |
Remove the 4 connecting rod
bearing caps bolts (2) of cylinder 1 and 4. |
| 5. |
Remove the connecting rod
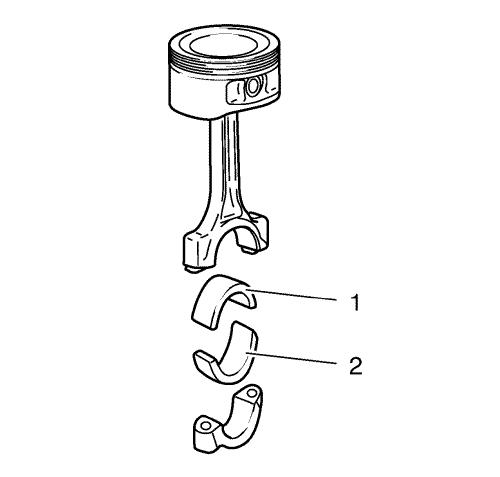
bearing caps (1) and the connecting rod bearing (3). |
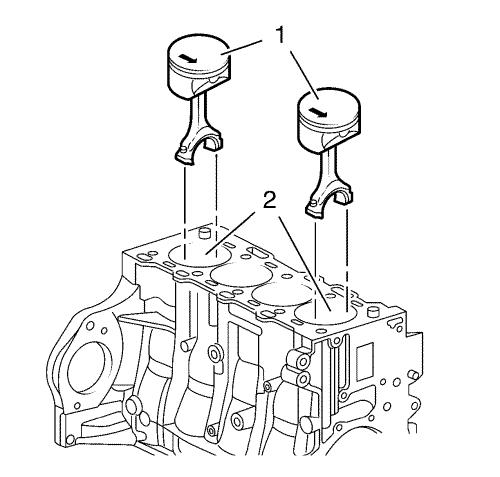
| 6. |
Push the pistons 1 and 4 (1)
out of the cylinder bore (2). |
|
Note: The shear
surfaces of the con-rod and the con-rod bearing cover form a unique
fit and must not be swapped or damaged. Do not lay down on the
shear surfaces.
|
| 7. |
Remove the pistons 1 and 4
(1). |
| 8. |
Turn crankshaft on crankshaft
balancer through 180° in direction of rotation of
engine. |
|
Note: Note cylinder
sequence.
|
| 9. |
Mark the connecting rod with
the connecting rod bearing cover (1). |
| 10. |
Remove the 4 connecting rod
bearing caps bolts (2) of cylinder 2 and 3. |
| 11. |
Remove the connecting rod
bearing caps (1) and the connecting rod bearing (3). |
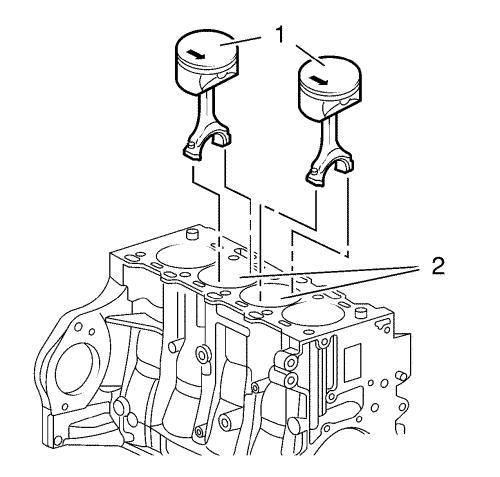
| 12. |
Push the pistons 2 and 3 (1)
out of the cylinder bore (2). |
|
Note: The shear
surfaces of the con-rod and the con-rod bearing cover form a unique
fit and must not be swapped or damaged. Do not lay down on the
shear surfaces.
|
| 13. |
Remove the pistons 2 and 3
(1). |
|
Note: Observe correct
fitting position, observe alignment.
|
| 14. |
Remove the connecting rod
bearing (1, 2). |
|
