Exhaust Gas Recirculation Valve Cooler Disassemble
| 1. |
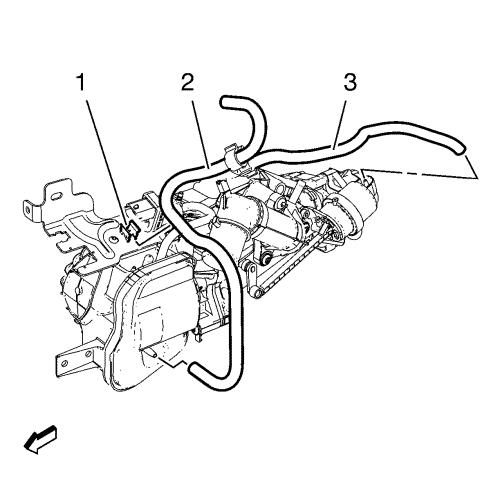
Remove the vacuum hose (2)
from the retainer (1) and from the vacuum tank. |
| 2. |
Remove the vacuum hose (3)
from the exhaust gas recirculation actuator valve and exhaust gas
recirculation actuator. |
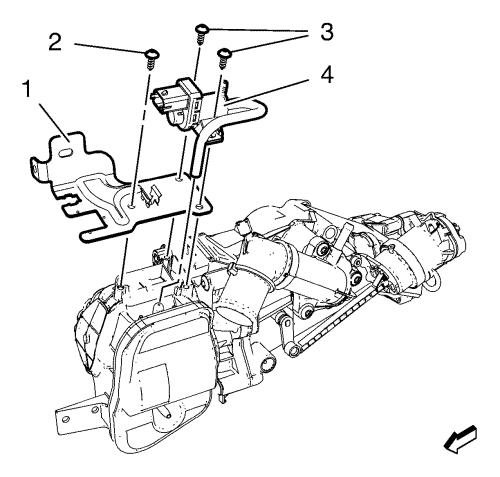
| 3. |
Remove the 2 exhaust gas
recirculation actuator valve bolts (3). |
| 4. |
Remove the exhaust gas
recirculation actuator valve (4) in conjunction with the vacuum
hose. |
| 5. |
Remove the exhaust gas
recirculation actuator valve bracket bolt (2). |
| 6. |
Remove the exhaust gas
recirculation actuator valve bracket (1). |
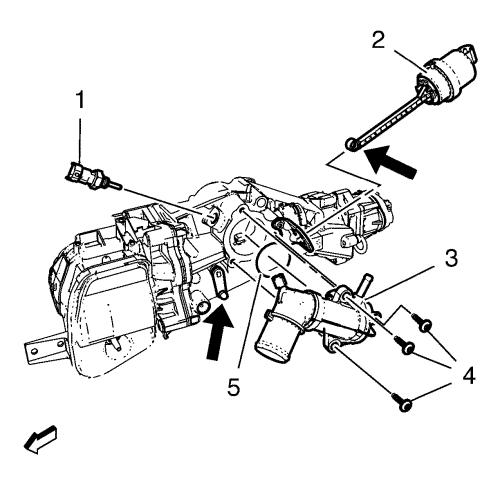
| 7. |
Remove the 3 thermostat
housing bolts (4). |
| 8. |
Remove the thermostat housing
(3) in conjunction with the seal ring (5). |
| 9. |
Remove the temperature sensor
(1). |
| 10. |
Remove the exhaust gas
recirculation valve cooler actuator (2). |
| |
• |
Unclip the actuating rod (see
arrow in picture) by using a screwdriver. |
| |
• |
Turn the exhaust gas
recirculation valve cooler actuator counter clockwise in order to
unclip it from the bracket. |
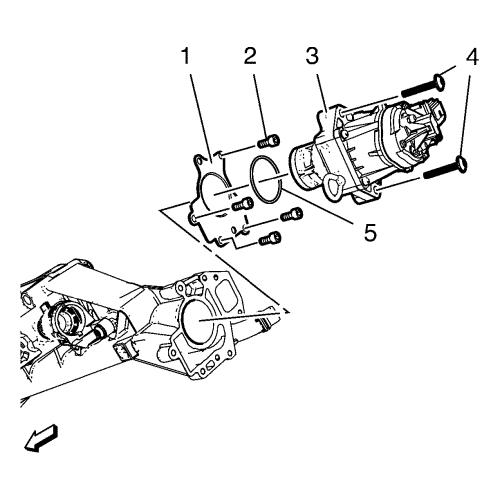
| 11. |
Remove the 2 exhaust gas
recirculation valve bolts (4). |
| 12. |
Remove the exhaust gas
recirculation valve (3). |
| 13. |
Remove the exhaust gas
recirculation valve gasket (5) |
| 14. |
Remove the 4 exhaust gas
recirculation valve gasket bolts (2). |
| 15. |
Remove the exhaust gas
recirculation valve gasket (1). |
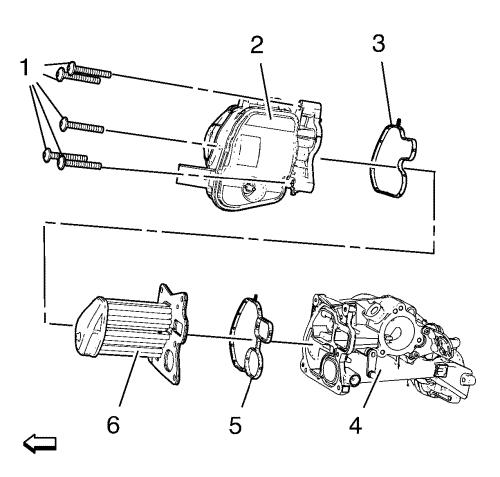
| 16. |
Remove the 5 tank assembly
bolts (1). |
| 17. |
Remove the tank assembly (2)
in conjunction with the sealing (5). |
| 18. |
Remove the cooling module (6)
in conjunction with the sealing (3). |
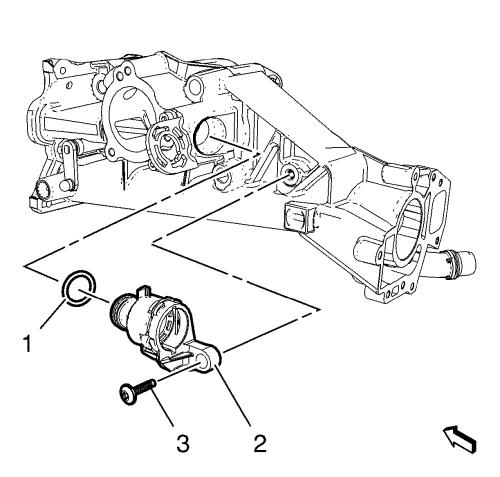
| 19. |
Remove the water pipe bolt
(3). |
| 20. |
Remove the water pipe (2) in
conjunction with the seal ring (1). |
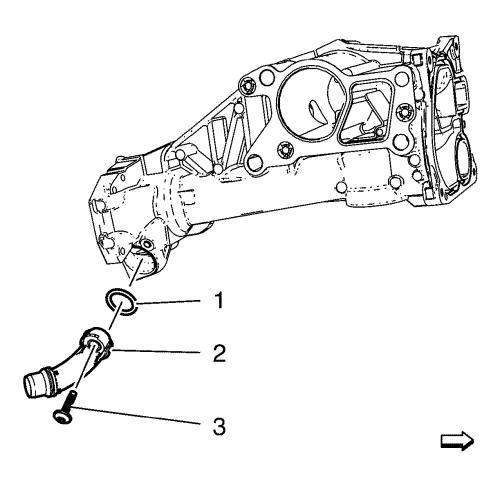
| 21. |
Remove the water pipe bolt
(3). |
| 22. |
Remove the water pipe (2) in
conjunction with the seal ring (1). |
|
