|
Toothed Belt Tension, Check And Correct (Z 17 DTH,
with Air Conditioning, LHD)
 Remove Remove
Important: In vehicles as of
model year 04 with ESP - every time the battery is disconnected,
the steering angle sensor loses its basic setting and must be
recalibrated
|
| 2. |
Disconnect battery
|
| 3. |
Detach front right wheel
|
| 5. |
Remove right front wheel
|
| 7. |
Remove ribbed V-belt cover
|
|
|
| 8. |
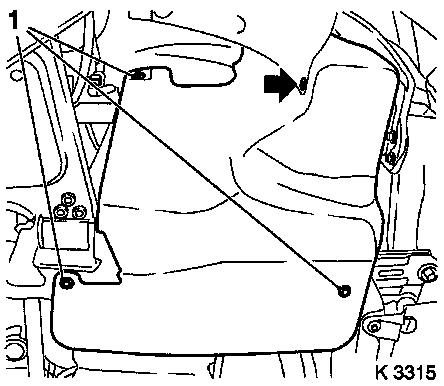
Attach KM-6394
| • |
Position KM-6394 (1) at the front on
the front axle body
Note: Both locating
pins (arrows) must be seated in the holes in the front axle
body
|
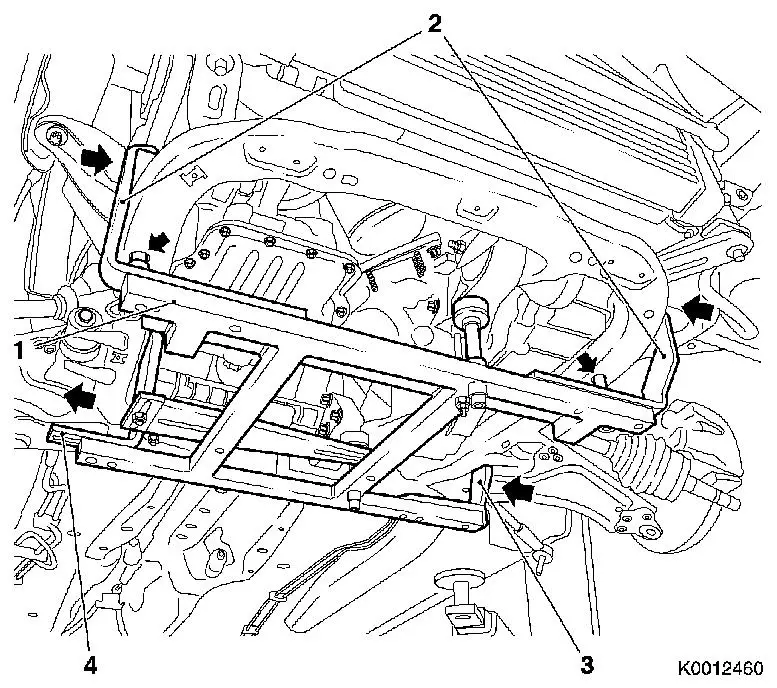
| • |
Push front bracket (2) in the direction of the arrow
|
| • |
Place rear bracket (4), right hand side, on front axle body
|
| • |
Attach rear bracket (3), left hand side
|
|
|
|
|
| 9. |
Install support
| • |
On KM-6394
| – |
Adjust bracket (2) for support
|
|
|
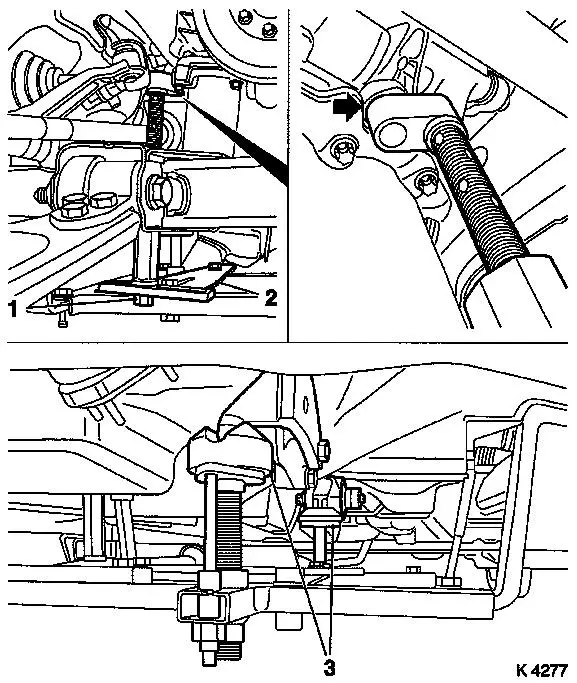
| 10. |
Adjust 3x support
| • |
Transmission side
Note: Turn spindles
until mounts (3) are positioned at guide journals free of play
|
| • |
Engine timing side
| – |
Insert journal of the support in the bore of the cylinder block
free of play (arrow)
|
|
|
|
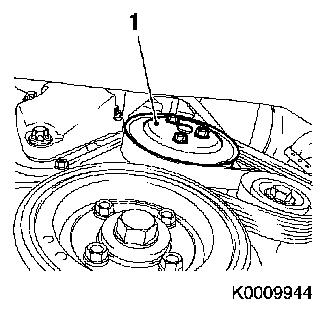
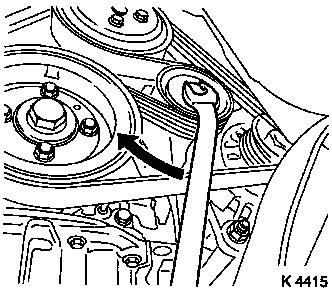
| 11. |
Loosen coolant pump ribbed V-belt pulley (1)
|
|
|
| 12. |
Remove ribbed V-belt
| • |
Tension ribbed V-belt tensioner in direction of arrow
| – |
Use KM-913-A
Note: Mark running
direction.
|
|
|
|
|
| 13. |
Detach coolant pump ribbed V-belt pulley
|
| 14. |
Detach starter wiring harness
| • |
Electrically disconnect starter
|
| • |
Disconnect wiring harness plug of fuel pressure sensor
|
|
| 16. |
Remove air cleaner housing
|
|
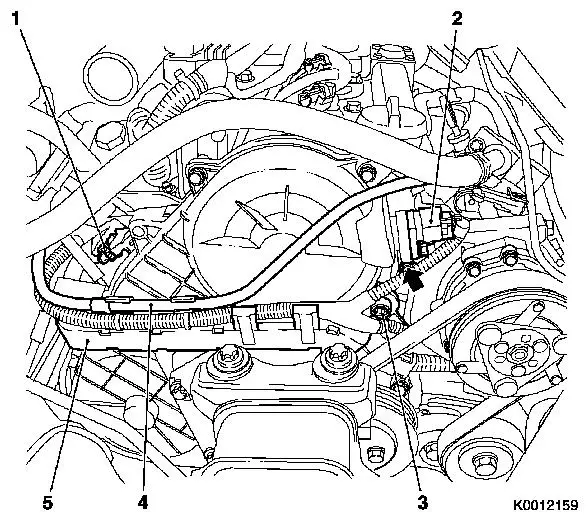
| 17. |
Remove wiring trough
| • |
Unclip wiring trough (5)
|
| • |
Disconnect 2 wiring harness plugs
| – |
Charge pressure sensor (1)
|
|
|
| 18. |
Remove camshaft sensor
|
|
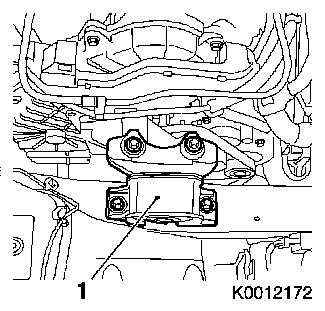
| 19. |
Remove right engine damping block (1)
|
|
|
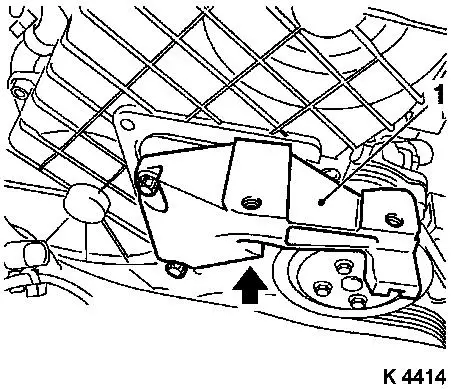
| 20. |
Detach right engine bracket (1)
| • |
Unscrew 3 bolts
Note: Lower bolt cannot
be removed.
|
| • |
With right engine bracket adapter
|
|
|
|
| 21. |
Remove upper toothed belt cover
Important: Take care not to
damage the increment counter on the camshaft sprocket when removing
the upper toothed belt cover
|
| • |
Unscrew 8 bolts
Note: Note dissimilar
bolt lengths
|
|
|
|
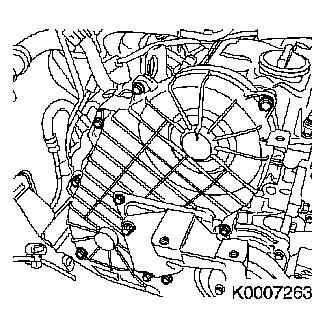
| 23. |
Remove torsional vibration damper (1)
|
|

|
| 24. |
Detach lower part of toothed belt cover
|
|
|
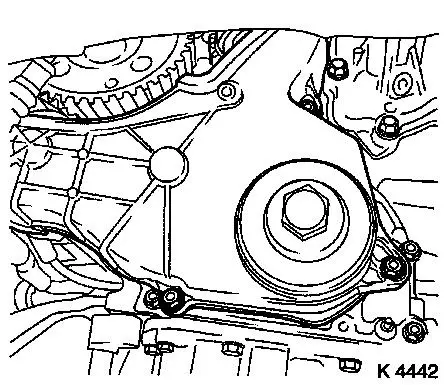
| 25. |
Remove right engine bracket
|
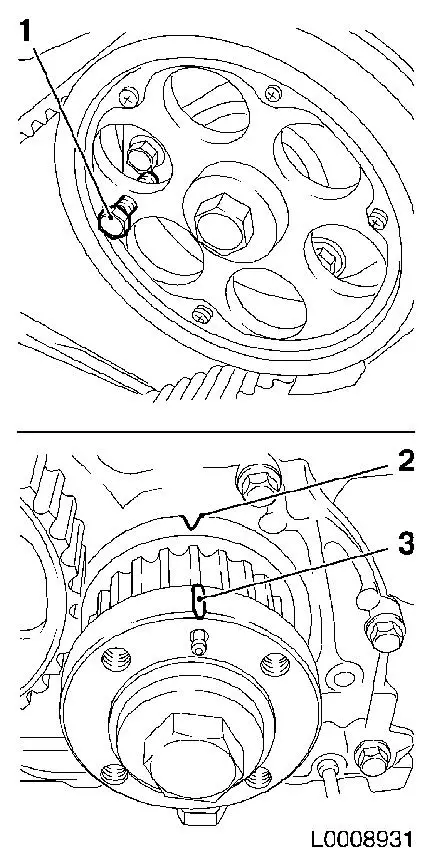
| 26. |
Set 1st cylinder to TDC
| • |
Turn crankshaft evenly until TDC fixing bolt (1) can be screwed
in
Note: Mark (3) on
toothed belt drive gear must align with mark (2) on oil pump
cover
|
|
|
|
| 27. |
Loosen toothed belt tension roller (1)
| • |
Loosen bolt of toothed belt tension roller (2)
|
|
| 28. |
Tension toothed belt
| • |
Remove TDC locking bolt
|
| • |
Rotate crankshaft 60° against direction of engine
rotation
|
| • |
Tighten bolt of toothed belt tension roller (2) 38.2 Nm
|
|
|

|
 Install
| 29. |
Attach right engine bracket
| • |
Insert lower bolt
| – |
Into right engine bracket and right engine bracket adapter
|
|
| • |
Fit right engine bracket and adapter
|
|
| 30. |
Attach lower part of toothed belt cover
|
| 32. |
Install upper toothed belt cover
| • |
Tighten 8 bolts 9.8 Nm
Note: Note dissimilar
bolt lengths
|
|
| 33. |
Fasten right engine bracket
| • |
Tighten 2 upper bolts 40 Nm
|
|
| 34. |
Install camshaft sensor
|
| 35. |
Attach wiring trough
| • |
Connect 2 wiring harness plugs
|
|
| 36. |
Install right engine damping block
| • |
On engine bracket
| – |
Tighten 2 bolts 60 Nm + 30° +
15°
|
|
|
| 38. |
Fasten right engine bracket
| • |
Tighten lower bolt 40 Nm
|
|
| 39. |
Attach coolant pump ribbed V-belt pulley
| • |
Tighten 3 bolts 12.3 Nm
|
|
| 40. |
Install torsional vibration damper
| • |
Tighten 4 bolts 19.6 Nm
|
|
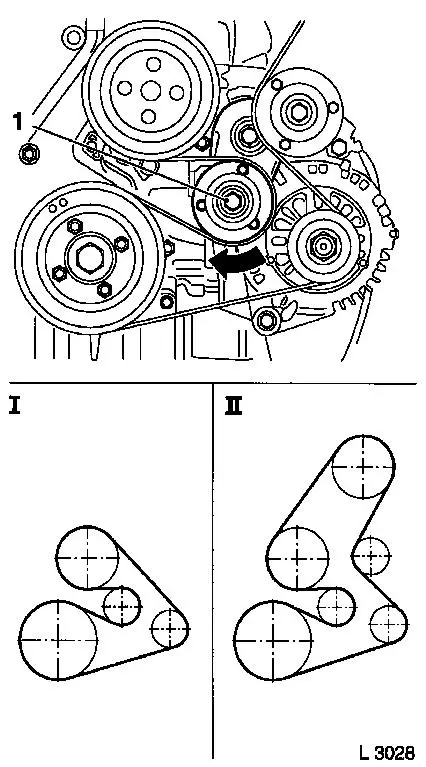
| 41. |
Install ribbed V-belt
Note: Observe running
direction and installation position
| • |
Release tension from ribbed V-belt tensioner (1)
| – |
I Ribbed V-belt without AC
|
| – |
II Ribbed V-belt with AC
|
|
|
|
|
| 42. |
Fasten coolant pump ribbed V-belt pulley
|
| 45. |
Attach starter wiring harness
| • |
Electrically connect starter
|
| • |
Connect fuel pressure sensor wiring harness plug
|
|
| 46. |
Attach ribbed V-belt cover
|
| 48. |
Attach front right wheel
|
| 50. |
Fasten right front wheel
|
| 51. |
Install air cleaner housing
|
| 53. |
Calibrate steering angle sensor
| • |
Turn on ignition
Note: Turn the steering
wheel once from the right stop to left stop.
|
|
| 55. |
Program volatile memory
|
|
