|
J340100-008 remove and install automatic
transmission with engine torque converter (Z14 XE, AC, RHD)
|
1. Remove exhaust manifold heat shield
- Disconnect mixture regulating oxygen sensor wiring harness
plug
- Remove 3 bolts
2. Remove exhaust manifold
- Remove 9 nuts
- Remove gasket.
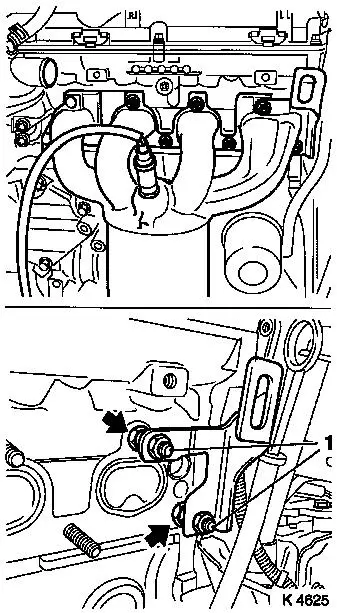
3. Attach engine transport shackle
- Insert 4 nuts (M 10) (arrows)
- Tighten 2 nuts (M8) (22 Nm / 16 lbf. ft.) (1)
|
|
|
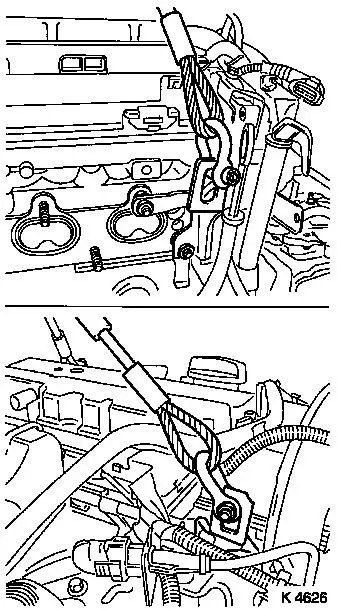
4. Attach cables to drive unit
- Attach KM-2358
- 2 off
- Attach workshop crane
|
|
|
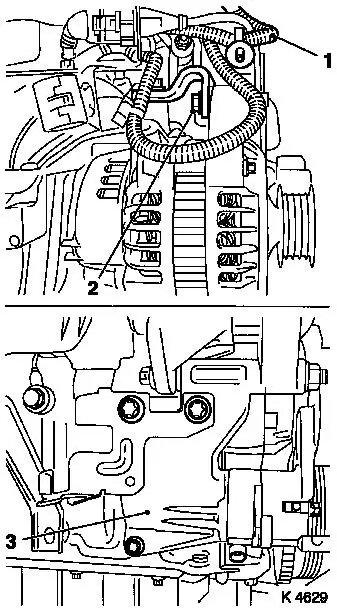
5. Detach engine wiring harness
|
|
- From starter
- From alternator
- Detach ground cable
- Unclip wiring harness (1)
|
|
|
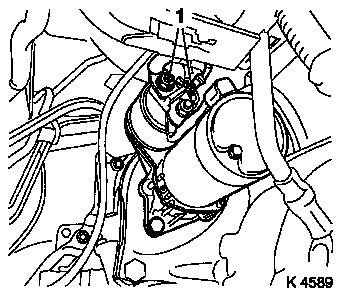
6. Disconnect oil pressure switch
wiring harness plug (1)
|

|
|
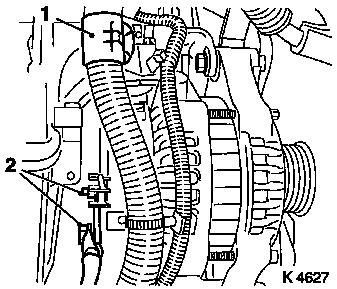
7. Detach alternator
- Loosen alternator support
- Unclip wiring harness (1)
- Remove bolt (2)
- Detach alternator support (3)
|
|
|
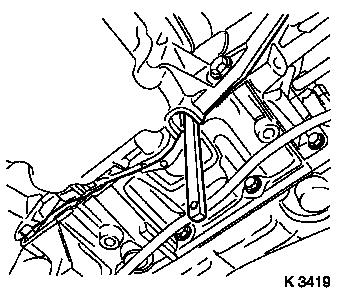
8. Detach intake manifold support
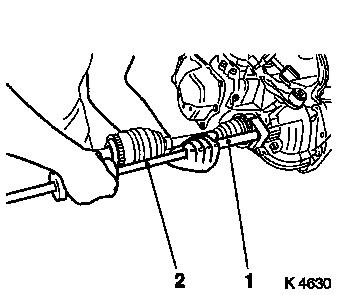
9. Unscrew axle shafts
- Note: 2nd person required
- Place collecting basin underneath.
- Using KM-313 (2), KM-902 (1)
- Seal openings
|
|
|
10. Attach KM-412-3
|
|
|
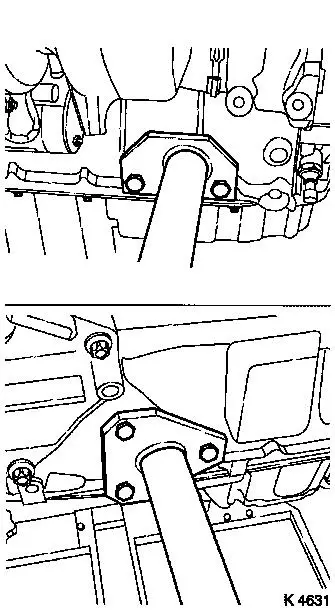
11. Loosen rear reaction member
12. Lift up drive unit
- Caution: Do not damage attaching parts
- Note: 2nd person required
13. Install drive unit
- Note: 2nd person required
- To KM-412
14. Lower drive unit on cables
|
|
|
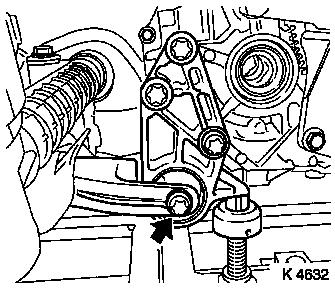
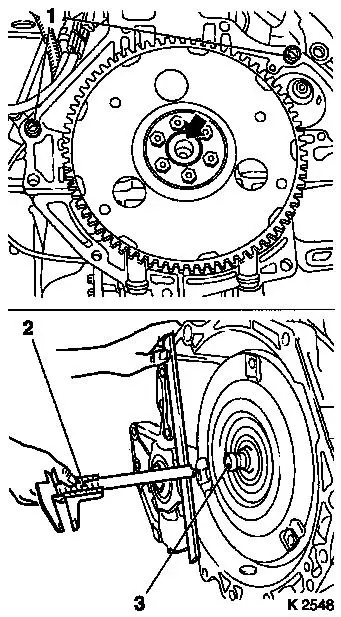
15. Loosen torque converter
- Remove 2 closure plugs
- Turn crankshaft in direction of engine rotation using
crankshaft ribbed V-belt pulley bolt
- Use KM-911
- Remove 3 bolts
16. Attach KM-910
17. Loosen automatic transmission
18. Lift automatic transmission
- Note: 2nd person required
- Lower engine
- Remove bolt
- Caution: Note torque converter
|
|
|
19. Check centring journal
- Check converter centring journal for rust and clean if
necessary
- Measure distance between connecting threads of converter and
the mating surface of the transmission housing with calliper gauge
(2): Gap approx. 12 mm
- Lightly coat centring seat for converter (arrow) with
grease
- Caution: With transmission replacement note guide bushings
(1)
20. Clean threads
21. Attach automatic transmission
- Note: 2nd person required
- Bolt in bolt
- Lift engine
22. Remove KM-910
|
|
23. Fasten automatic transmission
- At cylinder block
- Note: Position coolant pipe, oil filler pipe
- Tighten bolts (60 Nm / 44.5 lbf. ft.)
- To oil pan
- Tighten bolts (40 Nm / 29.5 lbf. ft.)
24. Attach torque converter
- Caution: Insert bolts with locking compound. Tighten bolts
evenly (20 Nm / 15 lbf. ft.)
- Tighten bolts (45 Nm / 33 lbf. ft.)
- Install closure plug
25. Attach cables to drive unit
26. Remove drive unit
- From KM-412
- Note: 2nd person required
27. Install drive unit
- Note: 2nd person required
- Position on KM-6168
- Note: Note bearing points
- Detach from workshop crane
- Remove KM-2358
- Attach rear reaction member
- Detach axle shafts
28. Fasten rear reaction member
- Tighten bolt (80 Nm / 59 lbf. ft.)
29. Detach KM-412-3
30. Lower drive unit on cables
31. Replace axle shaft retaining rings
32. Install axle shafts
- Note: Drive in at friction weld seam
- Until retaining rings engage
- Tie up axle shafts
33. Detach engine transport shackle
34. Attach exhaust manifold
- Replace gasket
- Replace nuts
- Tighten nuts (22 Nm / 16 lbf. ft.)
35. Attach exhaust manifold heat shield
- Tighten bolts (8 Nm / 6 lbf. ft.)
36. Attach alternator
- Tighten bolts
- To cylinder block (35 Nm / 26 lbf. ft.)
- To alternator shackle (20 Nm / 15 lbf. ft.)
37. Attach engine wiring harness
37. Attach intake manifold support
- Connect ground cable.
- Tighten bolts
- Intake manifold (20 Nm / 15 lbf. ft.)
- Cylinder block (35 Nm / 26 lbf. ft.)
|
