|
Turbocharger Oil Feed Line, Replace (Z 17 DTH,
without AC, LHD)
Important: On vehicles with ESP -
the steering angle sensor loses its basic adjustment each time the
battery is disconnected. It must be recalibrated
|
| 2. |
Disconnect battery
|
| 3. |
Detach coolant compensation tank hose from fan housing
|
| 4. |
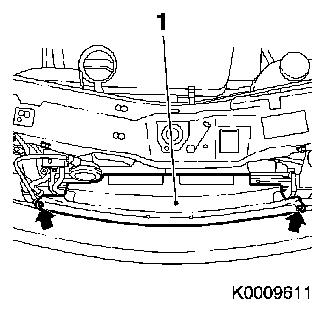
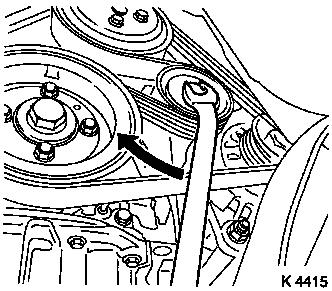
Release upper front panelling (1)
| • |
Unscrew 2x bolt (arrows)
|
|
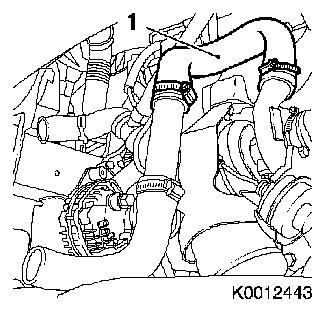
|
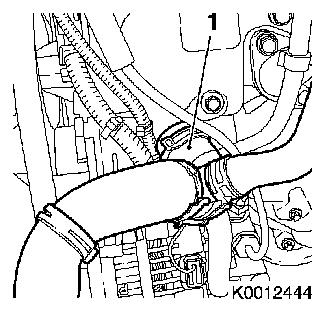
|
| 6. |
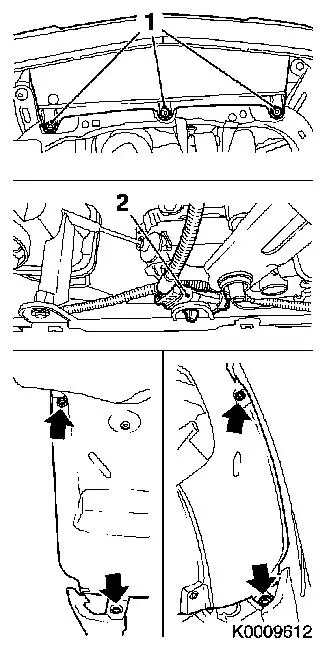
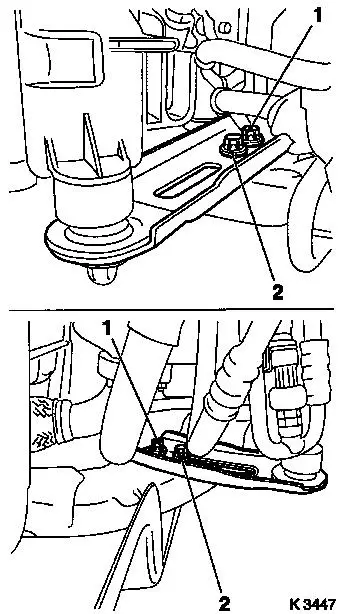
Release lower front panelling
| • |
Disconnect wiring harness plug (2)
|
| • |
Unscrew 4 bolts (arrows)
|
|
|
|
| 7. |
Remove ribbed V-belt cover
|
|
|
Important: When removing the
centre muffler, a catalytic converter, an exhaust manifold or an
exhaust manifold with catalytic converter, the exhaust system piece
remaining in the vehicle must be prevented from swinging
uncontrollably. The exhaust system piece with the flex pipe inside
can be secured for this purpose using suitable means, such as a
wire on the vehicle underbody. Bends in the flex pipe with an angle
as little as 5 – 10 degrees from the intended installation
position may result in damage with subsequent total failure of the
flex pipe.
|
| 8. |
Remove exhaust system
| • |
Remove front exhaust pipe
|
|
|
|
| 9. |
Attach exhaust system
Note: Second person
required
|
| 10. |
Remove ribbed V-belt
Note: Mark running
direction.
| • |
Tension ribbed V-belt tensioner in direction of arrow
|
|
|
|
| 12. |
Detach front panelling
Note: Second person
required
|
| 13. |
Drain coolant
| • |
Place collecting basin underneath.
|
| • |
Open coolant drain bolt
|
|
| 14. |
Disconnect 2 fan motor wiring harness plugs
|
| 15. |
Detach 2 charge air hoses
|
| 16. |
Detach 3 coolant hoses
|
| 17. |
Release lower radiator bracket
|
|
|
| 18. |
Remove cooling module
Note: 2nd person
required. Carefully remove cooling module from below
|
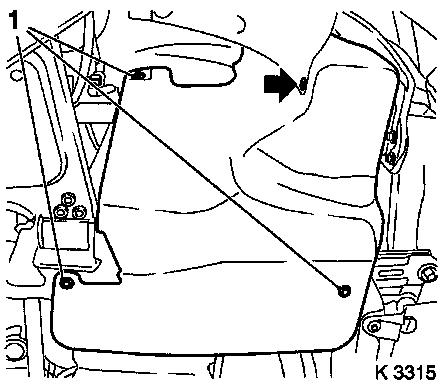
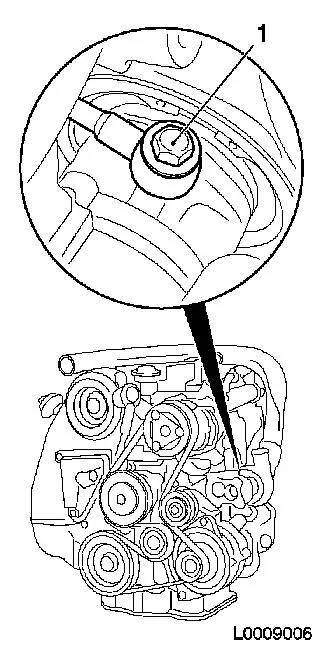
| 19. |
Detach connection hose (1) from turbocharger to charge air
pipe
|
|
|
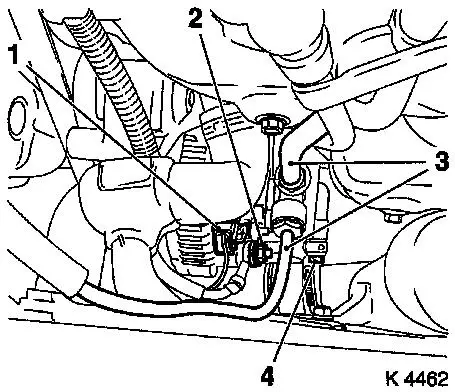
| 20. |
Detach coolant hose, coolant connection (1)
| • |
Release clamp
Note: Set coolant hose
to one side
|
|
|
|
| 21. |
Detach 2 vacuum lines of vacuum pump (3)
|
| 22. |
Detach oil dipstick guide tube
|
| 23. |
Release alternator
| • |
Disconnect wiring harness plug (1)
|
| • |
Remove bolt
Note: Oil feed line (4)
remains connected. Hinge alternator forwards
|
|
|
|
| 24. |
Remove heat shield of pre-catalytic converter
|
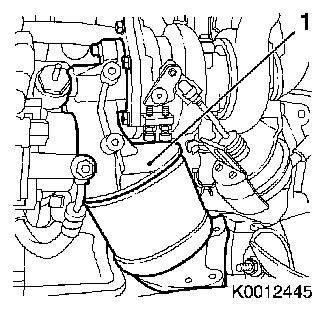
| 25. |
Remove pre-catalytic converter (1)
|
|
|
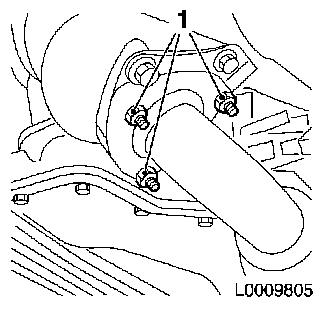
| 26. |
Detach turbocharger oil feed line (1)
|
|
|
 Install
| 27. |
Attach turbocharger oil feed line
| • |
Tighten 2 banjo bolts
| – |
Tighten at cylinder block 27.5
Nm
|
| – |
Tighten at turbocharger 20.6 Nm
|
|
|
| 28. |
Remove oil dipstick guide tube
|
| 29. |
Clean sealing surfaces
|
| 30. |
Insert dipstick guide tube
|
| 31. |
Install pre-catalytic converter
| • |
Tighten 3 bolts at turbocharger 45
Nm
|
|
| 32. |
Install heat shield of pre-catalytic converter
| • |
Tighten 3 bolts 11.8 Nm
|
|
| 33. |
Attach alternator
| • |
Tighten M8 bolt 18.6 Nm
|
| • |
Tighten M10 bolt 46.1 Nm
|
| • |
Connect wiring harness plug
|
|
| 34. |
Fasten oil dipstick guide tube
|
| 35. |
Attach 2 vacuum lines of vacuum pump
|
| 36. |
Attach coolant hose, coolant connection
|
| 37. |
Attach connection hose from turbocharger to charge air pipe
|
| 38. |
Install cooling module
Note: Second person
required
|
| 39. |
Fasten lower radiator bracket
|
| 40. |
Attach 3 coolant hoses
|
| 41. |
Attach 2x charge air hose
|
| 42. |
Connect 2 wiring harness plugs for fan motors
|
| 43. |
Close coolant drain bolt
|
| 44. |
Position front panelling
Note: Second person
required
|
| 46. |
Fasten lower front panelling
| • |
Connect wiring harness plug
|
|
| 47. |
Install ribbed V-belt
Note: Observe running
direction and installation position
| • |
Release ribbed V-belt tensioner
|
|
| 48. |
Attach exhaust system
Note: 2.
person required
|
| 49. |
Attach exhaust system
| • |
Tighten 3 new nuts 25 Nm
|
|
| 50. |
Install ribbed V-belt cover
|
| 52. |
Fasten upper front panelling
|
| 53. |
Fasten coolant compensation tank hose to fan housing
|
| 55. |
Check and correct engine oil level
| • |
Observe specified engine oil quantity
|
|
| 56. |
Top up and bleed cooling system 
|
| 57. |
Program volatile memory
|
|
